Posted on Leave a comment

Why Should You Clean Your Infrared Heater Regularly?

regular infrared heater maintenance

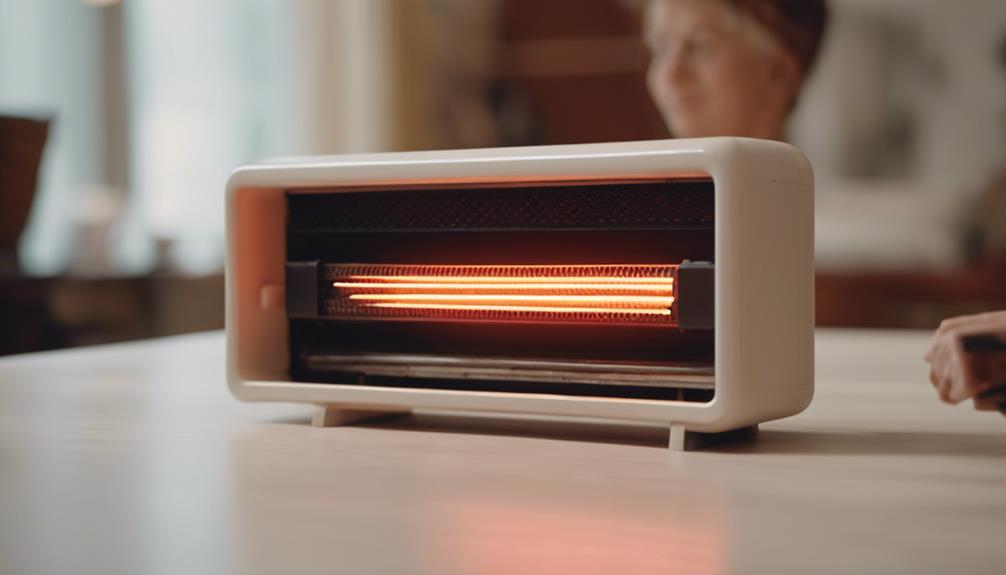
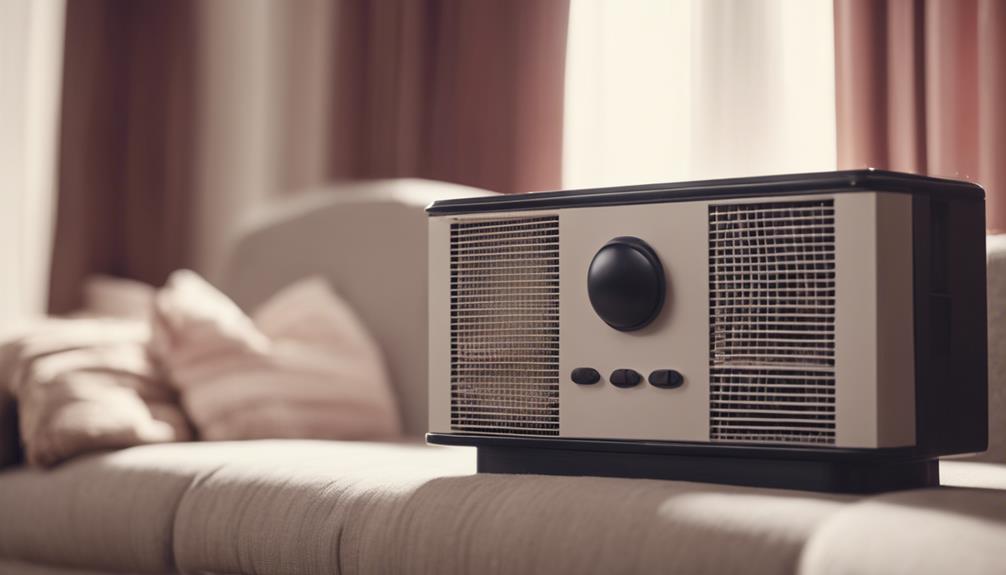
Regularly cleaning your infrared heater is crucial to maintain peak performance and safety. Dust accumulation can pose hazards and decrease air quality, leading to respiratory issues. Routine cleaning not only enhances energy efficiency, lowering bills, but also reduces your carbon footprint. Using tools like a soft cloth, vacuum, and compressed air guarantees thorough cleaning. Remember to unplug and allow the heater to cool before starting. Cleaning the exterior, heating element, and air filters is essential for longevity and efficiency. Reassemble properly, test, and monitor for any unusual signs for a well-functioning heater.

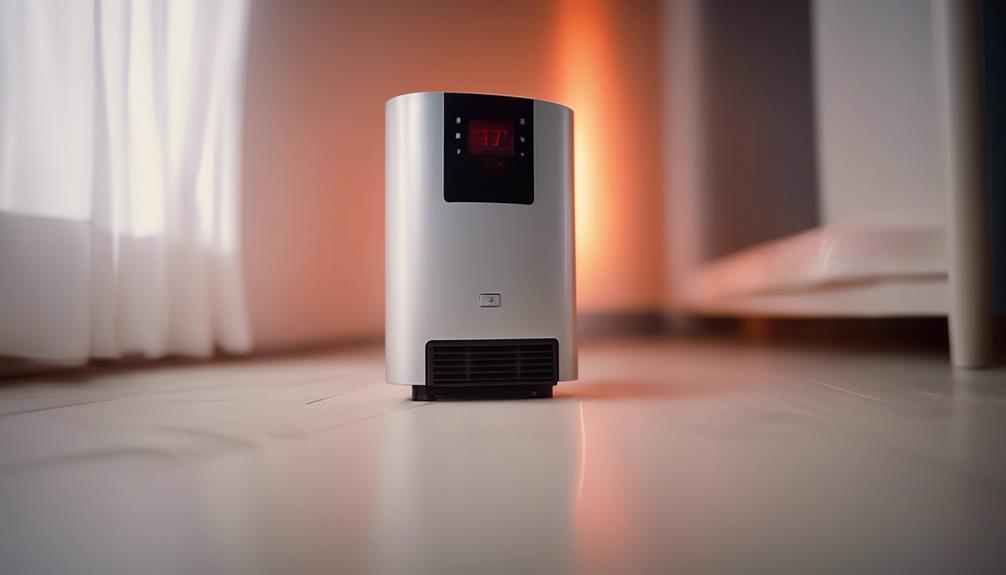
Importance of Regular Cleaning

consistent cleanliness promotes health

Regularly cleaning your infrared heater is vital to guarantee peak performance and prevent potential safety hazards. Not only does cleaning your heater make sure that it operates efficiently, but it also contributes to your health benefits and energy efficiency. Dust and debris accumulation on the heating elements can hinder the infrared heat distribution, reducing the heater's effectiveness and increasing energy consumption.

By maintaining a clean heater, you promote better air quality in your living space, reducing the risk of respiratory issues caused by circulating dust particles. Additionally, a clean infrared heater operates more efficiently, requiring less energy to produce the same amount of heat. This not only saves you money on energy bills but also reduces your carbon footprint.

Regular cleaning of your infrared heater is a simple yet essential task that can greatly impact your health, comfort, and energy savings. By incorporating this maintenance routine into your household chores, you can enjoy the full benefits of your heater while guaranteeing a safe and efficient heating system.

Tools Required for Cleaning

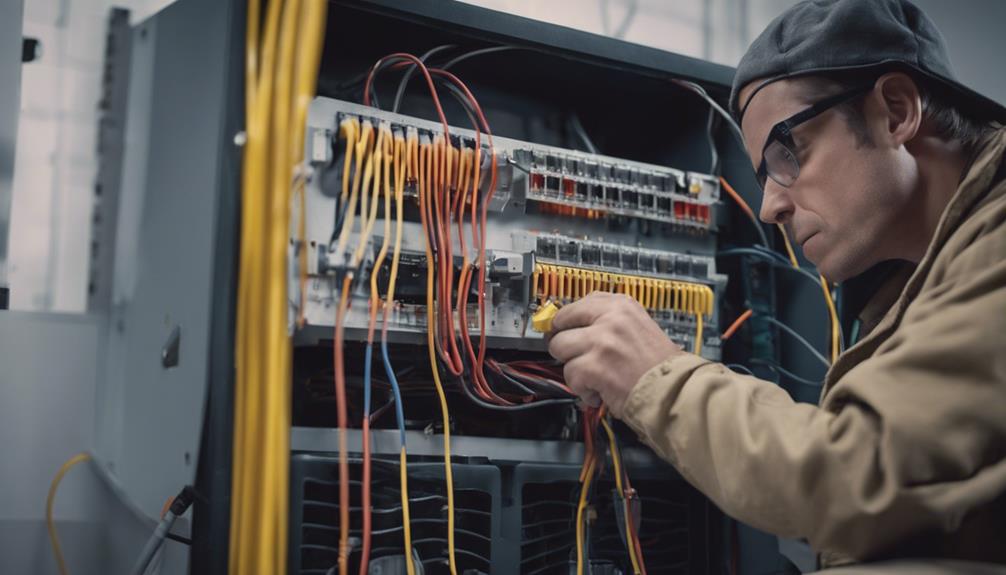
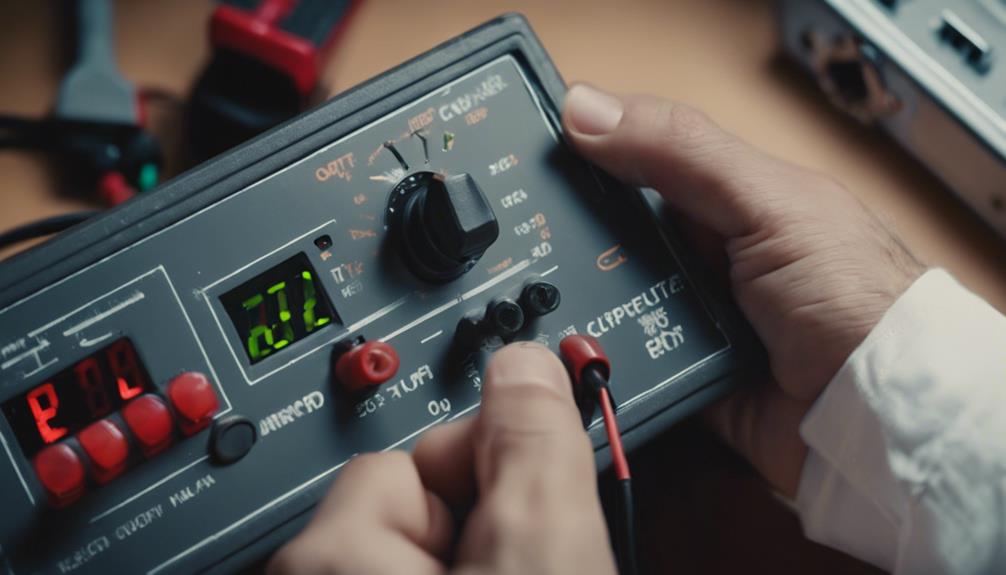
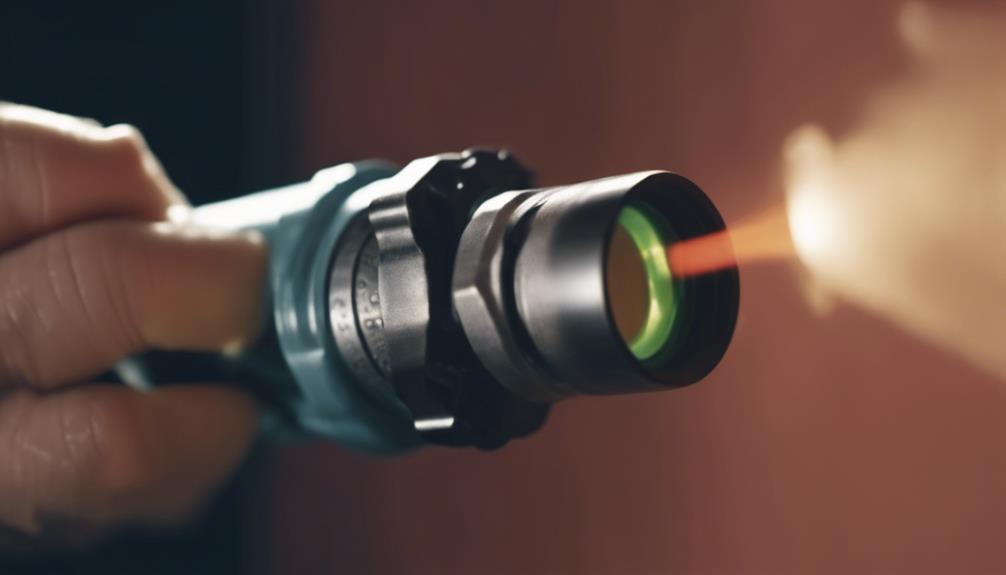
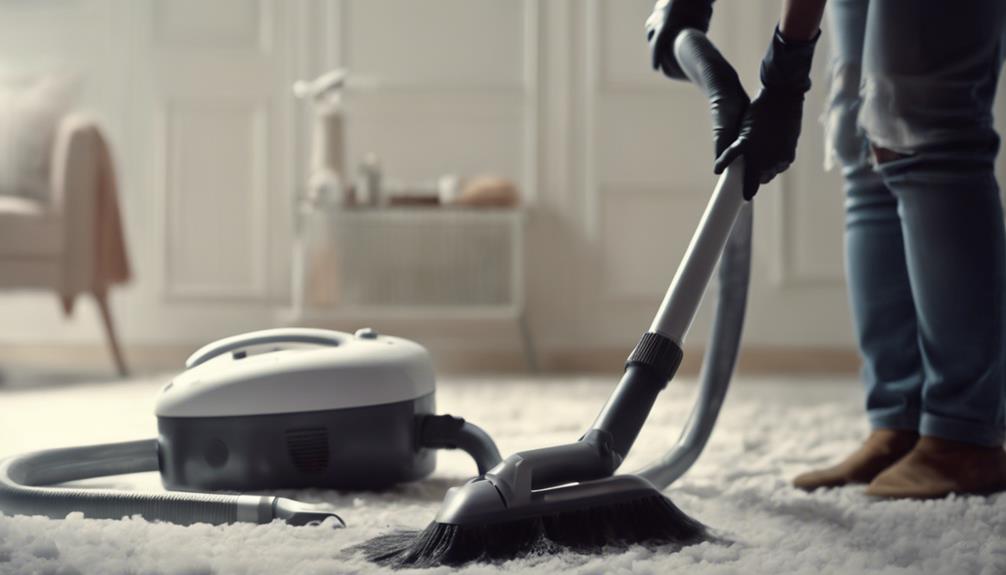
To effectively clean your infrared heater, you'll need a few essential tools. The primary cleaning materials required include a soft cloth or sponge, a vacuum cleaner with a brush attachment, a can of compressed air, and a screwdriver for removing any necessary parts. These tools will help you efficiently remove dust, debris, and other particles that can accumulate on the heater's surface and affect its performance.

When using these tools, it's vital to take some safety precautions. Make sure that the infrared heater is unplugged and completely cooled down before starting the cleaning process to prevent any risk of electric shock or burns.

Additionally, when using the vacuum cleaner or compressed air, hold them at a reasonable distance from the heater to avoid causing any damage to the unit.

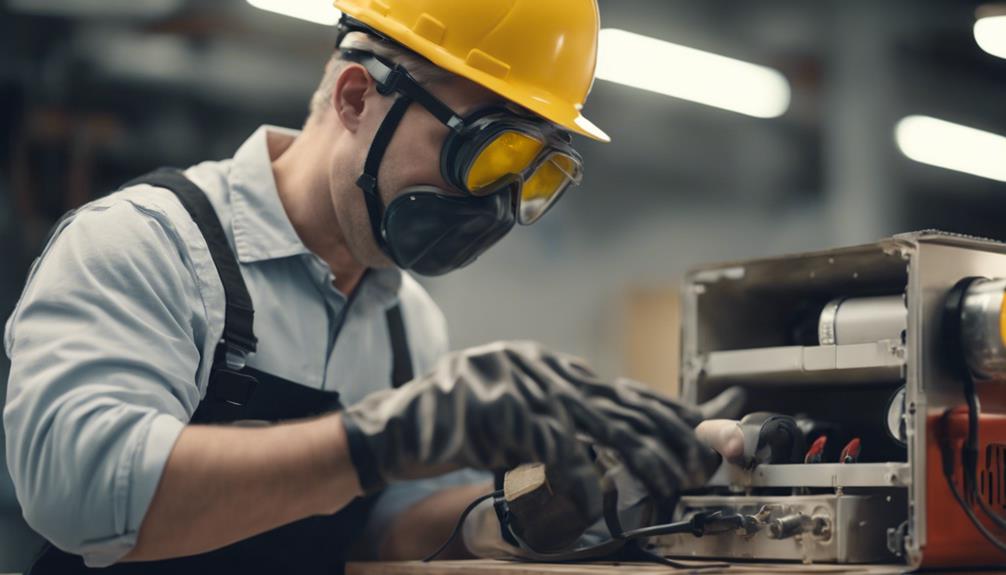
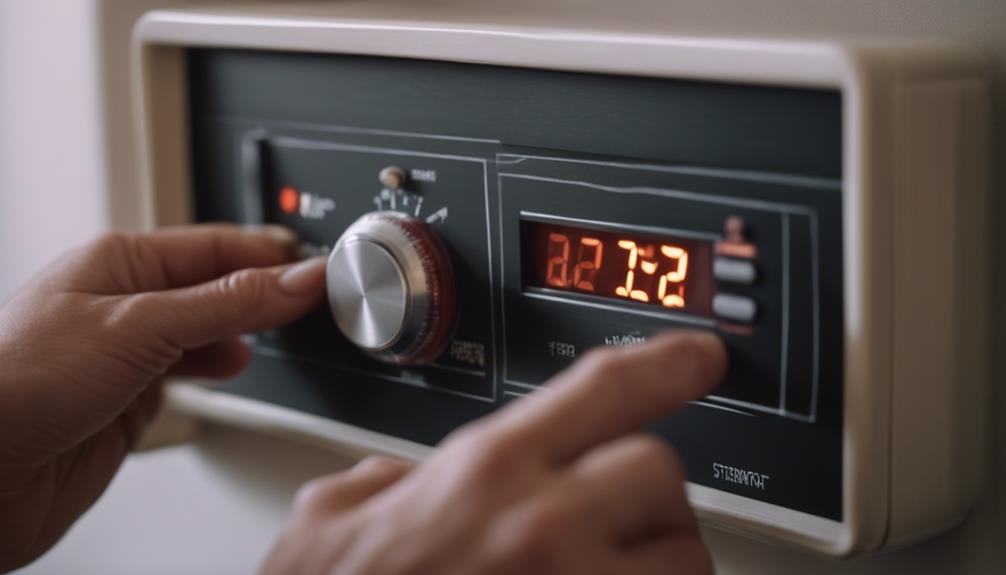
Preparing for Cleaning

cleaning preparation checklist ready

Before initiating the cleaning process on your infrared heater, verify that you have gathered all the necessary tools as mentioned in the previous section. To guarantee a safe cleaning experience, it's vital to follow a regular cleaning schedule for your infrared heater.

Start by turning off the heater and allowing it to cool down completely before beginning the cleaning process. This reduces the risk of burns or electrical shocks. Remember to unplug the heater from the power source to prevent any accidents while cleaning.

Next, gather safety precautions such as wearing protective gloves and a mask to avoid inhaling dust particles or debris. Position the heater in a well-ventilated area to dissipate any fumes that may arise during the cleaning.

It's essential to refer to the manufacturer's guidelines for specific cleaning instructions and any precautions to take. By following these steps and incorporating them into a routine cleaning schedule, you can maintain the efficiency and longevity of your infrared heater while guaranteeing a safe cleaning process.

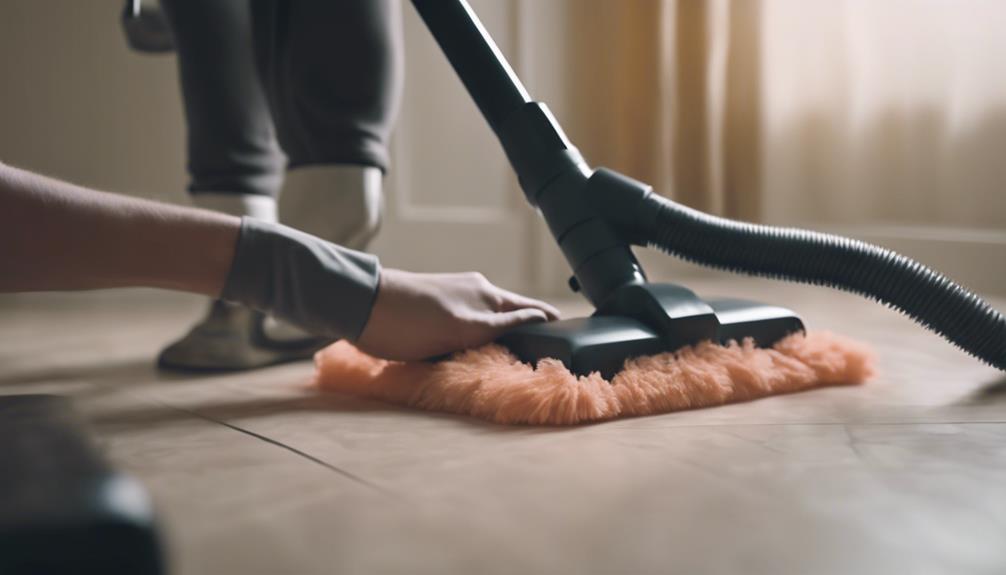
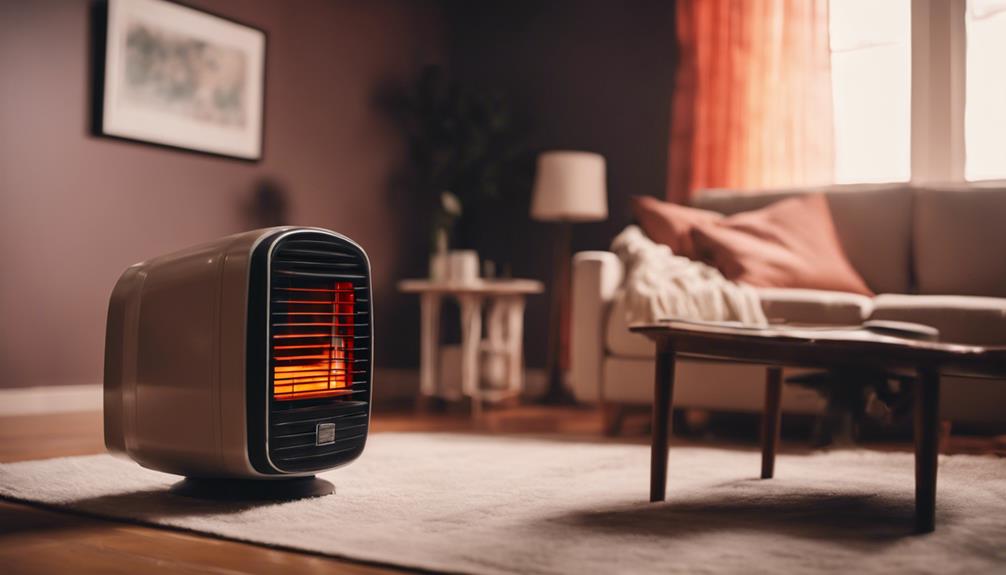
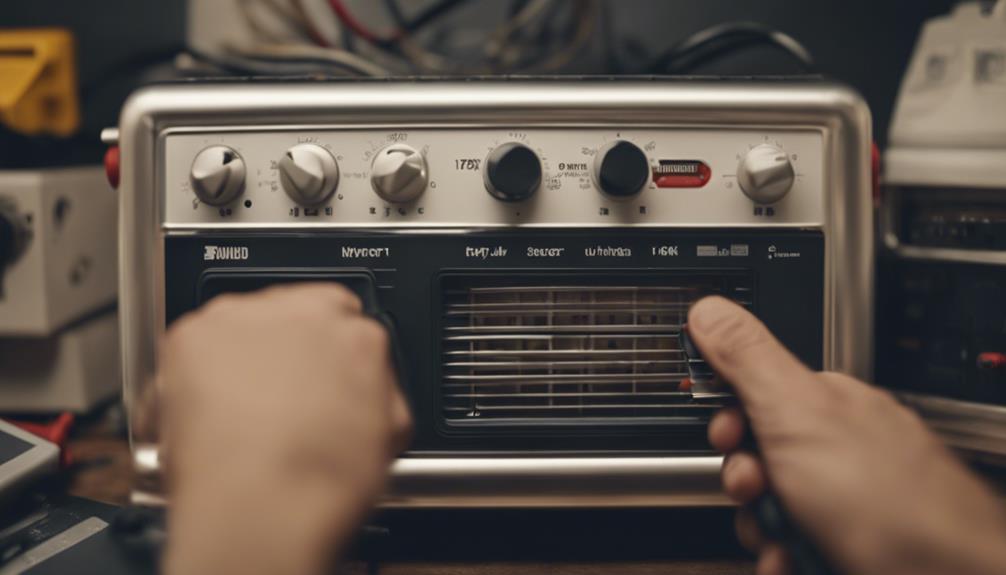
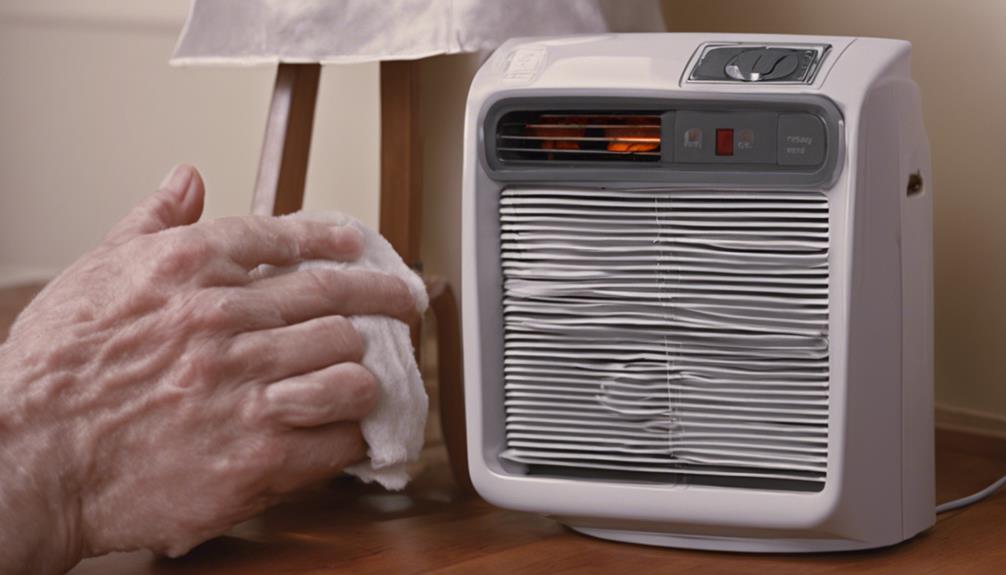
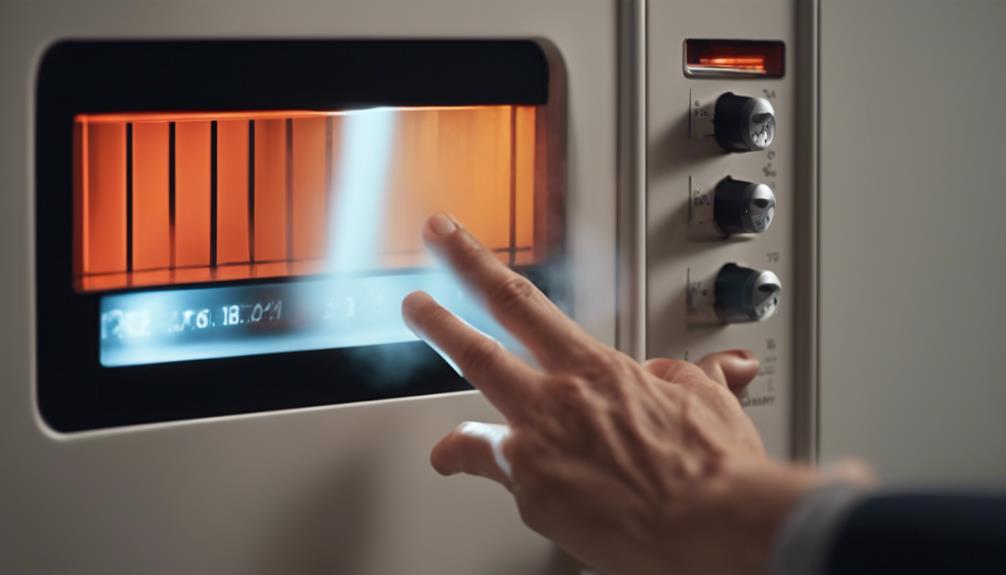
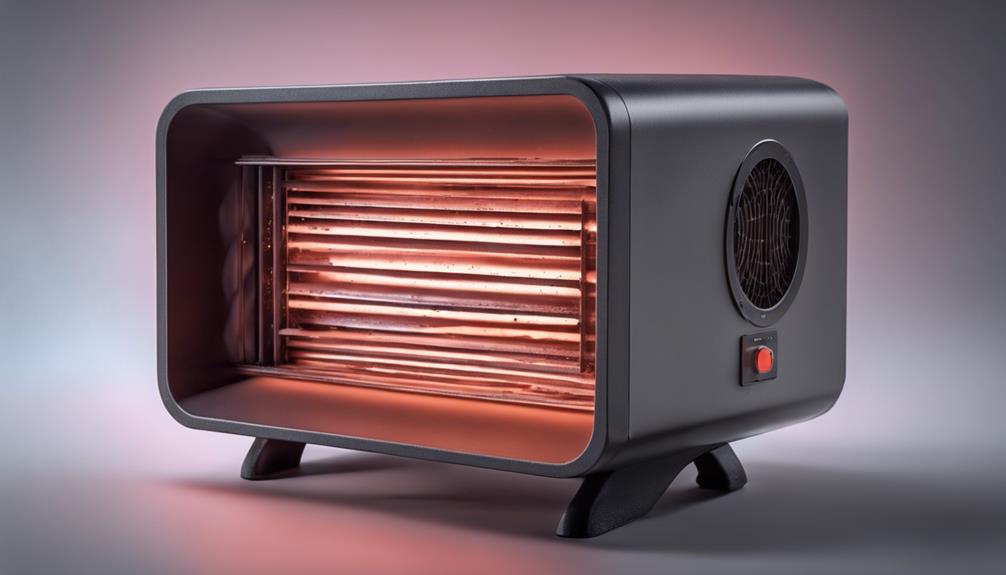
Cleaning the Exterior Surface

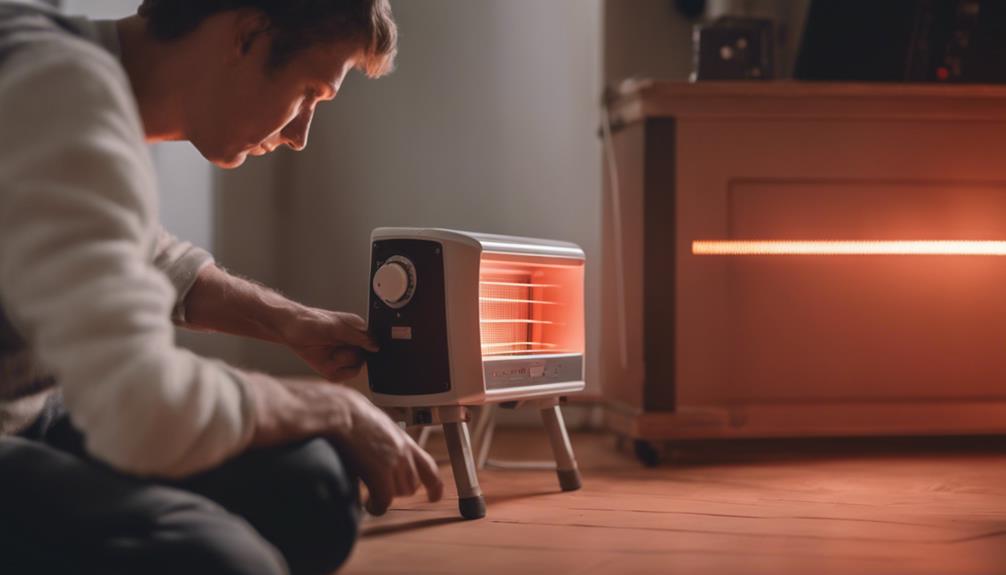
Initiate the cleaning process on your infrared heater by focusing on the exterior surface to maintain its appearance and functionality.

To keep your heater looking new and performing efficiently, follow these maintenance tips. Start by unplugging the heater and allowing it to cool down completely before cleaning.

For general cleaning, use a soft, dry cloth to wipe down the exterior surface. If there are stubborn stains or dirt buildup, dampen the cloth slightly with water or a gentle cleaner specifically designed for the material of your heater.

When choosing a cleaning solution, consider the material of your heater. For example, if your heater is made of wood, avoid using harsh chemicals that could damage the finish. Similarly, for metal heaters, opt for a cleaner that's safe for metal surfaces.

Regularly cleaning the exterior surface not only enhances the aesthetics of your infrared heater but also guarantees its longevity and efficient operation.

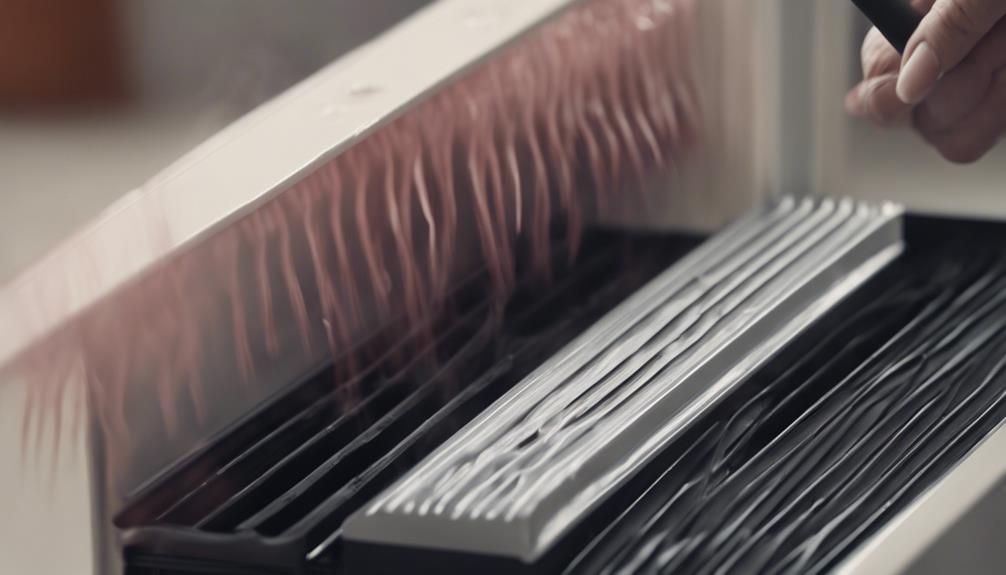
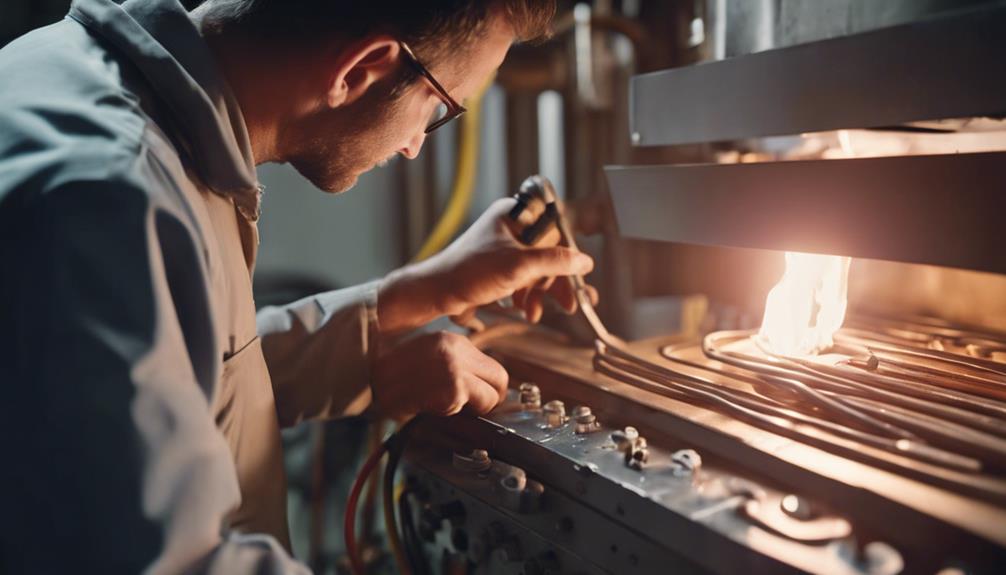
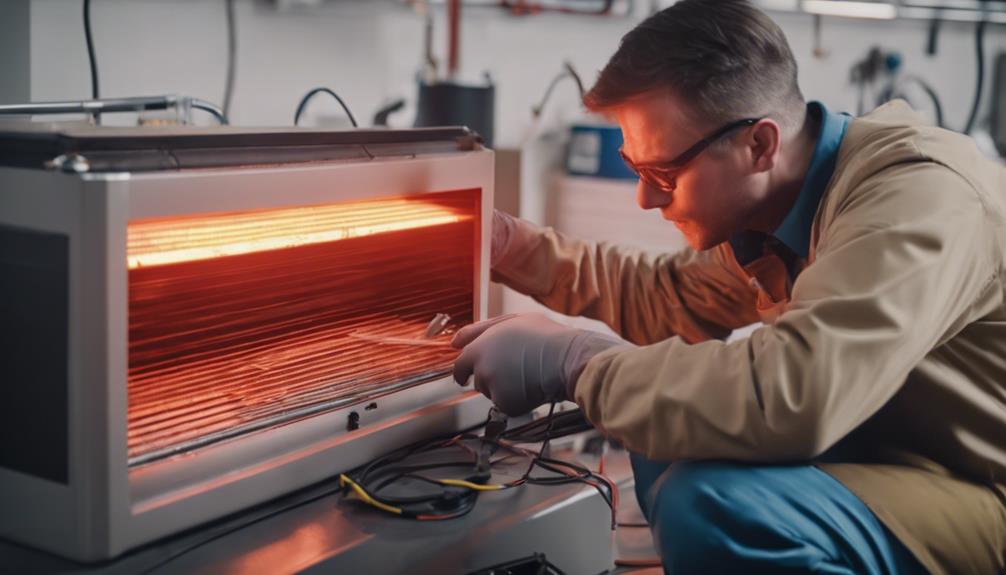
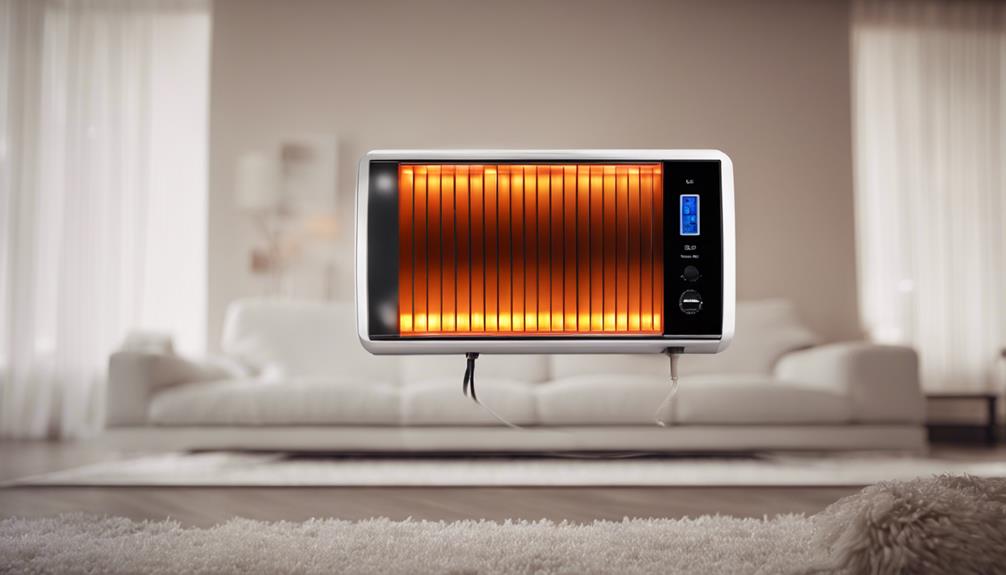
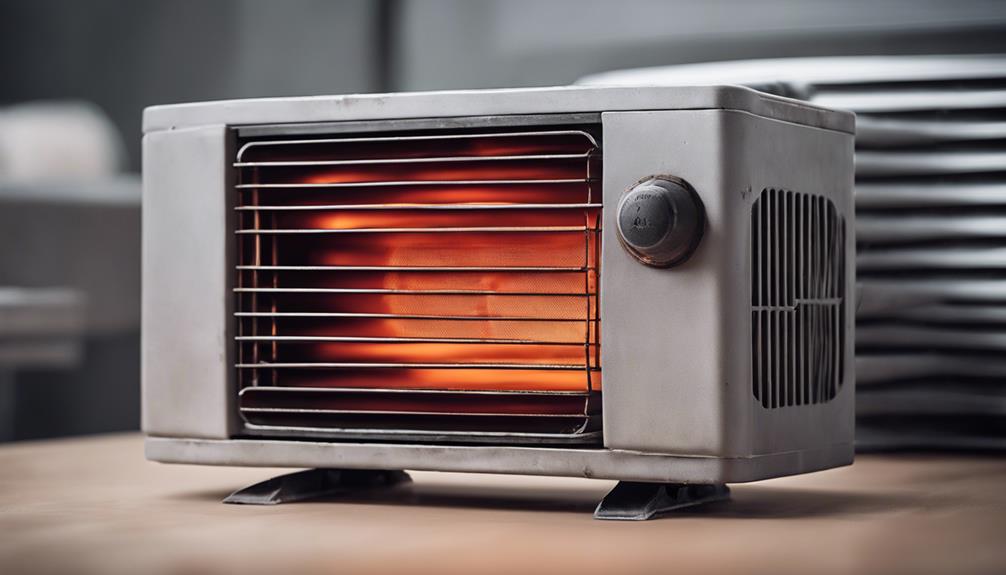
Cleaning the Heating Element

maintenance of heating element

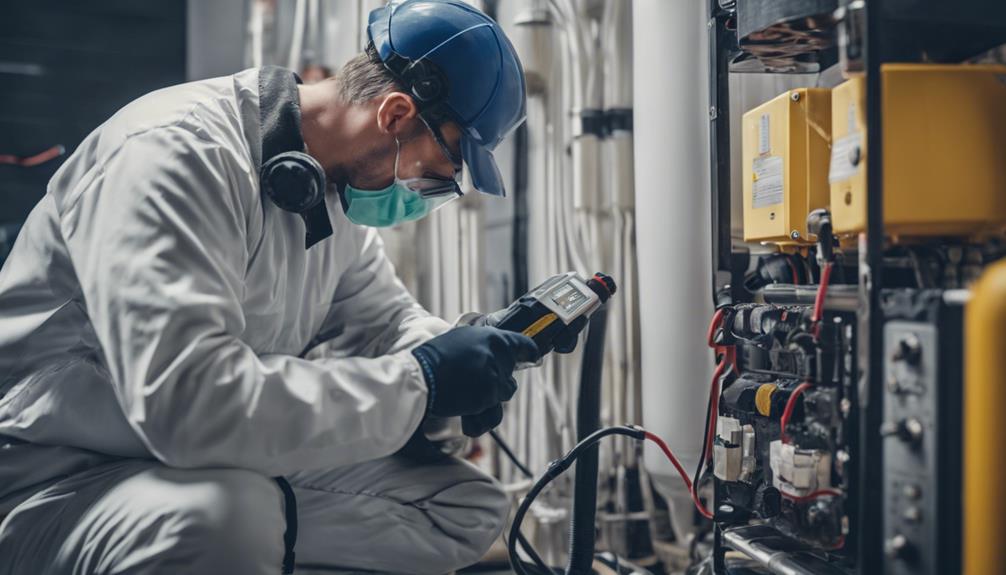
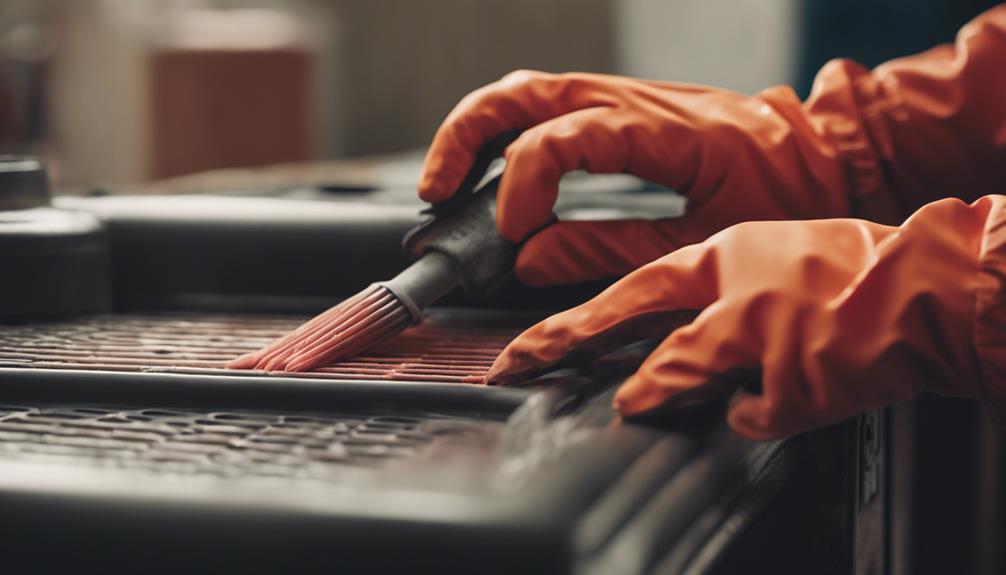
Start by verifying the heater is unplugged and completely cooled down before proceeding to clean the heating element.

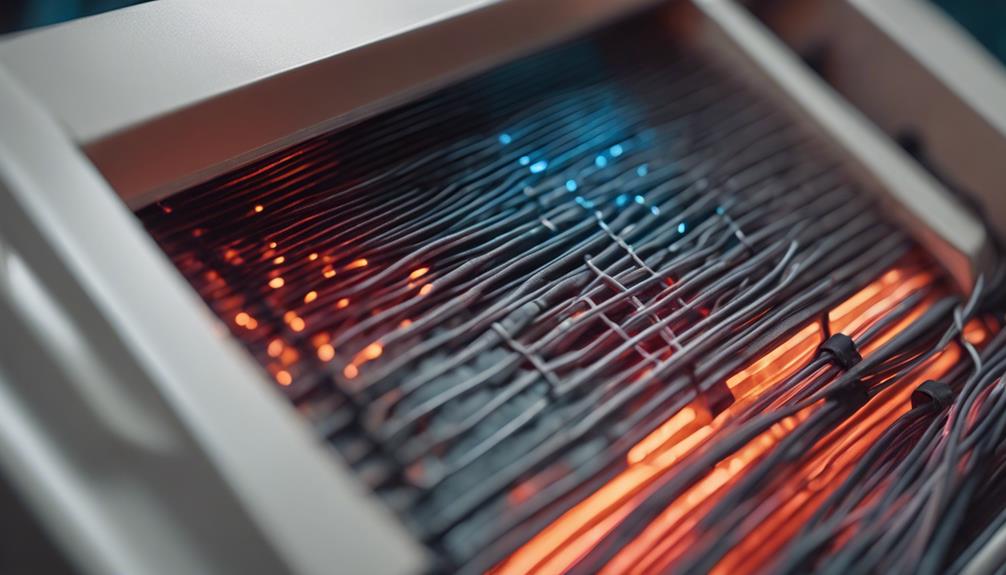
The heating element is vital for the efficiency of your infrared heater. Over time, dust accumulation on the heating element can hinder its performance and reduce heating efficiency. To clean the heating element, use a soft brush or a vacuum cleaner with a brush attachment to gently remove any dust or debris. Be careful not to damage the delicate heating element during the cleaning process.

Regularly cleaning the heating element of your infrared heater can help maintain its effectiveness and prolong its lifespan. By keeping the heating element free from dust accumulation, you guarantee that the heater operates at its ideal efficiency, providing you with the warmth and comfort you need.

Remember to schedule this cleaning task periodically to prevent any buildup that could affect the performance of your heater.

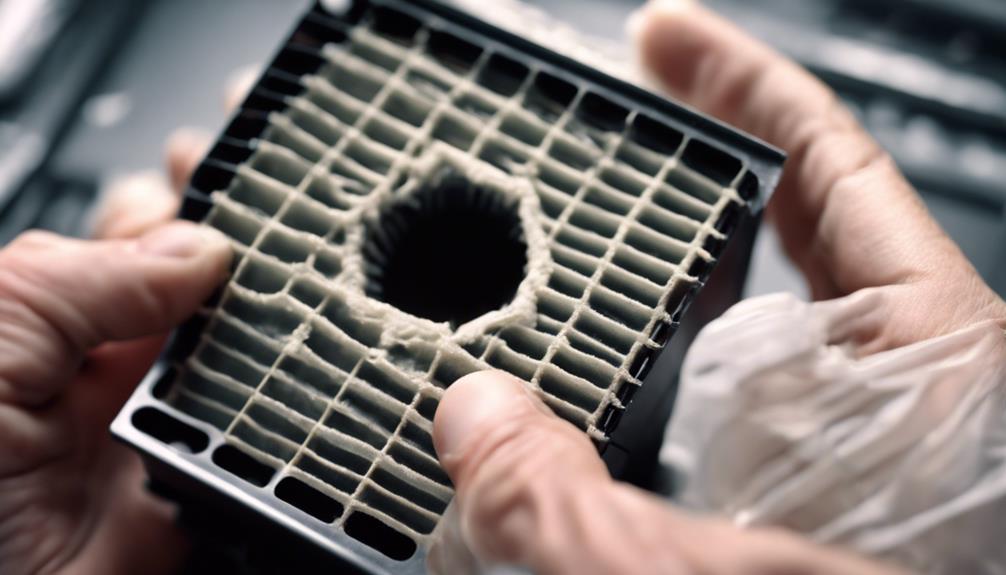
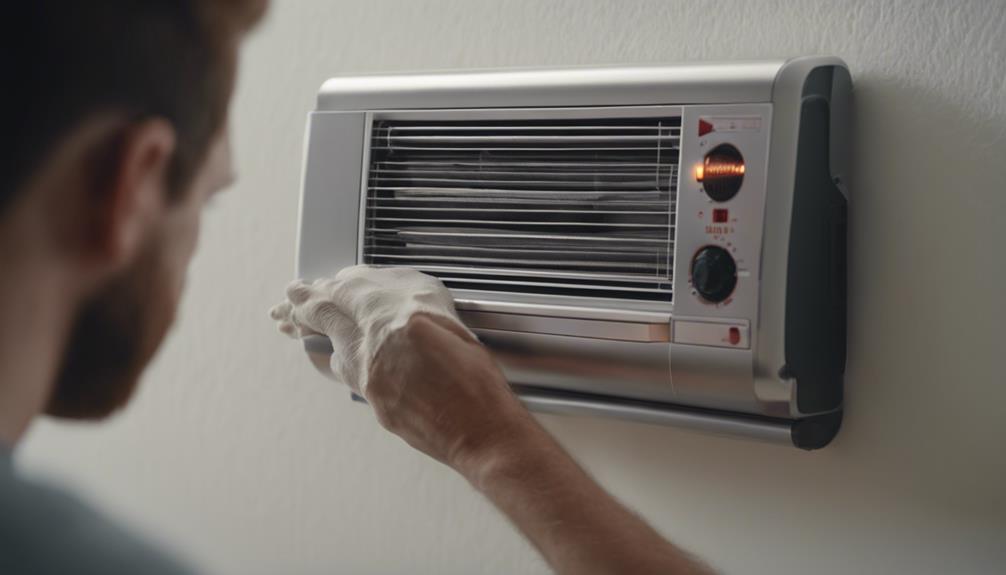
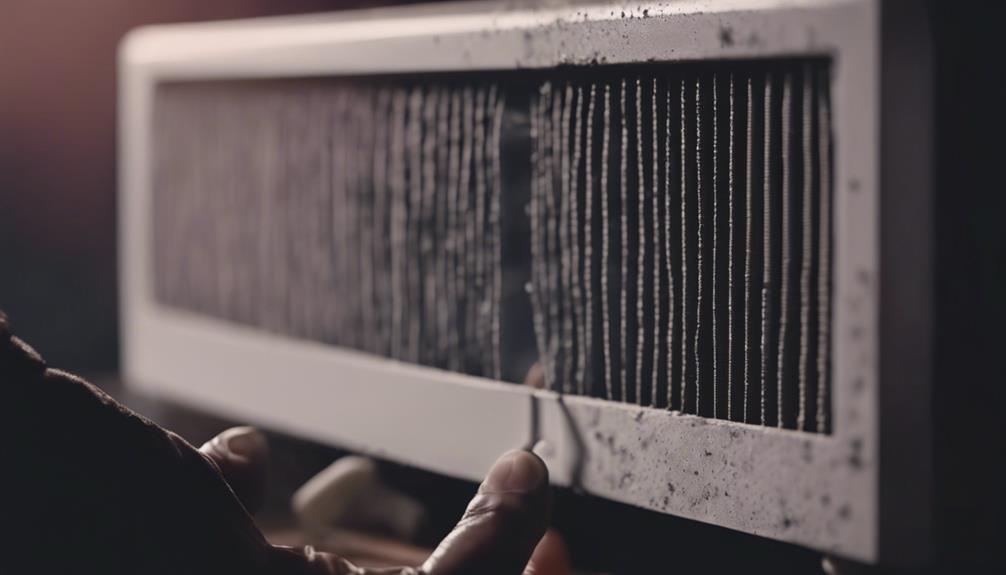
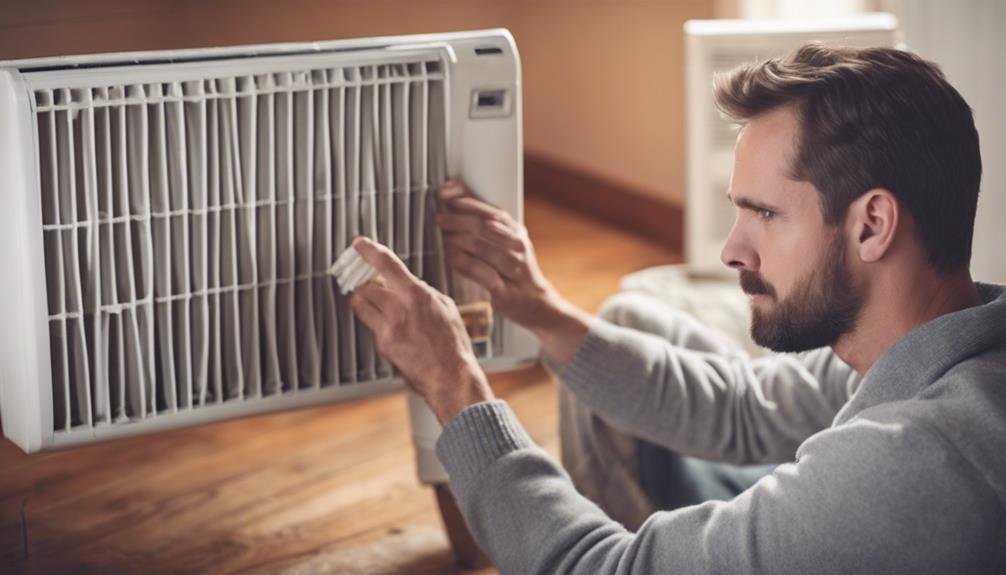
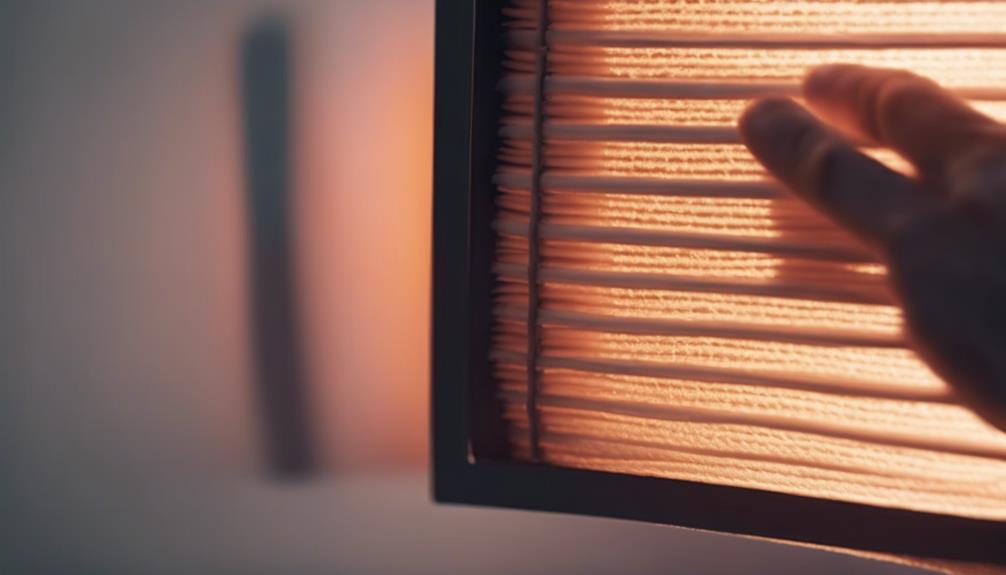
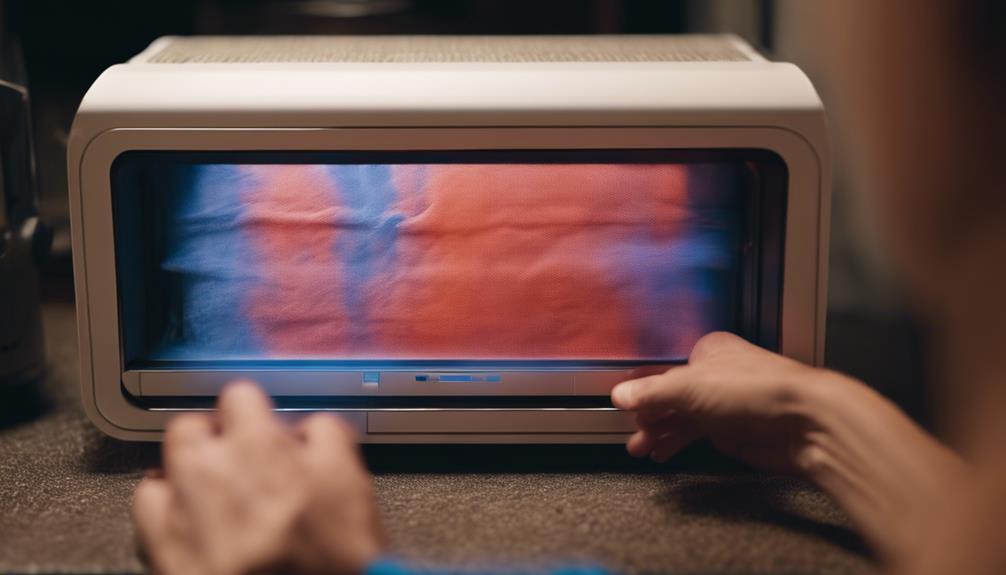
Cleaning the Air Filters

Make certain you unplug the infrared heater and allow it to cool completely before cleaning the air filters to maintain peak performance.

Proper filter maintenance is essential for ensuring good air quality and efficient operation of your infrared heater. To clean the air filters, locate them on the back or sides of the unit. Gently remove the filters from their housing; depending on the model, they may be washable or replaceable.

For washable filters, use a vacuum cleaner with a brush attachment to remove dust and debris. Then, rinse the filter under warm water and allow it to dry completely before reinstalling.

If your filters are replaceable, check the manufacturer's instructions for the correct filter type and size. Regularly cleaning or replacing the air filters every few months will help prevent dust buildup, improve air quality, and maintain the heater's efficiency.

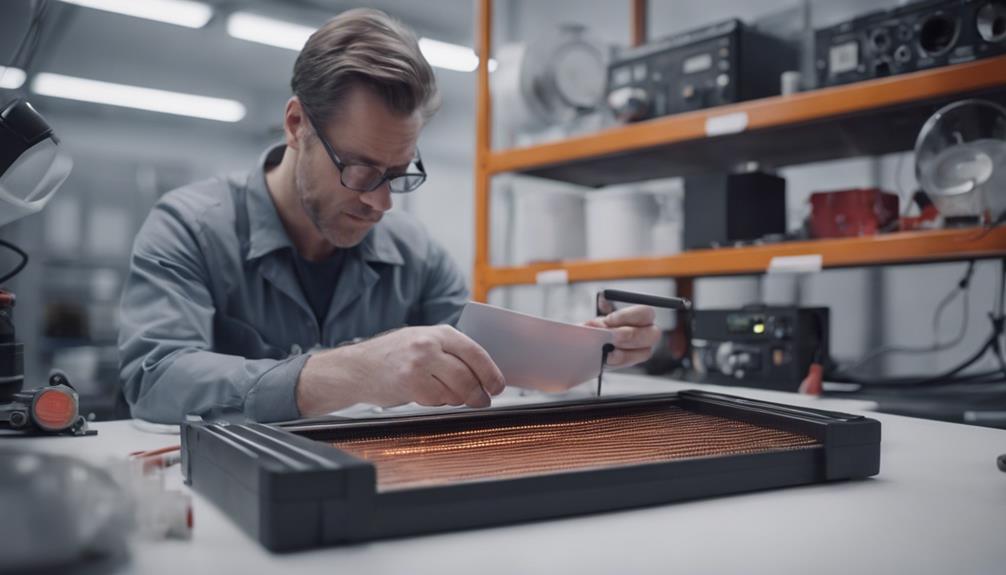
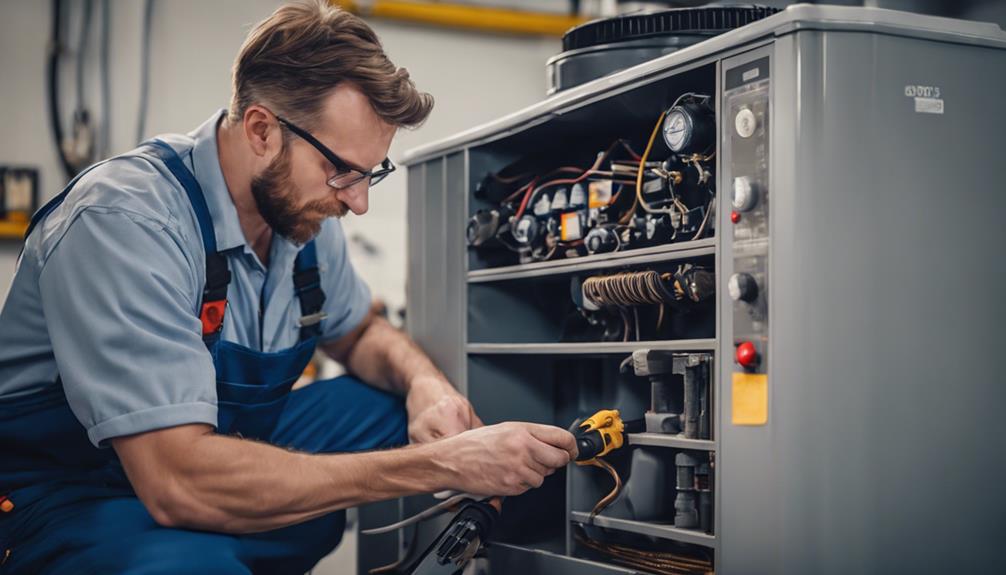
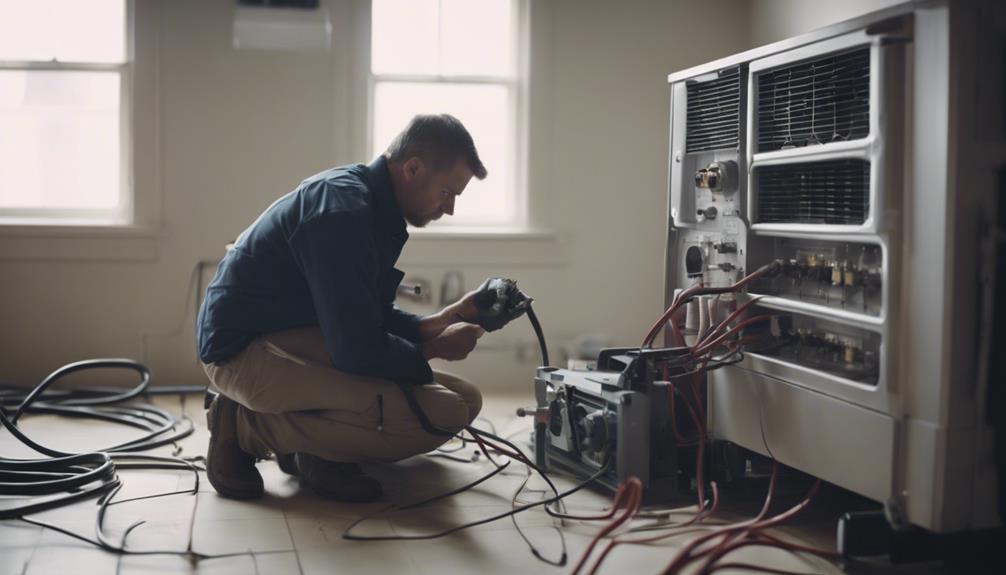
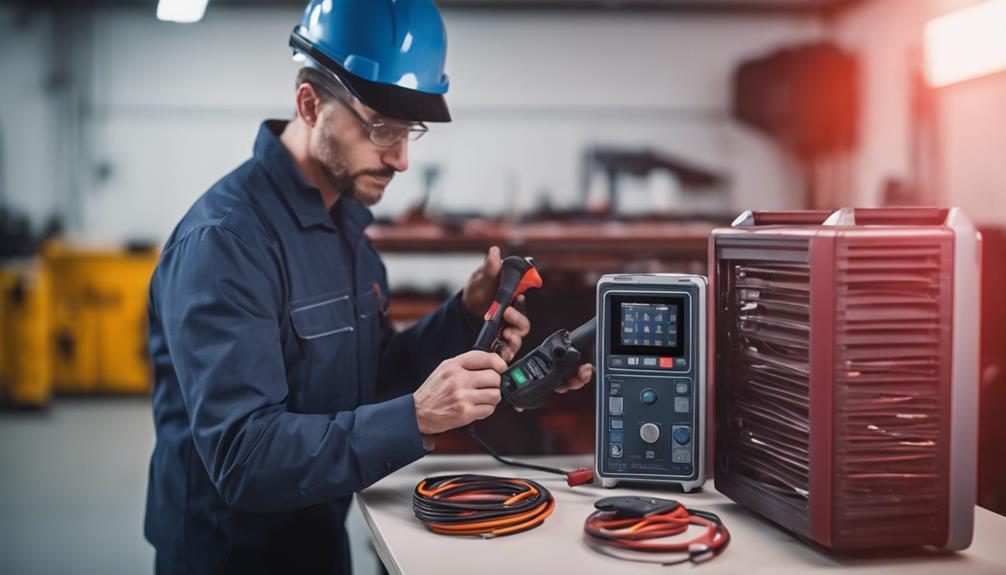
Reassembling and Testing the Heater

heater reassembly and testing

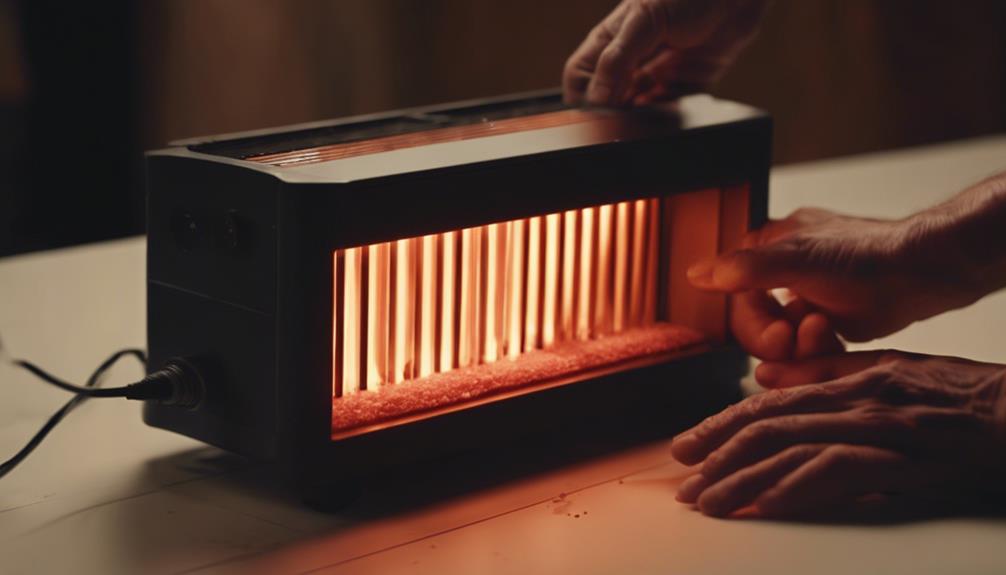
After cleaning the air filters of your infrared heater, carefully reassemble the unit and perform a test run to confirm proper functionality.

To start, ascertain all components are correctly put back together according to the manufacturer's instructions. Check that the heating elements, reflectors, and housing are securely in place. Make sure all screws or fasteners are tightened but avoid over-tightening to prevent damage.

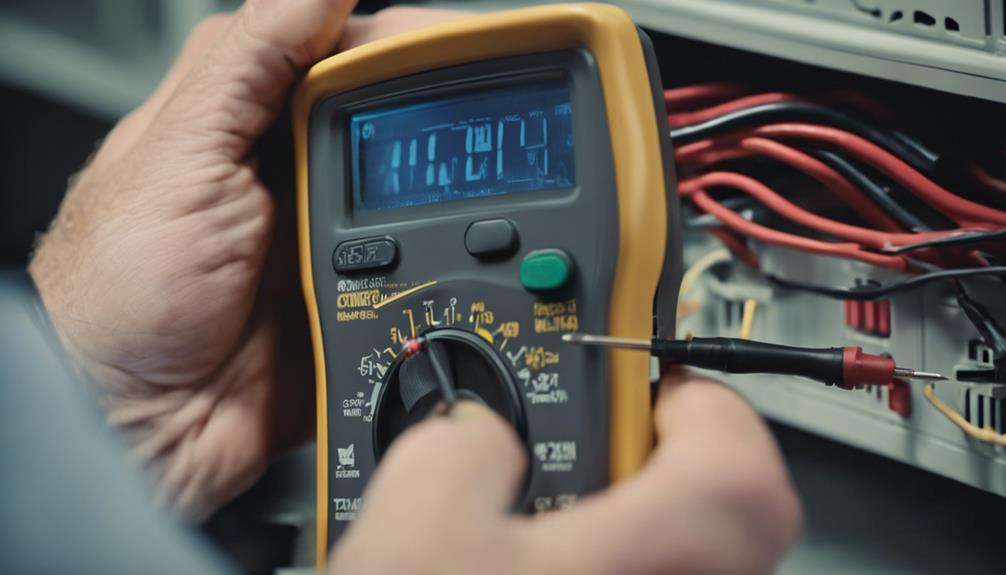
Before powering up the heater, remember to follow safety precautions. Plug the unit into a suitable outlet and switch it on. Monitor the startup process closely for any unusual noises, smells, or malfunctions. If you notice anything out of the ordinary, immediately turn off the heater and refer to troubleshooting tips provided in the user manual.

During the test run, pay attention to the heat output and distribution. Feel the warmth across the room to confirm that the heater is working efficiently.

If everything appears to be functioning correctly, congratulations on successfully cleaning, reassembling, and testing your infrared heater.

Conclusion

Regularly cleaning your infrared heater is essential to guarantee it functions efficiently and safely.

By keeping the exterior surface, heating element, and air filters clean, you can prevent dust buildup, maintain peak heat output, and improve air quality in your space.

With the right tools and a simple cleaning routine, you can prolong the lifespan of your heater and enjoy its benefits for years to come.

Posted on Leave a comment

Revolutionary Tips to Extend Infrared Heater Lifespan

extend infrared heater lifespan

For an extended lifespan of your infrared heater, focus on innovative maintenance techniques. Guarantee efficient heating by maintaining proper ventilation for uniform warmth distribution and preventing hot spots. Set a cleaning schedule, dust weekly, and avoid liquid cleaning products to sustain peak performance. Timely replace filters to block dust and debris, enhancing efficiency. Monitor thermostat settings regularly to optimize energy use and prevent component strain. Check and secure electrical connections to maintain safe and effective operation. Place your heater strategically, avoiding obstructions, to evenly distribute heat. Consider professional maintenance checks seasonally to guarantee first-rate performance.

Proper Ventilation for Efficient Heating

optimal airflow enhances heating

To guarantee efficient heating and prolong the lifespan of your infrared heater, prioritize proper ventilation in the designated area.

Adequate airflow patterns are vital to make certain that the heat generated by the infrared heater is evenly distributed throughout the room. Stagnant air can lead to hot spots and cold areas, reducing the overall effectiveness of the heater.

Additionally, maintaining ideal humidity levels in the room is essential. High humidity levels can cause moisture to accumulate inside the heater, potentially damaging its components over time. On the other hand, overly dry conditions can affect the performance of the heater and lead to issues like static electricity buildup.

By making certain of proper ventilation and monitoring humidity levels, you can enhance the functionality of your infrared heater and extend its lifespan considerably.

Remember to keep the area around the heater clear of obstructions to allow for smooth airflow and efficient operation.

Regular Dusting and Cleaning Techniques

Proper maintenance of your infrared heater includes implementing regular dusting and cleaning techniques to secure peak performance and longevity. Dust accumulation on the heating elements can hinder the efficiency of your infrared heater. To prevent this, it's essential to establish a cleaning schedule.

Aim to dust the exterior of the heater weekly using a soft, dry cloth to remove any surface dust. For a deeper clean, turn off the heater, let it cool down, and then carefully vacuum the vents and grills to eliminate trapped dust and debris. Additionally, utilize compressed air to blow out any remaining particles in hard-to-reach areas.

When performing maintenance, pay special attention to the heating elements. Avoid using water or liquid cleaners on these components to prevent damage. Instead, gently wipe them with a dry cloth or a soft brush to remove any dust buildup.

Timely Replacement of Filters

filters replacement timely ensured

Guarantee timely replacement of filters in your infrared heater to maintain peak performance and longevity.

Filters are vital components that prevent dust and debris from entering the heater, guaranteeing efficient operation. There are typically two main types of filters used in infrared heaters: pre-filters and HEPA filters. Pre-filters capture larger particles like dust and hair, while HEPA filters trap smaller particles such as allergens and pollutants.

To keep your infrared heater running smoothly, it's recommended to check the filters monthly and replace them every 3 to 6 months, depending on usage and environmental factors. If you notice a significant buildup of dirt on the filters or a decrease in heating efficiency, it's time for a replacement.

Neglecting filter maintenance can lead to reduced heating performance, overheating, and potential damage to the heater components. By staying diligent with filter replacements, you can extend the lifespan of your infrared heater and guarantee peak heating efficiency.

Monitor Thermostat Settings Carefully

Regularly monitoring your infrared heater's thermostat settings is key to enhancing its performance and guaranteeing efficient operation over time. Maintaining the correct temperature setting not only boosts energy efficiency but also prevents unnecessary wear and tear on the heater components.

By monitoring and adjusting the thermostat settings based on your comfort needs, you can avoid temperature fluctuations that strain the heater and lead to increased energy consumption.

To achieve superior energy efficiency, set the thermostat to a comfortable temperature rather than constantly adjusting it to extreme highs or lows. Sudden changes in temperature can cause the heater to work harder, reducing its lifespan. It's advisable to program your thermostat to maintain a consistent temperature, avoiding the need for frequent adjustments that can impact the unit's efficiency.

Regularly checking and calibrating the thermostat guarantees accurate temperature readings, preventing the heater from running longer than necessary. By monitoring the thermostat settings carefully, you can maximize your infrared heater's performance and longevity while minimizing energy costs.

Inspect and Secure Electrical Connections

electrical connections inspection securement

Verify that all electrical connections in your infrared heater are thoroughly inspected and securely fastened to maintain peak performance and safety. Confirming connection integrity is vital for the efficient operation of your heater.

Start by checking all wiring connections for any signs of wear, corrosion, or loose fittings. Tighten any loose connections using the appropriate tools to prevent overheating and potential fire hazards.

Inspect the power cord for any fraying or damage. If you notice any issues, replace the cord immediately to avoid electrical malfunctions. Additionally, examine the outlet where the heater is plugged in to verify it's in good condition and provides a stable power supply.

Regularly checking the electrical connections not only enhances the longevity of your infrared heater but also prioritizes wiring safety in your home. By maintaining a secure and well-inspected electrical system, you can enjoy the comfort of your heater while minimizing the risk of electrical accidents.

Optimal Placement for Heat Distribution

To guarantee ideal heat distribution and efficiency, carefully consider the placement of your infrared heater within the designated area.

Start by conducting a heat zone mapping of the room to identify the areas that require the most heating. Place the infrared heater in a central location within the room to guarantee even distribution of warmth. Avoid obstructing the heater with furniture or curtains, as this can hinder the dispersion of heat. Additionally, positioning the heater near cold spots or drafty areas can help counteract the chill effectively.

When considering furniture arrangement, make certain that there are no large pieces blocking the heat flow. Arrange furniture in a way that allows the heat to radiate freely across the room.

Strategic placement can maximize the heater's reach and provide consistent warmth throughout the space. By optimizing the placement of your infrared heater, you can enhance its performance and longevity while guaranteeing a comfortable environment for your activities.

Schedule Professional Maintenance Checks

regular equipment maintenance schedule

Consider engaging professional technicians for routine maintenance checks to guarantee peak performance and longevity of your infrared heater.

Preventive maintenance is essential to keep your heater running efficiently and to catch any potential issues before they escalate. Seasonal inspections by qualified professionals can ascertain that all components are in prime condition, from the heating elements to the thermostat and safety features.

During these maintenance checks, technicians will clean the internal parts of the heater, ensuring that dust and debris don't obstruct airflow or cause overheating.

They'll also inspect electrical connections for any signs of wear or damage, which can pose a safety hazard if not addressed promptly.

Additionally, professionals can calibrate the thermostat to guarantee accurate temperature control and energy efficiency.

Conclusion

In summary, by following these revolutionary tips to extend your infrared heater's lifespan, you can guarantee peak performance and efficiency for years to come.

Proper ventilation, regular cleaning, timely filter replacements, careful thermostat monitoring, secure electrical connections, and ideal placement are all essential factors in maintaining your heater.

By also scheduling professional maintenance checks as needed, you can assure that your infrared heater will continue to provide reliable warmth and comfort in your home or workspace.

Posted on Leave a comment

10 Best Tips for Infrared Heater Maintenance

infrared heater maintenance tips

To maintain your infrared heater effectively, start by cleaning it monthly using a soft, dry cloth for the exterior and a vacuum with a brush attachment for grills. Be sure to check for airflow obstructions and guarantee proper ventilation for peak performance. Regularly inspect and replace filters to prevent overheating, and monitor thermostat settings for consistent operation. Test safety features, secure electrical connections, and schedule professional inspections annually. Position your heater strategically for efficient heat distribution and consider upgrading to energy-efficient models. Following these ten tips will guarantee your infrared heater works efficiently and safely.

Regular Cleaning Practices

consistent hygiene maintenance routine

To guarantee peak performance and longevity of your infrared heater, regular cleaning is essential.

The cleaning frequency for your infrared heater should be at least once every month, or more often if you notice an accumulation of dust or debris.

When cleaning your heater, it's vital to use suitable materials to avoid damaging any components.

Start by turning off the heater and letting it cool down completely before beginning the cleaning process.

Use a soft, dry cloth to gently wipe down the exterior of the heater to remove any surface dust.

For more thorough cleaning, you can use a vacuum cleaner with a brush attachment to carefully remove dust from the grills and vents.

Avoid using harsh chemicals or abrasive materials that could scratch or damage the heater.

Check for Airflow Obstructions

Guarantee peak performance of your infrared heater by regularly checking for any airflow obstructions that could hinder its efficiency.

Adequate airflow is vital for the ideal operation of your infrared heater. Start by confirming that there are no objects blocking the front or rear grills of the heater. These grills are essential for the intake and exhaust of air.

Additionally, check that the heater is positioned correctly. Proper heater positioning plays a significant role in airflow improvement. Make sure there's at least 12 inches of clearance around the heater to allow for unrestricted air circulation.

Observe the airflow patterns around the heater while it's running. Feel the air coming out of the vents to verify it's not obstructed or weak.

If you notice any irregularities, readjust the heater's position or remove any obstacles that could be affecting the airflow. By maintaining unobstructed airflow, you can enhance the overall efficiency and effectiveness of your infrared heater.

Inspect and Replace Filters

check and change filters

Check the filters regularly to confirm proper maintenance of your infrared heater. Filters play a vital role in guaranteeing that your heater functions efficiently.

There are different filter types available, such as mesh filters and HEPA filters. Mesh filters are commonly used and should be checked at least once a month. These filters can often be cleaned with a vacuum or washed with water, depending on the manufacturer's instructions.

HEPA filters have a longer lifespan but may need replacement every 6 to 12 months, depending on usage. Inspecting and replacing filters when necessary is essential for maintaining good indoor air quality and preventing dust and debris from accumulating inside your heater.

Clogged filters can restrict airflow, causing your heater to work harder and potentially leading to overheating issues. By following the manufacturer's recommendations for filter maintenance, you can confirm your infrared heater operates efficiently and effectively.

Monitor Thermostat Settings

Inspecting and maintaining your infrared heater also involves monitoring the thermostat settings to guarantee peak performance and energy efficiency.

To make certain your heater operates at its best, it's essential to regularly check the thermostat calibration. A thermostat that isn't calibrated correctly can lead to temperature inconsistencies and increased energy consumption.

Begin by confirming that the thermostat is mounted away from any heat sources or drafts, as these can disrupt its accuracy.

Then, use a separate thermometer to compare the temperature readings between the heater and the thermometer. If there's a variance, consider recalibrating the thermostat according to the manufacturer's instructions.

Moreover, maintaining temperature consistency is key to maximizing comfort and efficiency. Set your thermostat to a comfortable level and observe if the heater maintains this temperature consistently.

If you notice fluctuations, it may indicate a need for recalibration or maintenance. By staying vigilant with your thermostat settings, you can make certain your infrared heater operates efficiently and effectively.

Test Safety Features Regularly

regularly test safety features

Regularly testing the safety features of your infrared heater is essential to guaranteeing safe operation and peace of mind.

To maintain safety compliance, start by testing the heater's tip-over switch. Gently tilt the heater to trigger the switch, making sure it automatically shuts off as intended.

Next, examine the overheat protection feature by intentionally overheating the unit. The heater should power down promptly to prevent any hazardous situations.

Check the heater's cord for any signs of wear or damage, as this could pose a fire risk. Additionally, verify that the plug fits securely into the outlet to prevent electrical hazards.

Finally, inspect the heater's casing for any cracks or damage that could affect its safe operation.

Ensure Proper Ventilation

To guarantee the safe and efficient operation of your infrared heater, it's imperative to maintain proper ventilation within the designated area.

Adequate ventilation is vital for confirming the heater functions at peak performance and helps prevent any potential hazards. There are two main types of ventilation to take into account: natural ventilation, which relies on openings like windows or vents, and mechanical ventilation, which involves fans or duct systems to circulate air.

Proper ventilation not only confirms the heater works efficiently but also helps control humidity levels in the room. High humidity can impact the performance of the infrared heater and lead to discomfort. By allowing fresh air to circulate, you can maintain a healthy environment and extend the lifespan of your heater.

Regularly checking and cleaning ventilation openings is essential to prevent blockages that could impede airflow.

Additionally, monitoring humidity levels and using dehumidifiers when necessary will help maintain an ideal environment for your infrared heater to operate effectively.

Secure Electrical Connections

reliable power system integrity

Guarantee all electrical connections for your infrared heater are securely fastened to prevent any potential safety hazards.

Maintaining wiring safety is vital to guarantee the efficient and safe operation of your heater. Start by inspecting all the connections, making sure they're tight and free of any damage. Loose or frayed wires can lead to overheating, sparking, or even electrical fires. Take note of any signs of wear and tear, such as exposed wires or burnt insulation, and address these issues promptly.

Check the connection integrity between the heater's power cord, the outlet, and any extension cords used. Make sure the plugs fit snugly into the outlets and there are no signs of arcing or sparking. Avoid overloading circuits by plugging the heater directly into a wall outlet whenever possible.

Regularly inspecting and maintaining the electrical connections of your infrared heater is essential for safe and effective operation. By prioritizing wiring safety and connection integrity, you can enjoy a warm and cozy environment without worrying about potential hazards.

Schedule Professional Inspections

Guarantee the continued safety and ideal performance of your infrared heater by scheduling professional inspections at regular intervals.

Professional inspections are essential for confirming that your infrared heater is functioning at its best and safely. Experts recommend having a qualified technician inspect your infrared heater at least once a year to identify any potential issues and perform necessary maintenance tasks.

During a professional inspection, technicians will thoroughly examine all components of your infrared heater, including the heating elements, reflectors, controls, and electrical connections.

They'll also check for any signs of wear and tear, corrosion, or damage that could affect the performance of your heater.

Additionally, technicians will verify that your infrared heater is operating efficiently and effectively according to the latest infrared heater technology and maintenance best practices.

Optimize Placement for Efficiency

maximize efficiency through placement

For ideal efficiency, carefully consider the placement of your infrared heater within the designated space.

To maximize heat distribution, place your infrared heater in a location where there are no obstructions blocking the heat waves, such as furniture or curtains. Ideally, the heater should be positioned in a central area of the room to guarantee even heating. If the room layout allows, placing the heater near a wall can help reflect the heat back into the room, increasing its overall effectiveness.

When determining the placement of your infrared heater, take into account the size of the room and the heat output of the unit. A larger room may require a heater with higher wattage or multiple heaters strategically placed to achieve maximum heat distribution.

Additionally, avoid placing the heater near air vents or drafty areas that can disrupt the flow of warmth throughout the room. By thoughtfully considering the room layout and heat distribution, you can guarantee that your infrared heater operates at its highest effectiveness levels.

Consider Upgrading to Energy-Efficient Models

Consider upgrading to energy-efficient models to reduce your electricity consumption and lower your heating costs in the long run.

When looking for a new infrared heater, prioritize energy savings by comparing different models. Energy-efficient heaters are designed to provide the same level of warmth while consuming less power. Look for heaters with high Energy Efficiency Ratings (EER) or Energy Star certifications, indicating that they meet strict energy efficiency guidelines. These models often use advanced technology like programmable thermostats, motion sensors, or eco modes to optimize energy usage.

When comparing models, pay attention to features like wattage, heating capacity, and programmable settings. Higher wattage doesn't always equate to better heating performance; instead, focus on the heater's ability to efficiently distribute warmth. Programmable settings allow you to customize heating schedules based on your usage patterns, further enhancing energy savings.

Additionally, consider the initial cost versus long-term savings to make an informed decision. By investing in an energy-efficient infrared heater, you can enjoy a comfortable environment while reducing your carbon footprint and saving on utility bills.

Conclusion

To summarize, following these 10 best tips for infrared heater maintenance will guarantee peak performance and efficiency for your heating system.

By regularly cleaning, checking for obstructions, replacing filters, and monitoring thermostat settings, you can extend the lifespan of your heater and keep your space warm and comfortable all winter long.

Additionally, testing safety features, securing electrical connections, scheduling professional inspections, optimizing placement, and considering energy-efficient upgrades are crucial steps in maintaining your heater's functionality.

Stay proactive and stay warm!

Posted on Leave a comment

Top Tips to Maintain Your Heater's Energy Efficiency

maximize heater energy efficiency

Position your heater centrally, keep filters clean, seal air leaks, calibrate the thermostat, inspect heating elements, guarantee ventilation, and schedule pro maintenance for efficiency. Placing your heater strategically guarantees heat distributes effectively. Regularly clean filters and use proper insulation to reduce workload. Inspect for air leaks and seal them to prevent energy waste. Calibrate the thermostat for accurate readings. Regularly check heating elements for wear. Clear obstructions for ideal airflow and schedule professional maintenance for prolonged efficiency. Following these tips will help maximize your heater's energy efficiency and performance.

Choosing the Right Location

selecting ideal site location

To guarantee ideal heater energy efficiency, position your unit in a central location within the room. Proper heater placement is vital for effective heat distribution. Placing the heater centrally guarantees that warm air is evenly circulated throughout the space, enhancing the heating process.

Additionally, consider the insulation of the room where the heater is located. Well-insulated rooms retain heat better, reducing the workload on the heater and promoting energy efficiency. Insulating walls, windows, and doors can prevent heat loss, allowing the heater to maintain a comfortable temperature more effectively.

When selecting the placement for your heater, avoid positioning it near drafty areas such as windows or doors. Drafts can cause heat loss and make the heater work harder to maintain the desired temperature. It's also advisable to keep the heater away from furniture or curtains that could obstruct airflow.

Regular Filter Cleaning

For ideal heater energy efficiency, maintaining clean filters is key. The frequency of filter replacement is vital in guaranteeing your heater operates at its best. It's recommended to replace disposable filters every 1-3 months, depending on usage and the manufacturer's guidelines. For reusable filters, they should be cleaned according to the manufacturer's instructions, typically every 1-2 months.

When selecting a filter type, consider factors such as the size of particles it can capture, the MERV (Minimum Efficiency Reporting Value) rating, and the compatibility with your heating system. High-MERV filters can trap smaller particles but may restrict airflow if not suitable for your system. Consult your heater's manual or an HVAC professional to determine the right filter type for peak performance.

Regular filter maintenance not only improves energy efficiency but also enhances indoor air quality by reducing dust, pollen, and other contaminants circulating in your home. By adhering to the recommended filter replacement frequency and selecting the appropriate filter type, you can guarantee your heater operates efficiently and effectively.

Checking for Air Leaks

detecting air leaks efficiently

Inspect your heater system for air leaks regularly to guarantee ideal energy efficiency. Air leaks in your heating system can lead to energy waste and decreased performance.

Start by examining areas where different components meet, such as where the ductwork connects to the furnace or where vents enter rooms. Feel for drafts or use a smoke pencil to detect airflow indicating potential leaks.

Once you locate air leaks, consider using weather stripping to seal any gaps around doors or windows that lead to the outside. For larger gaps or leaks in ductwork, sealant options like mastic sealant or foil tape can provide effective solutions. Apply the weather stripping or sealant carefully to make certain a tight seal and prevent air from escaping.

Checking for air leaks and sealing them promptly can greatly improve your heater's energy efficiency, reducing energy costs and enhancing overall performance. By taking these simple steps, you can enhance the effectiveness of your heating system and keep your home comfortable while saving on energy bills.

Calibrating the Thermostat

Examine the thermostat settings to validate accurate temperature readings and ideal energy usage in your heating system. Proper thermostat calibration is vital for efficient heating.

Begin by confirming the thermostat is mounted on an interior wall away from direct sunlight or drafts. Check for any obstructions that could affect temperature readings. Next, verify that the thermostat is level to prevent inaccuracies.

To calibrate the thermostat, compare the displayed temperature with a separate thermometer placed nearby. If there's a discrepancy, follow the manufacturer's instructions to adjust the calibration settings. It's important to test the accuracy of the thermostat in both heating and cooling modes to ascertain overall functionality.

Moreover, set your thermostat to the recommended temperature settings for each season. Lowering the temperature by a few degrees in winter and raising it in summer can greatly impact energy consumption.

Regularly checking and adjusting the thermostat calibration and temperature settings will help optimize your heating system's performance and energy efficiency.

Inspecting the Heating Elements

evaluating heating element functionality

To guarantee ideal heater performance, closely evaluate the condition of the heating elements for any signs of wear or damage. Heating elements are vital components in various types of heaters, such as electric furnaces, heat pumps, and baseboard heaters. Common heating element types include electric coils, heat exchangers, and ceramic plates.

Begin by switching off the power to the heater and allowing it to cool down before inspecting the elements. Look for any visible cracks, breaks, or discoloration on the elements, as these can indicate potential issues.

When inspecting heating elements, remember to observe proper safety precautions. Always wear protective gear like gloves and safety glasses to prevent any injuries. Verify that the heater is completely powered off and disconnected from any electrical sources before beginning the inspection.

If you notice any damage to the heating elements, it's important to have them repaired or replaced by a qualified technician to maintain the efficiency and safety of your heater. Regularly checking and maintaining the heating elements can help extend the lifespan of your heater and guarantee peak performance.

Ensuring Proper Ventilation

For ideal heater performance, guarantee proper ventilation by regularly clearing any obstructions from vents and ducts. Proper ventilation is essential for efficient air circulation in your heating system. Clogged vents and ducts can restrict airflow, leading to reduced heating efficiency and potential damage to your heater.

To verify optimal air circulation, inspect your ventilation systems regularly. Remove any debris, dust, or blockages that may accumulate in the vents or ducts. This simple maintenance task can considerably improve the overall performance of your heater.

In addition to clearing obstructions, consider the layout of your furniture and other objects in the vicinity of your vents. Confirm that there are no obstacles blocking the airflow from the vents to allow for proper distribution of heated air throughout the room.

Scheduling Professional Maintenance

organizing regular maintenance services

Regularly scheduling professional maintenance for your heater is key to ensuring its ideal performance and efficiency.

Seasonal tune-ups conducted by qualified technicians play a vital role in keeping your heating system running smoothly. These routine check-ups help identify and address any potential issues before they escalate into costly repairs or compromise the energy efficiency of your unit.

Qualified technicians possess the necessary expertise to inspect, clean, and tune your heater effectively. They can identify and rectify any inefficiencies, ensuring that your system operates at peak performance levels.

Additionally, technicians can provide valuable recommendations on how to optimize your heater's energy efficiency and prolong its lifespan.

Conclusion

In summary, by following these top tips for maintaining your heater's energy efficiency, you can guarantee peak performance and lower energy bills.

Remember to choose the right location, clean the filters regularly, check for air leaks, calibrate the thermostat, inspect the heating elements, guarantee proper ventilation, and schedule professional maintenance when needed.

By staying on top of these tasks, you can keep your heater running efficiently and effectively for years to come.

Posted on Leave a comment

Maximize Infrared Heater Efficiency With These Tips

enhance heater efficiency tips

Position your infrared heater at 5-6 feet above the ground for ideal heat distribution in the room, making certain it's centrally located for even coverage. Consider using multiple heaters in larger spaces. Regularly clean with a soft, dry cloth or vacuum to prevent airflow blockages, focusing on vents and grilles. Check and replace air filters every 3 to 6 months, especially in dusty environments, for energy efficiency. Inspect insulation for gaps and damage and confirm proper ventilation to avoid gas buildup. Set thermostat temperatures accurately and consider smart thermostats for energy-saving features. Remember, annual professional maintenance can identify and prevent issues for peak performance.

Proper Placement for Optimal Performance

optimal placement enhances performance

Position your infrared heater at a height of 5-6 feet above the ground level for ideal performance and efficient heat distribution. This angle positioning allows the infrared heat waves to cover a broader area, guaranteeing optimal warmth in your space.

When considering room size, it's vital to place the heater in a central location to evenly distribute heat. For smaller rooms, a single heater may suffice, while larger areas might benefit from multiple units strategically placed to maximize coverage.

To determine the best placement, consider the layout of the room and potential obstacles that could obstruct the heat flow. Avoid positioning the heater directly above furniture or near curtains that could block the infrared waves.

Additionally, make sure there's ample space around the heater for proper ventilation and safety measures.

Regular Dusting and Cleaning Schedule

Maintain the efficiency of your infrared heater by implementing a regular dusting and cleaning schedule to guarantee peak performance.

Dust accumulation on the heating elements can hinder the heater's ability to emit heat effectively, reducing its overall efficiency. To combat this, use a soft, dry cloth or a vacuum cleaner with a brush attachment to gently remove dust and debris from the surface of the heater.

Be sure to unplug the heater and let it cool down before cleaning to avoid any accidents.

For more stubborn dirt or residue, dampen the cloth slightly with water or a mild cleaning solution specifically designed for electronics. Avoid using harsh chemicals or abrasive materials that could damage the heater.

Pay close attention to vents and grilles where dust tends to build up, as blockages in these areas can impede airflow and reduce the heater's performance.

Check and Replace Air Filters

air filter maintenance reminder

To guarantee peak performance of your infrared heater, regularly check and replace air filters as part of your maintenance routine. Air filters play a vital role in making sure that your heater functions efficiently by trapping dust, debris, and other particles that can obstruct airflow.

There are different filter types available, including fiberglass, pleated, electrostatic, and HEPA filters. Fiberglass filters are cost-effective but need to be replaced more frequently, while HEPA filters provide high filtration but may lead to reduced airflow if not changed regularly.

Maintenance frequency for air filters varies depending on the type and usage of your infrared heater. As a general rule of thumb, it's recommended to inspect your filters monthly and replace them every 3 to 6 months.

However, if you use your heater frequently or if you live in a dusty environment, more frequent checks and replacements may be necessary to optimize your heater's efficiency.

Checking and replacing air filters guarantees that your infrared heater operates at its best, consuming less energy and providing consistent warmth.

Inspect and Repair Insulation

Inspecting and repairing insulation is essential for ensuring ideal heat retention and energy efficiency in your infrared heater system.

Proper insulation materials play a vital role in preventing heat loss and maintaining a consistent temperature within your space. When inspecting your insulation, look for any signs of wear, damage, or gaps that could lead to thermal bridging, where heat escapes through unprotected areas. Common insulation materials include fiberglass, foam board, and reflective barriers, each with its own benefits in reducing heat transfer.

To repair insulation, start by sealing any gaps or cracks with appropriate insulation materials to prevent heat leakage. Additionally, consider upgrading to higher R-value insulation for better thermal performance.

Properly installed and well-maintained insulation will help optimize the efficiency of your infrared heater system by minimizing heat loss and reducing energy consumption. By addressing insulation issues promptly, you can enjoy a more comfortable and cost-effective heating experience.

Ensure Proper Ventilation

maintain adequate airflow safety

Proper ventilation is essential for maximizing the efficiency of your infrared heater system.

When using an infrared heater, ensuring adequate airflow dynamics is vital to maintain peak performance. Poor ventilation can lead to the buildup of harmful gas emissions like carbon monoxide, posing serious health risks. To prevent this, make sure the area where the heater is placed has proper ventilation, allowing fresh air to circulate and carry away any combustion byproducts.

To enhance ventilation, consider installing vents or fans to facilitate air movement. Positioning the heater near a window or doorway can also help promote better airflow.

Regularly check for obstructions such as furniture or curtains blocking airflow around the heater. Maintaining clear pathways for air circulation will improve the heater's efficiency and prevent the accumulation of gases indoors.

Monitor Thermostat Settings

Regularly adjusting the thermostat settings on your infrared heater is essential for enhancing its efficiency and ensuring peak performance.

Smart thermostats offer advanced energy-saving features that can help optimize your heater's operation. These thermostats allow you to set precise temperatures and schedules, ensuring that your heater only runs when needed.

Smart thermostats can learn your heating preferences over time, automatically adjusting settings to maximize comfort while minimizing energy consumption. Some models even offer remote access through smartphone apps, allowing you to control your heater from anywhere.

By utilizing the energy-saving features of smart thermostats, you can reduce your heating costs and environmental impact. Setting lower temperatures when you're away or asleep and gradually increasing them when needed can make a significant difference in your overall energy usage.

Monitoring and adjusting your infrared heater's thermostat settings regularly, especially with the help of smart thermostats, can lead to substantial energy savings and improved efficiency in your heating system.

Schedule Professional Maintenance Annually

annual professional maintenance schedule

How can you guarantee peak performance and longevity for your infrared heater?

Scheduling annual professional maintenance is essential in confirming the energy efficiency of your heating system and minimizing heating costs.

Professional technicians can inspect your infrared heater thoroughly, identifying any potential issues before they escalate, thereby optimizing its performance.

During annual maintenance, technicians will clean the heating elements, confirming they operate efficiently and effectively.

They'll also inspect the wiring and connections, tighten any loose components, and lubricate moving parts to prevent unnecessary wear and tear.

Additionally, professionals will check the thermostat calibration to verify accurate temperature control, which can contribute to energy efficiency and reduced heating costs over time.

Conclusion

To maximize your infrared heater efficiency, follow these tips:

Place it in an ideal location.

Clean it regularly.

Change air filters as needed.

Inspect and repair insulation.

Guarantee proper ventilation.

Monitor thermostat settings.

Schedule annual professional maintenance.

By taking these steps, you can guarantee that your infrared heater is running at its peak performance and providing you with the most efficient heating possible.

Posted on Leave a comment

Top Tips for Successful Heater Installation Quiz

heater installation success tips

Master your heater installation with top tips: maintain safe distance from flammables, test alarms, use soapy water for gas leaks, follow ventilation guidelines. Evaluate vent types, guarantee airflow, clean vents, match circuit load. Consider room layout, size, clearance, and thermostat-heater combo. Calculate heat load, review energy ratings, match wattage. Connect remote correctly, set temperature and timer, test regularly. Replace filters, calibrate thermostat, inspect components for wear. By implementing these tips, you'll guarantee a successful heater installation experience.

Safety Precautions

essential safety measures implemented

Before beginning the heater installation process, always remember to carefully review and implement the essential safety precautions to guarantee a secure and successful installation.

When dealing with heaters, fire safety is paramount. Confirm that the heater is placed a safe distance away from any flammable materials such as curtains or papers. Additionally, test smoke alarms and carbon monoxide detectors to verify they're in working order before starting the installation. Carbon monoxide is a colorless, odorless gas that can be produced by faulty heaters, posing a serious health risk. Installing a carbon monoxide detector near the heater is vital to alert you in case of any leaks.

When handling gas heaters, always check for gas leaks by using a soapy water solution on all connections. If bubbles form, there's a leak, and immediate action is required.

Moreover, make sure to follow manufacturer guidelines for proper ventilation to prevent the build-up of carbon monoxide. By adhering to these safety precautions, you can guarantee a safe and efficient heater installation process.

Proper Ventilation Requirements

To guarantee the safe operation of your heater, it's imperative to carefully adhere to the proper ventilation requirements as specified by the manufacturer. Proper ventilation is vital for the efficient and safe functioning of your heater.

There are two main ventilation types to evaluate: direct vent and natural vent. Direct vent systems draw combustion air from the outside and vent exhaust gases directly outside, guaranteeing a continuous flow of fresh air and proper combustion. On the other hand, natural vent systems rely on indoor air for combustion and utilize a flue to exhaust gases outside.

When installing your heater, verify that the airflow management is optimized. Adequate airflow is essential for combustion and heat distribution. Make sure that there are no obstructions blocking the vents or flue pipes, as this can lead to improper ventilation and potential safety hazards.

Regularly inspect and clean the vents to prevent dust or debris buildup that could impede airflow. By following these ventilation requirements diligently, you can guarantee the safe and effective operation of your heater.

Electrical Connections Check

verify electrical connections integrity

Make certain that all electrical connections for your heater are securely tightened to prevent any potential safety risks during operation.

When checking the electrical connections, verify they adhere to wiring standards to guarantee safe and efficient operation.

Inspect the wiring for any signs of wear or damage, replacing any compromised wires promptly.

It's essential to verify that the circuit load matches the heater's electrical requirements to prevent overloading and potential hazards.

Double-check that all wires are correctly connected to their respective terminals, following the manufacturer's guidelines meticulously.

Utilize appropriate tools to tighten the connections securely without causing any damage.

Before proceeding with the installation, conduct a thorough examination of the electrical connections to confirm they're in prime condition.

Placement Considerations

Consider the layout of the room and the proximity to existing electrical outlets when determining the ideal placement for your heater.

To identify the best location, start by evaluating the size of the room. For smaller areas, wall-mounted heaters work efficiently, providing localized heat without occupying valuable floor space. In contrast, rooms with more square footage may benefit from a centrally positioned heater to distribute warmth evenly.

When choosing the placement, confirm there's adequate clearance around the heater to prevent overheating and maintain safety. Avoid placing the heater near curtains, furniture, or other flammable materials. Additionally, be mindful of any obstructions that could block the heat flow, such as large pieces of furniture or closed doors.

For rooms with limited space, consider heaters with built-in thermostats and timers for efficient heating control.

Heat Output Assessment

thermal energy evaluation report

Evaluate the heat output of your heater by observing its wattage and coverage area to determine its effectiveness in warming the intended space. The heat load, which is the amount of heating required for a specific area, is a vital factor in choosing the right heater.

Calculating the heat load involves considering factors such as room size, insulation, and desired temperature rise.

Energy efficiency is another important aspect to review when analyzing heat output. Look for heaters with high energy efficiency ratings, as they can provide effective heating while consuming less electricity. This not only helps in reducing energy costs but also minimizes environmental impact.

To guarantee ideal heat output, match the heater's wattage to the size of the room. A heater with insufficient wattage may struggle to heat the space adequately, while an overly powerful heater can lead to energy wastage.

Remote Control Programming

To efficiently program the remote control for your heater, familiarize yourself with the manufacturer's instructions for setting up and adjusting the settings.

Remote programming allows you to control your heater conveniently from a distance. Begin by confirming that the remote control is paired correctly with the heater. Follow the step-by-step guide provided by the manufacturer to synchronize the remote with the heater.

When programming the remote control, make certain to set the desired temperature, mode, and timer settings accurately.

Troubleshooting techniques for remote control programming may include checking the batteries, confirming the signal strength, and verifying that there are no obstructions between the remote and the heater. If you encounter any issues during programming, refer to the troubleshooting section in the manual or contact customer support for assistance.

Regularly test the remote control functions to guarantee smooth operation. Proper programming of the remote control enhances the overall user experience and convenience of using your heater.

Regular Maintenance Checks

scheduled equipment inspections necessary

Perform regular maintenance checks on your heater to guarantee peak performance and longevity.

Start by verifying your filter is replaced regularly. A clogged filter can restrict airflow, reducing efficiency and potentially causing damage to your unit. Check your filter monthly and replace it every 1-3 months, depending on usage and manufacturer recommendations.

Additionally, thermostat calibration is vital for accurate temperature control. A misaligned thermostat can lead to inconsistent heating and increased energy consumption. To calibrate your thermostat, compare its reading to a separate thermometer placed nearby. If there's a discrepancy, follow your unit's manual to adjust the calibration settings accordingly.

During maintenance checks, also inspect for any signs of wear or damage in the heating system components. Look for loose connections, unusual noises, or abnormal odors. Address any issues promptly to prevent further damage and guarantee your heater operates efficiently.

Conclusion

In summary, following these top tips for successful heater installation will guarantee a safe and efficient heating system for your home.

Remember to always prioritize safety precautions, check proper ventilation requirements, assess heat output, and regularly maintain your heater.

By taking these steps, you can enjoy a comfortable and warm environment while minimizing the risk of potential hazards.

Stay informed and proactive when it comes to installing and maintaining your heater.

Posted on Leave a comment

Expert Troubleshooting Guide for Infrared Heater Installation

infrared heater installation troubleshooting guide

Assure a successful infrared heater installation by diagnosing common issues. Check wiring connections to prevent power supply problems; confirm the heater's circuit load matches the requirements. Mount the heater 6 to 8 feet high with 3 feet wall clearance for safety. Improve heating efficiency by addressing insulation problems and matching heater size to the area. Troubleshoot remote control malfunctions by replacing batteries and adjusting interference. Optimize heat distribution through airflow adjustments and heat mapping. Prevent overheating with regular maintenance, assuring proper temperature settings and unobstructed vents. This guide covers key troubleshooting aspects for a seamless heater installation process.

Power Supply Issues

electrical supply disruptions identified

Are you experiencing frequent power supply issues when trying to install your infrared heater? One common reason for this problem could be faulty wiring connections. Make sure that all the wiring connections are secure and properly connected. Loose connections can lead to voltage drops, resulting in your heater not receiving adequate power to function correctly.

Another factor to take into account is the circuit load. Your infrared heater might be drawing more power than the circuit can handle. Check the electrical specifications of your heater and compare them to the circuit's capacity. If the heater's power requirements exceed the circuit's load capacity, it can cause power supply issues.

To troubleshoot power supply problems effectively, use a voltage tester to check the power outlets. Make sure that the voltage matches the requirements of your infrared heater. If the voltage is below or above the specified range, it can cause operational issues.

Incorrect Mounting Position

Positioning your infrared heater incorrectly can lead to inefficient heating and potential safety hazards.

When mounting your infrared heater, verify it's positioned at the recommended mounting height for peak performance. The mounting height typically ranges from 6 to 8 feet above the floor, allowing the heater to distribute heat evenly across the room.

Moreover, maintaining proper wall clearance is essential to prevent overheating and potential fire risks. Make sure there's sufficient space between the heater and any combustible materials.

The recommended wall clearance is usually around 3 feet on all sides of the heater. This clearance allows for proper airflow and guarantees that the heater operates safely and efficiently.

Poor Heating Performance

inefficient heat distribution issues

To enhance the heating efficiency of your infrared heater, confirm that it's installed at the recommended mounting height and with adequate wall clearance to avoid poor heating performance.

Poor heating performance can also be attributed to insulation problems within the room where the heater is being used. If the room lacks proper insulation, the heat produced by the infrared heater may dissipate quickly, leading to inefficiency.

Additionally, verify that the size of the heater matches the area you intend to heat. An infrared heater that's too small for the space will struggle to provide sufficient warmth, while one that's too large may consume excess energy without effectively heating the room.

Checking for these factors can greatly improve the performance of your infrared heater, confirming that you receive ideal heating comfort while maximizing energy efficiency.

If poor heating performance persists despite addressing these issues, it may be necessary to consult with a professional to assess any underlying problems.

Remote Control Malfunction

Check the batteries in the remote control if you're experiencing issues with remote control malfunction on your infrared heater.

Remote control malfunctions can often be traced back to low or dead batteries. Replace the batteries with fresh ones to guarantee proper functioning.

If replacing the batteries doesn't resolve the issue, consider the possibility of remote interference.

Electronic devices or other infrared heaters in close proximity can sometimes interfere with the signal from the remote control to the heater. Try moving the remote control closer to the heater or confirming that there are no obstructions blocking the signal path.

In some cases, a simple reset of the remote control and the heater can also help troubleshoot remote control malfunctions.

Follow the manufacturer's instructions on how to reset both devices properly.

Uneven Heating Distribution

inconsistent temperature variation

If you notice uneven heating distribution in your space when using an infrared heater, adjusting the airflow direction may help optimize heat distribution. Ensuring proper airflow circulation is essential for achieving uniform warmth throughout the room. To address this issue effectively, start by conducting a heat mapping analysis of the area to identify cold spots or areas with inadequate heat coverage.

Additionally, performing an insulation assessment can help determine if heat loss is occurring through poorly insulated walls or windows, causing uneven heating. Properly insulating these areas can greatly improve the overall heat distribution in the room.

Furthermore, positioning the infrared heater strategically can also enhance heat distribution. Placing the heater in a central location or adjusting its angle towards areas that require more warmth can help balance out the temperature throughout the space.

Overheating Concerns

Address potential overheating concerns by monitoring the infrared heater's temperature settings regularly to prevent excessive heat output.

To guarantee safety and maximum performance, follow specific installation guidelines. Place the heater at least three feet away from any combustible materials such as curtains or furniture. Be sure to plug the heater directly into a wall outlet, avoiding the use of extension cords, which can overheat and pose a fire hazard.

Additionally, check that the heater's vents are unobstructed to allow proper airflow and prevent overheating. Avoid placing objects on top of the heater or blocking the airflow with curtains or furniture.

If you notice the heater emitting an unusual smell or if it becomes too hot to touch, immediately turn it off and unplug it. These could be signs of overheating and require prompt attention to prevent any potential fire hazards.

Maintenance and Cleaning Tips

effective maintenance and cleaning

Regular maintenance and cleaning of your infrared heater are essential to guarantee peak performance and longevity.

One important aspect of maintenance is regular filter replacement. Filters can become clogged with dust and debris over time, hindering the heater's efficiency. It's recommended to check and replace the filters according to the manufacturer's guidelines, typically every few months.

In addition to filter replacement, performing routine safety checks is critical. Inspect the heater for any signs of wear and tear, such as frayed wires or loose connections. Verify that the heater is placed on a stable surface and that there are no flammable materials nearby.

Dust and debris buildup can also pose a safety hazard, so it's important to clean the heater regularly using a soft brush or cloth.

Conclusion

In summary, troubleshooting infrared heater installation issues requires attention to detail and a methodical approach.

By addressing common problems such as power supply issues, heating performance, remote control malfunction, uneven heating distribution, and overheating concerns, you can guarantee peak performance and efficiency.

Regular maintenance and cleaning will also help extend the lifespan of your infrared heater.

Remember to consult the manufacturer's guidelines for specific troubleshooting tips and instructions.

Posted on Leave a comment

Top Troubleshooting Tips for Heater Installation Success

heater installation troubleshooting tips

For a successful heater installation, carefully choose the right location by guaranteeing proper clearance, matching room size, and identifying airflow obstacles. Confirm the power supply compatibility, verify circuit requirements, and secure mounting with appropriate hardware for stability. Follow ventilation guidelines, check for blockages, and maintain air filters. Test the thermostat for accuracy and troubleshoot sensors if needed. Inspect wiring for wear and connection security, addressing any issues promptly. If experiencing uneven heating, check airflow, consider insulation, and rearrange objects for better distribution. These vital steps guarantee a smooth heater installation process for peak performance.

Proper Location Selection

optimal site choice strategy

When selecting a location for your heater installation, confirm adequate clearance around the unit for proper ventilation and maintenance access. Ideal placement is significant to guarantee efficient heating in the designated space.

Consider the size of the room where the heater will be installed. A heater that's too small for the space will struggle to reach the desired temperature, while a heater that's too large may lead to overheating and discomfort.

To determine the ideal placement, measure the dimensions of the room. Calculate the square footage to match it with the heater's heating capacity. Additionally, take note of any obstacles that could obstruct airflow, such as furniture or curtains. The goal is to allow unrestricted air circulation around the heater for even heat distribution.

Keep in mind that heaters require proper ventilation to function effectively and safely. Choose a location with access to fresh air intake and an exhaust vent to prevent the buildup of carbon monoxide.

Checking Power Supply

Ascertain the power source for the heater installation is compatible and meets the required specifications before proceeding with the setup.

Begin by checking the power capacity of the heater and confirming it aligns with the power supply available. Verify that the circuit compatibility matches the electrical requirements of the heater to prevent any potential issues.

To check the power capacity, refer to the heater's manual or specifications sheet for the wattage or voltage requirements. Inspect the power supply in the installation area to confirm it can support the heater's needs without overloading the circuit.

If necessary, consult with an electrician to assess the circuit compatibility and make any adjustments needed to meet the heater's power requirements.

Failure to verify the power capacity and circuit compatibility can result in malfunctions, damage to the heater, or even pose a safety hazard.

Taking the time to confirm these elements align will contribute to a successful and safe heater installation.

Ensuring Secure Mounting

secure mounting assurance methods

To guarantee a stable and safe installation, securely mounting the heater is vital for best performance and longevity. Properly securing the heater to the wall requires the use of appropriate mounting hardware. Before beginning the installation process, verify that the wall stability can support the weight of the heater. Use a stud finder to locate the wall studs, as mounting the heater to studs provides the most secure attachment.

When selecting mounting hardware, opt for screws or bolts that are strong enough to hold the weight of the heater securely. It's essential to follow the manufacturer's guidelines regarding the type and size of hardware to use for mounting. Make sure to tighten the screws or bolts firmly to prevent the heater from shifting or becoming loose over time.

Additionally, consider the material of the wall when choosing the mounting hardware. Different wall materials may require specific anchors or screws for a secure attachment. By verifying the heater is securely mounted, you can prevent accidents and guarantee the efficient operation of the unit.

Verifying Proper Ventilation

Guarantee proper ventilation for your heater installation by following specific guidelines to enhance performance and safety. Adequate ventilation is vital to guarantee efficient operation and maintain good indoor air quality. When installing a heater, it's essential to adhere to ventilation requirements outlined by the manufacturer. Improper ventilation can lead to a build-up of harmful gases like carbon monoxide, posing serious health risks.

Verify that the heater is installed in a well-ventilated area with sufficient airflow to prevent the accumulation of combustion byproducts. Check the manufacturer's specifications for the recommended clearance distances around the heater to allow for proper air circulation. Additionally, inspect the venting system for any blockages or leaks that could impede the flow of exhaust gases.

Regular maintenance of the ventilation system is also important to uphold air quality standards. Clean or replace air filters as recommended to prevent dust and debris buildup that can affect the heater's efficiency and air quality.

Testing Thermostat Functionality

thermostat functionality testing procedure

Guarantee proper functionality of the thermostat by conducting thorough testing procedures before completing the heater installation process.

Begin by calibrating the thermostat to guarantee accurate temperature readings. Follow the manufacturer's instructions for calibration, usually involving adjusting the temperature settings to match a separate thermometer. Once calibrated, test the thermostat by setting it to different temperatures and verifying that the heater responds accordingly.

If the thermostat doesn't seem to be functioning correctly, troubleshoot the sensors. Dust and debris can accumulate over time, affecting sensor accuracy. Use a clean, soft cloth to gently wipe the sensors clean. Additionally, check for any obstructions that may be blocking the sensors' ability to detect temperature changes accurately.

After calibrating and troubleshooting the sensors, retest the thermostat to confirm proper functionality. Guarantee that the temperature settings are accurate and that the heater responds promptly to adjustments.

Inspecting Wiring Connections

Check each wiring connection carefully for any signs of wear, looseness, or damage before proceeding with the heater installation. Confirming wiring safety is vital for the proper functioning of your heater.

Start by examining each wire for any visible wear on the insulation or exposed metal. Look out for loose connections that could lead to electrical hazards or heating inefficiencies. It's important to maintain connection integrity to prevent potential malfunctions down the line.

Use a multimeter to test the continuity of the wires and confirm that each connection is secure. Tighten any loose connections and replace any damaged wires to guarantee a safe and effective heater installation.

Make sure all wires are correctly matched and connected according to the manufacturer's instructions to avoid any short circuits or overheating risks. Prioritize wiring safety throughout the installation process to promote the longevity and efficiency of your heating system.

Addressing Uneven Heating

balancing temperature distribution issues

Inspect the airflow and distribution patterns in your heating system to identify and address any sources of uneven heating.

Start by checking for any blockages or obstructions in the vents or ductwork that could be impeding the proper flow of warm air. Ascertain that all vents are open and unobstructed to allow for efficient heat distribution throughout your space.

Next, conduct an insulation assessment in your home to determine if there are any areas where heat may be escaping or where cold air is infiltrating. Poor insulation can lead to temperature variations in different areas of your home, causing uneven heating. Consider adding insulation to areas such as attics, walls, and floors to improve heat retention and distribution.

Additionally, check the positioning of your furniture and other objects in the room. Large items blocking vents or radiators can disrupt the flow of warm air, leading to uneven heating. By rearranging furniture and ascertaining that air vents are unobstructed, you can help promote better heat distribution and achieve more consistent temperatures throughout your home.

Conclusion

In summary, following these top troubleshooting tips for heater installation will guarantee a successful and efficient heating system in your space.

By carefully selecting the location, checking power supply, securing mounting, confirming proper ventilation, testing thermostat functionality, inspecting wiring connections, and addressing any issues with uneven heating, you can assure a comfortable and safe environment for your home or workplace.

Stay proactive and thorough in your heater installation process for ideal results.

Posted on Leave a comment

Why Is My Infrared Heater Installation Failing?

infrared heater installation issues

If your infrared heater installation is failing, it might be due to incorrect wiring connections. Verify your wiring matches the heater's requirements to avoid issues. Check for proper power supply; use a multimeter to confirm voltage output meets specs. Position your heater correctly for even distribution and adequate airflow. Inspect components for damage or faults affecting performance. Ascertain your mounting height and angle are suitable. Regular maintenance and cleaning prevent breakdowns. Check compatibility with thermostat systems. Understanding these common issues can help you troubleshoot and resolve your infrared heater installation problems effectively.

Incorrect Wiring Connections

faulty electrical installations identified

Make certain that the wiring connections on your infrared heater are correctly aligned with the corresponding terminals to prevent potential installation issues.

When dealing with wiring connections, it's imperative to take into account both the wiring gauge and connection types. The wiring gauge refers to the thickness of the wire used, with lower gauge numbers indicating thicker wires capable of handling higher currents. Always verify that the wiring gauge matches the requirements of your infrared heater to prevent overheating and potential hazards.

Moreover, understanding the different connection types is essential for a successful installation. Common connection types include screw terminals, spade terminals, and wire nuts. It's important to use the appropriate connection type specified by the manufacturer to guarantee a secure and reliable connection.

Improper connections can lead to erratic heater behavior, malfunctions, or even electrical hazards. By paying close attention to the wiring gauge and using the correct connection types, you can avoid potential issues with your infrared heater installation.

Insufficient Power Supply

Make certain that your infrared heater is receiving an adequate power supply to avoid operational issues and performance deficiencies.

When dealing with insufficient power supply, the first step is to conduct a thorough power source troubleshooting process. Begin by checking the power outlet to ascertain it's functioning correctly and providing the required voltage. Use a multimeter to assess the voltage output accurately. If the voltage is below the manufacturer's specifications, it could lead to the infrared heater not operating effectively.

Additionally, examine the circuit breaker connected to the heater to verify it hasn't tripped or blown. Reset the breaker if necessary and monitor it for any reoccurrence.

In some cases, inadequate power supply can be due to overloaded circuits or shared circuits with high-power-consuming appliances. Consider redistributing the load to guarantee the infrared heater receives the power it needs to function efficiently.

Placement and Ventilation Issues

ventilation placement challenges addressed

Guaranteeing proper placement and adequate ventilation are vital factors to take into account when installing an infrared heater to enhance its performance and prevent potential issues.

Proper placement involves positioning the heater in a location where it can evenly distribute heat throughout the intended space. Placing the heater too close to walls or furniture can obstruct heat distribution, leading to uneven heating and reduced efficiency. To improve heat distribution, verify that the heater is mounted at an appropriate height and angle to cover the desired area effectively.

In addition to placement, effective airflow management is important for the ideal operation of an infrared heater. Poor ventilation can result in overheating, reduced performance, and potential safety hazards. Make certain there's sufficient clearance around the heater to allow for proper air circulation.

Clear any obstructions that could impede airflow, such as curtains or furniture. Regularly clean the heater and its surroundings to prevent dust buildup, which can hinder heat emission and airflow.

Faulty or Damaged Components

To guarantee the proper functioning of your infrared heater, it's vital to inspect for any faulty or damaged components that could impact its performance. One common issue is poor component quality. When components like heating elements, wiring, or sensors are subpar, they can lead to malfunctions or even safety hazards. Ascertain that all parts meet quality standards and are compatible with your specific heater model.

Another aspect to take into account is adherence to installation guidelines. Even the highest quality components can fail if not installed correctly. For instance, improper wiring connections can cause the heater to short circuit. Make sure to follow the manufacturer's instructions meticulously during the installation process.

Regularly checking for damaged components is imperative for the longevity of your infrared heater. Conduct routine inspections to look for signs of wear and tear, corrosion, or loose connections.

Improper Mounting or Positioning

incorrect installation or placement

Check the positioning and mounting of your infrared heater to avoid potential performance issues and safety hazards.

Improper mounting height or positioning angle can lead to inefficient heating and even potential safety risks. When installing your infrared heater, verify that the mounting height is appropriate for the size of the space you intend to heat.

Mounting the heater too high can result in heat dispersion that's too widespread, while mounting it too low may lead to localized heating.

Additionally, consider the positioning angle of the heater. Aiming the heater too high or too low can impact the distribution of heat in the room.

To achieve maximum heating efficiency, position the heater at an angle that allows the heat to spread evenly throughout the space.

Inadequate Maintenance and Cleaning

Inspecting your infrared heater regularly for any signs of dust buildup or wear is crucial to maintaining its efficiency and prolonging its lifespan. Dust accumulation on the heater's components, especially on the reflective surfaces and heating elements, can greatly reduce its performance.

To address this, make certain you perform routine filter replacement to prevent dust from clogging the system and hindering heat distribution. Additionally, conduct safety inspections to check for any loose connections or signs of damage that may pose a risk.

Inadequate maintenance can lead to decreased heating efficiency and potential safety hazards. To avoid these issues, incorporate regular performance checks into your maintenance routine.

Monitor the heater's output temperature and heating patterns to make sure it's operating at peak levels. By staying proactive with maintenance and cleaning tasks, you can maximize the effectiveness of your infrared heater and enjoy a safe and comfortable environment.

Compatibility With Thermostat Systems

thermostat system compatibility check

How can you guarantee that your infrared heater is compatible with thermostat systems for ideal control and efficiency? Verifying thermostat compatibility is essential for seamless integration and efficient operation of your infrared heater.

When selecting an infrared heater, check for compatibility with various thermostat systems, especially considering smart thermostat integration for enhanced control and energy savings.

Smart thermostats offer advanced features like remote monitoring, scheduling, and energy usage tracking. To confirm compatibility, verify that your infrared heater supports the communication protocol required by your chosen smart thermostat. Common protocols include Wi-Fi, Zigbee, or Z-Wave.

Additionally, some infrared heaters come with built-in smart capabilities, allowing direct integration with popular smart thermostat brands.

Before purchasing an infrared heater, thoroughly review the product specifications to confirm compatibility with your existing thermostat system or the smart thermostat you plan to install.

Conclusion

Guarantee proper wiring connections, adequate power supply, correct placement and ventilation, and regular maintenance to prevent infrared heater installation failures.

Check for faulty components, guarantee proper mounting, and compatibility with thermostat systems.

By addressing these issues, you can troubleshoot and resolve any problems with your infrared heater installation, guaranteeing efficient and effective operation.

Posted on Leave a comment

Top 10 Tips for Infrared Heater Care

infrared heater maintenance tips

To guarantee your infrared heater functions at its best, start with regular maintenance and cleaning. Keep the filter clean to maintain airflow, and have a qualified technician inspect it periodically. Test safety features, position the heater for proper ventilation and even heat distribution, and monitor thermostat settings. Avoid obstructions, inspect wiring regularly, and enhance usage for energy efficiency. Remember to stay mindful of safety considerations and get professional inspections done to extend its lifespan. Following these tips will help you care for your infrared heater effectively and keep it running smoothly for years to come, securing a cozy and safe environment in your space.

Regular Cleaning

consistent maintenance routine

To maintain ideal performance and efficiency, clean your infrared heater regularly to prevent dust accumulation.

One important aspect of cleaning your infrared heater is filter maintenance. The filter in your infrared heater plays a significant role in trapping dust, dirt, and other particles to prevent them from entering the unit and affecting its functionality. Over time, these filters can become clogged with dust, hindering the heater's performance.

To guarantee peak airflow and heating capacity, it's recommended to clean or replace the filter at least every 3 months, or more frequently if you notice reduced heating output.

When cleaning the filter, first, verify the heater is turned off and unplugged. Carefully remove the filter according to the manufacturer's instructions. Depending on the type of filter, you can either vacuum it gently or wash it with mild soap and water.

Once cleaned, make certain the filter is completely dry before reinserting it into the heater. By maintaining clean filters, you can prevent dust accumulation, prolong the lifespan of your infrared heater, and enjoy efficient heating in your space.

Proper Ventilation

Guarantee that your infrared heater is positioned in an area with proper ventilation to enhance its performance and safety.

Adequate airflow management is vital for infrared heaters to function efficiently. Ascertain that the heater isn't obstructed by furniture, curtains, or any other objects that may impede the circulation of air around the unit. Proper ventilation helps prevent overheating and allows the heater to distribute warmth evenly throughout the room.

Maintaining humidity control is also imperative when it comes to proper ventilation for your infrared heater. High humidity levels can affect the performance of the heater and may lead to issues like condensation or corrosion.

Use a dehumidifier if necessary to keep the humidity at an ideal level for your heater to operate effectively.

Check for Leaks

monitor for information breaches

Guarantee that a thorough inspection for leaks is conducted regularly on your infrared heater to maintain its safety and efficiency.

Detecting leaks early is essential to prevent potential hazards and guarantee peak energy efficiency. Start by checking all connections and fittings for any signs of leakage. Use a soapy water solution to detect even the smallest leaks – bubbles will form where there's escaping gas.

Additionally, inspect the heater's gas valve and supply lines for any corrosion or damage that could lead to leaks. Remember to examine the heat exchanger for any cracks or holes that may allow gas to escape.

Proper leak detection not only enhances safety but also contributes to the heater's efficiency by preventing energy wastage. By staying vigilant and addressing leaks promptly, you can guarantee that your infrared heater operates effectively and safely for a long time.

Inspect Wiring

Inspect the wiring of your infrared heater regularly to guarantee peak performance and safety. The wiring in your heater plays a critical role in ensuring that electricity flows efficiently and safely to power the heating elements.

There are two main types of wiring commonly found in infrared heaters: stranded wire and solid wire. Stranded wire is more flexible and less prone to breaking from constant movement or vibration, making it a reliable choice for heaters. Solid wire, on the other hand, is more rigid and suitable for fixed installations where movement is minimal.

Safety concerns related to wiring include frayed or damaged insulation, loose connections, and overheating. Exposed wires can lead to electrical shorts and pose a fire hazard. Loose connections may cause intermittent heating or even complete failure of the heater. Overheating of wires can result in melting insulation or, in extreme cases, cause a fire.

Regularly inspecting the wiring for any signs of wear, securing loose connections, and ensuring proper insulation are essential steps in maintaining the safety and efficiency of your infrared heater.

Monitor Thermostat Settings

adjust temperature control settings

To guarantee peak performance and efficiency of your infrared heater, closely monitor the thermostat settings to maintain the desired temperature levels. Proper thermostat calibration is vital for confirming that your heater operates at its ideal level.

Check the accuracy of your thermostat by comparing it with a separate thermometer to verify that it's reading the room temperature correctly. If there are discrepancies, you may need to recalibrate the thermostat to improve its accuracy.

Monitoring your thermostat settings also plays an important role in maximizing energy efficiency. By setting your thermostat to the perfect temperature for your comfort, you can prevent energy wastage and reduce your heating costs.

Adjust the settings based on your heating needs throughout the day to avoid unnecessary energy consumption. Additionally, be mindful of any drafts or heat sources near the thermostat that could affect its readings and lead to inefficient operation.

Positioning Matters

Proper positioning of your infrared heater is vital for optimizing its performance and efficiency.

To guarantee the best heat distribution, place your heater in an area with good air circulation, avoiding obstructions that may block the infrared waves. Ideal locations for your infrared heater include near a wall for reflective warmth or in a corner to maximize heat dispersion.

Avoid placing the heater directly in front of furniture or curtains, as they can absorb the infrared heat. It's important to maintain a clear space around the heater, at least three feet away, to prevent overheating and guarantee safety.

Additionally, positioning the heater at a higher level can help distribute heat more evenly throughout the room.

Test Safety Features

evaluate protective mechanisms thoroughly

Guarantee that the safety features of your infrared heater are functioning correctly by conducting regular tests. Following safety guidelines is essential to confirm the proper operation of your heater.

Start by checking the tip-over switch, which automatically turns off the heater if it's knocked over. To test this feature, gently tip the heater to see if it powers down.

Additionally, examine the overheat protection feature by running the heater at its maximum temperature for a few hours. If the heater shuts off, the overheat protection is working as intended.

Conduct a visual inspection of the power cord and plug for any signs of wear or damage. Confirm that the plug fits securely into the outlet without any looseness.

Test the thermostat by adjusting the temperature setting and verifying that the heater responds accordingly.

Avoid Obstructions

Make certain that your infrared heater is placed in a location free of obstructions to maximize its performance and safety. Proper heat distribution is vital for efficient operation.

Confirm that there are no objects blocking the front or rear of the heater, as this can disrupt the airflow and hinder the unit's ability to distribute heat evenly. It's recommended to maintain a clearance of at least three feet around the heater to prevent any potential fire hazards. Additionally, avoid placing the heater near curtains, furniture, or other flammable materials.

To enhance safety precautions, never drape clothing or towels over the heater, as this could lead to overheating and pose a significant fire risk.

It's also essential to regularly inspect the area around the heater to verify there are no new obstructions that have inadvertently been placed in its vicinity.

Professional Inspection

thorough evaluation by experts

Regularly schedule a professional inspection of your infrared heater to confirm peak performance and safety.

Setting up a maintenance schedule with a qualified technician guarantees that your heater functions effectively and remains safe to use. Technicians with the appropriate qualifications will be able to conduct a thorough examination of your infrared heater, checking for any potential issues or worn-out components that may impact its efficiency or pose a safety hazard.

During the inspection, the technician will meticulously assess all components of the infrared heater, including the heating elements, thermostat, wiring, and ventilation system.

They'll also clean any dust or debris that may have accumulated, which can hinder the heater's performance.

Additionally, the technician will verify that the heater is properly installed and that there are no obstructions that could compromise its operation.

Stay Mindful of Usage

Make certain that you're mindful of how you use your infrared heater to optimize its performance and longevity. To guarantee energy efficiency, consider your usage patterns.

It's recommended to use your infrared heater in rooms that are frequently occupied to maximize its effectiveness. This not only helps in maintaining a comfortable environment but also reduces the strain on the heater, leading to lower energy consumption.

Additionally, be mindful of the duration for which you run the infrared heater. Avoid leaving it on for extended periods when not needed. Utilize the built-in timer function if available to regulate usage effectively.

By being conscious of when and how long you operate the heater, you can greatly impact its energy efficiency and overall lifespan.

Monitoring the usage patterns of your infrared heater allows you to make informed decisions that benefit both your comfort and energy bills. By following these guidelines, you can enjoy the warmth provided by your heater while guaranteeing it operates efficiently for years to come.

Conclusion

In summary, following these top 10 tips for infrared heater care will guarantee the safety and efficiency of your heating system.

By regularly cleaning, checking for leaks, and monitoring thermostat settings, you can prevent potential issues and extend the lifespan of your heater.

Remember to stay mindful of usage and seek professional inspections when needed to keep your infrared heater running smoothly for years to come.