Posted on Leave a comment

Top Troubleshooting Tips for Heater Installation Success

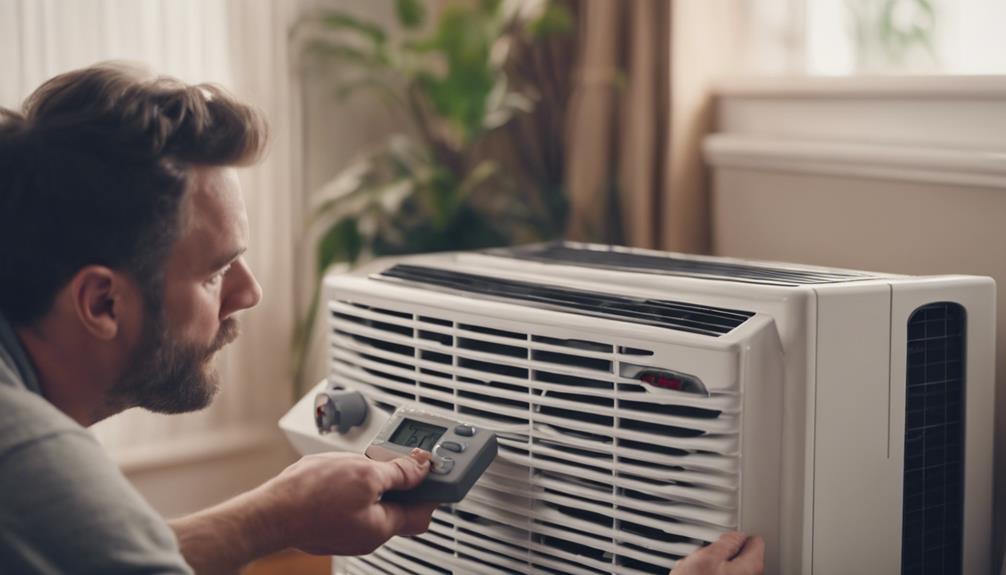
heater installation troubleshooting tips

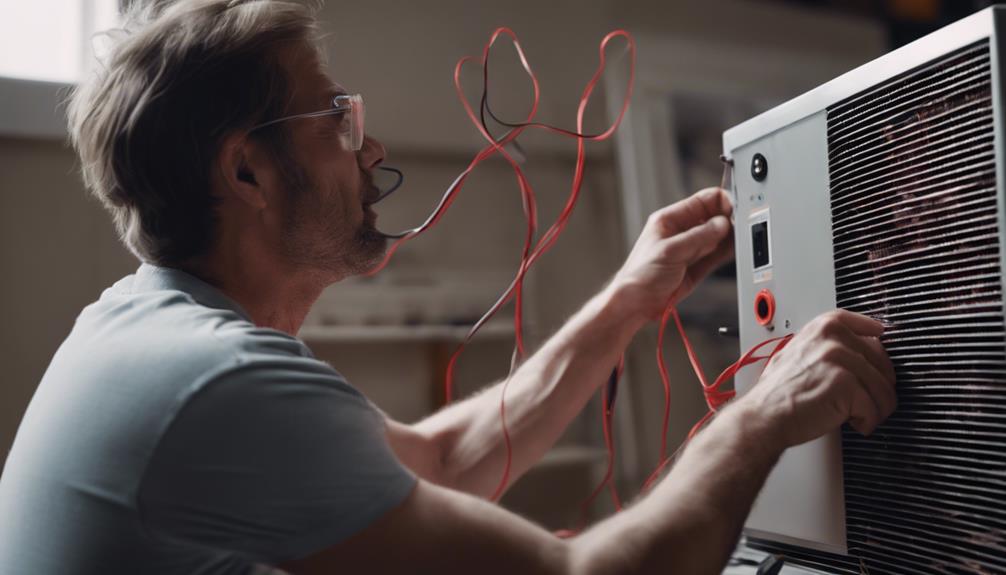
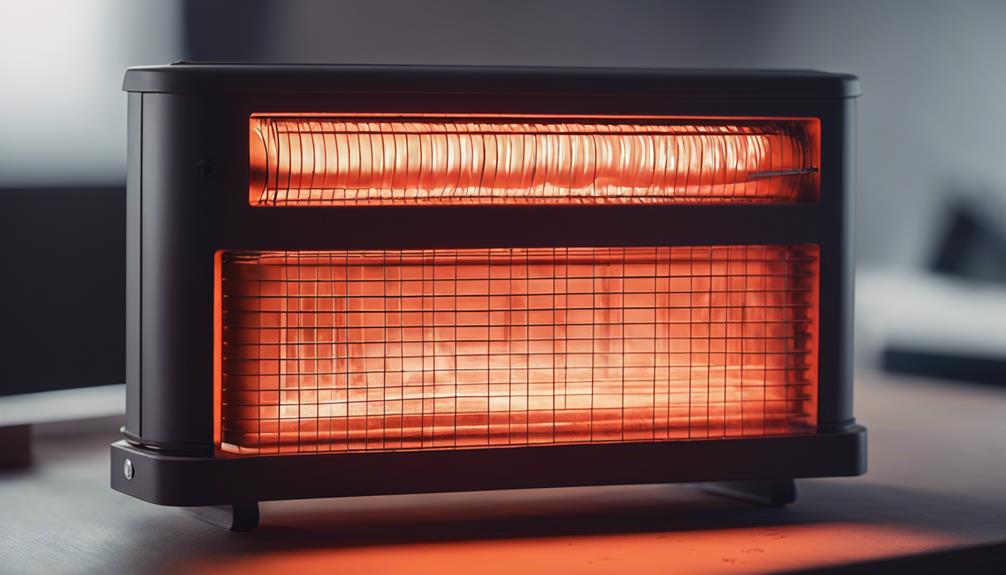
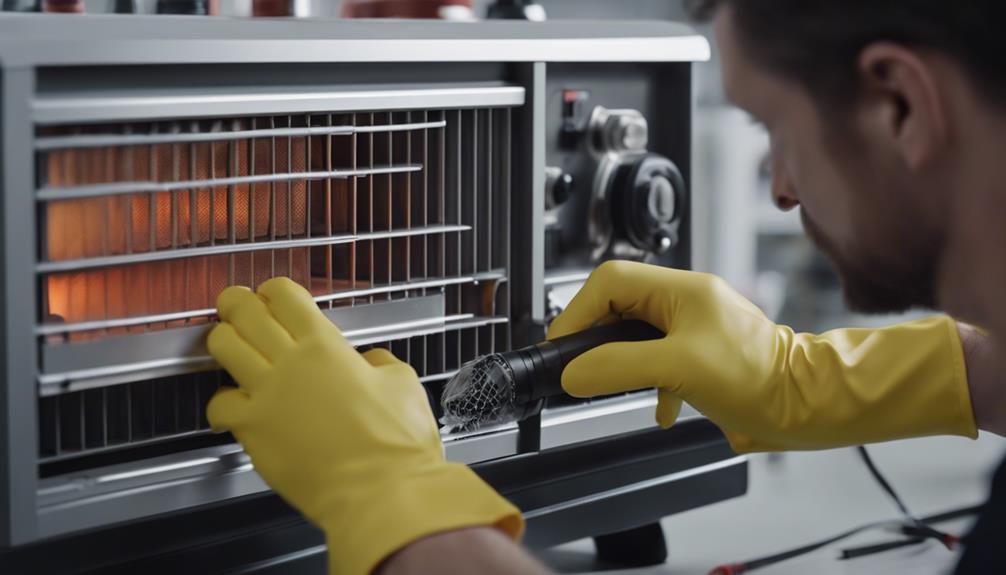
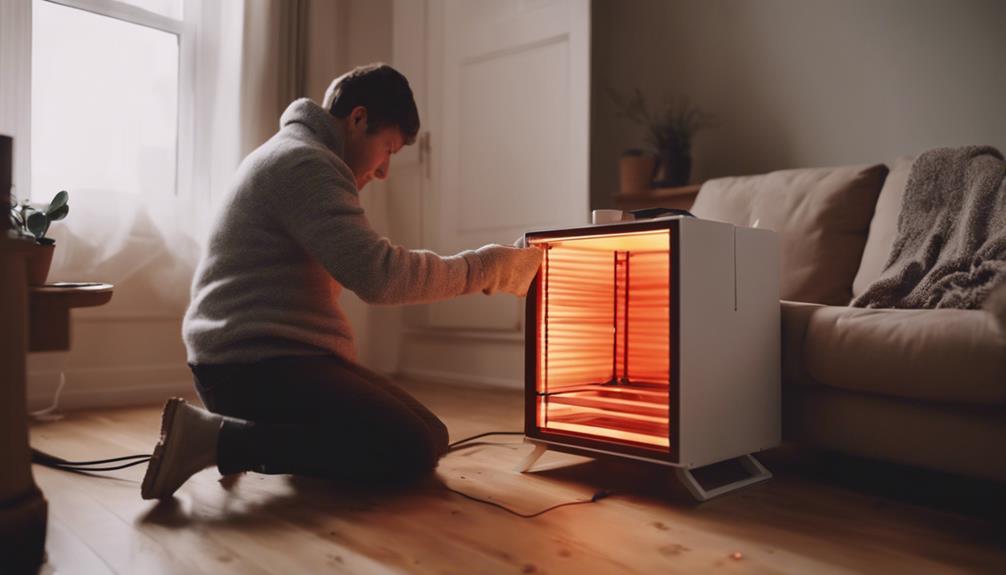
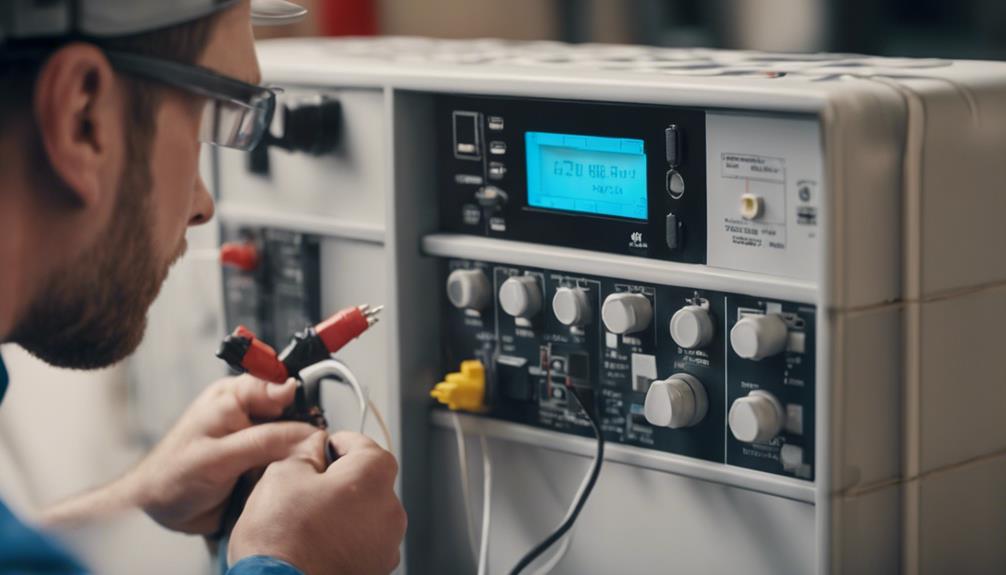
For a successful heater installation, carefully choose the right location by guaranteeing proper clearance, matching room size, and identifying airflow obstacles. Confirm the power supply compatibility, verify circuit requirements, and secure mounting with appropriate hardware for stability. Follow ventilation guidelines, check for blockages, and maintain air filters. Test the thermostat for accuracy and troubleshoot sensors if needed. Inspect wiring for wear and connection security, addressing any issues promptly. If experiencing uneven heating, check airflow, consider insulation, and rearrange objects for better distribution. These vital steps guarantee a smooth heater installation process for peak performance.

Proper Location Selection
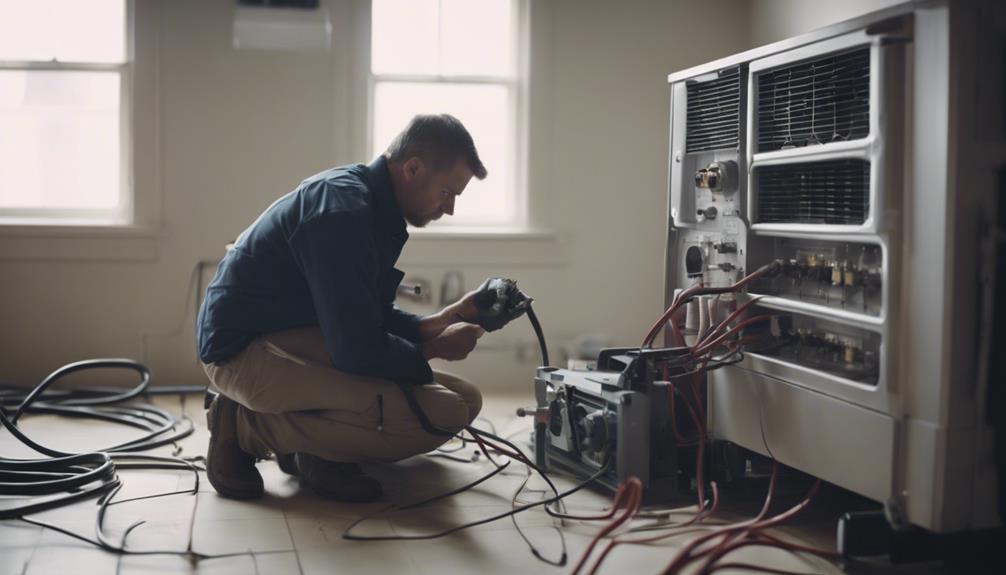
optimal site choice strategy

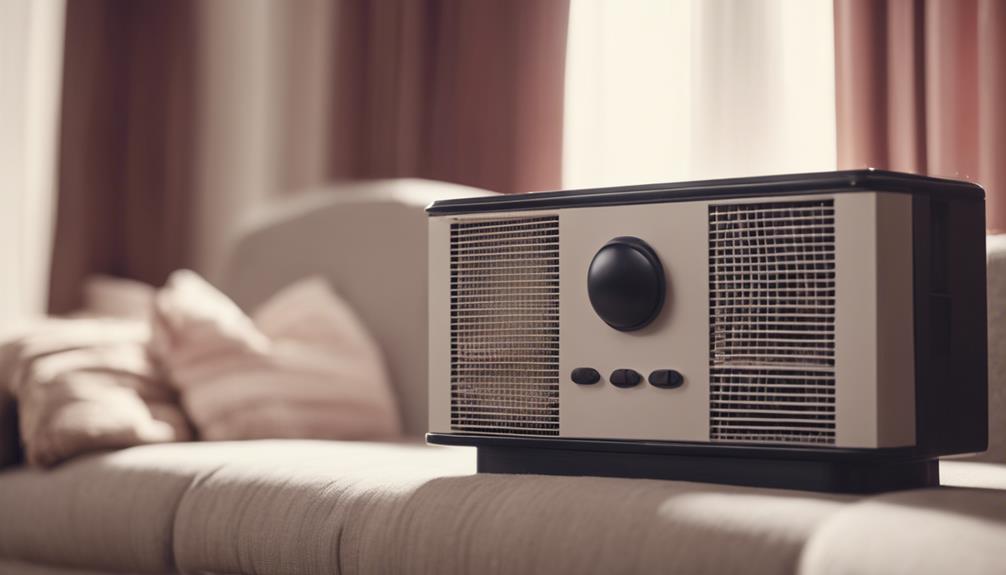
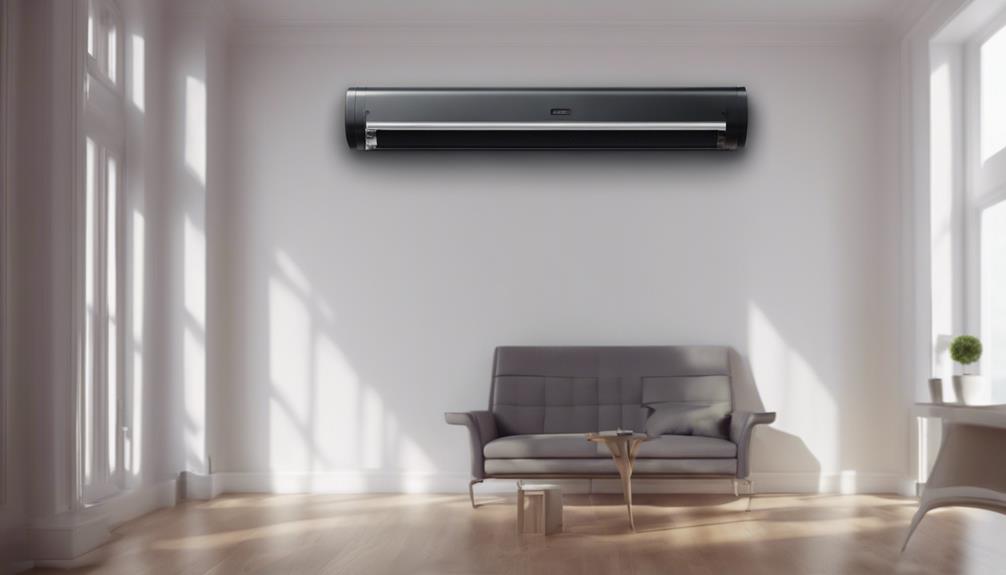
When selecting a location for your heater installation, confirm adequate clearance around the unit for proper ventilation and maintenance access. Ideal placement is significant to guarantee efficient heating in the designated space.

Consider the size of the room where the heater will be installed. A heater that's too small for the space will struggle to reach the desired temperature, while a heater that's too large may lead to overheating and discomfort.

To determine the ideal placement, measure the dimensions of the room. Calculate the square footage to match it with the heater's heating capacity. Additionally, take note of any obstacles that could obstruct airflow, such as furniture or curtains. The goal is to allow unrestricted air circulation around the heater for even heat distribution.

Keep in mind that heaters require proper ventilation to function effectively and safely. Choose a location with access to fresh air intake and an exhaust vent to prevent the buildup of carbon monoxide.

Checking Power Supply

Ascertain the power source for the heater installation is compatible and meets the required specifications before proceeding with the setup.

Begin by checking the power capacity of the heater and confirming it aligns with the power supply available. Verify that the circuit compatibility matches the electrical requirements of the heater to prevent any potential issues.

To check the power capacity, refer to the heater's manual or specifications sheet for the wattage or voltage requirements. Inspect the power supply in the installation area to confirm it can support the heater's needs without overloading the circuit.

If necessary, consult with an electrician to assess the circuit compatibility and make any adjustments needed to meet the heater's power requirements.

Failure to verify the power capacity and circuit compatibility can result in malfunctions, damage to the heater, or even pose a safety hazard.

Taking the time to confirm these elements align will contribute to a successful and safe heater installation.

Ensuring Secure Mounting
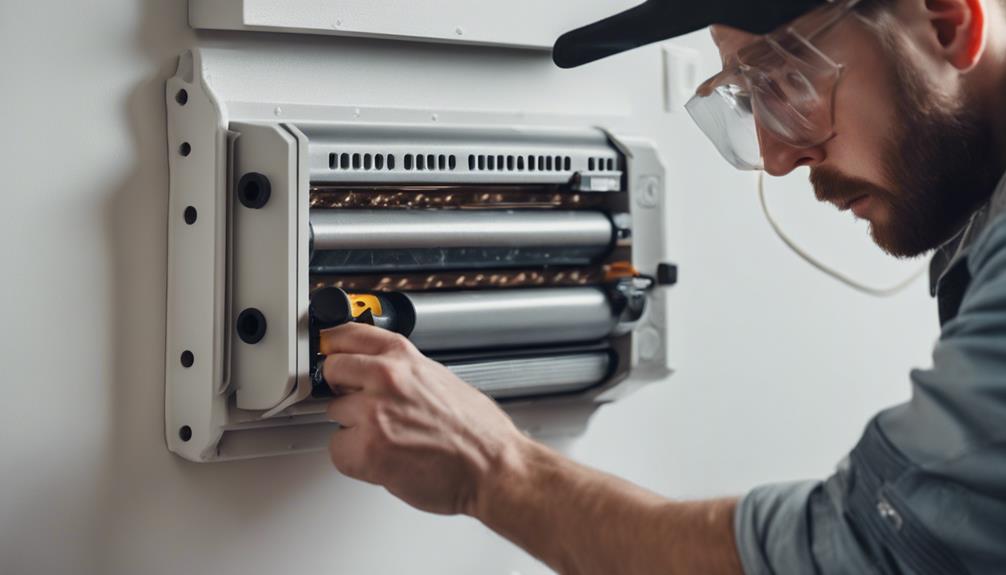
secure mounting assurance methods

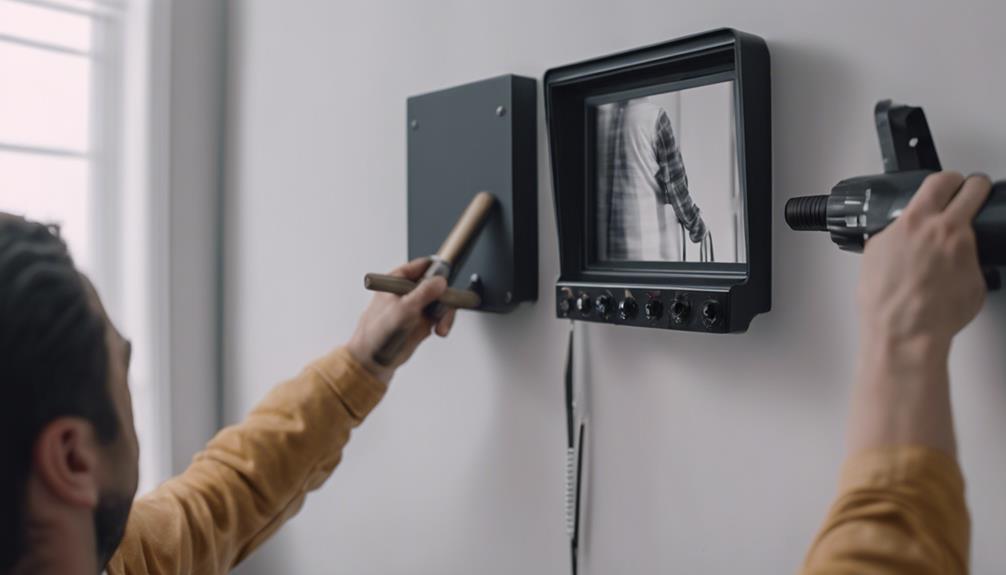
To guarantee a stable and safe installation, securely mounting the heater is vital for best performance and longevity. Properly securing the heater to the wall requires the use of appropriate mounting hardware. Before beginning the installation process, verify that the wall stability can support the weight of the heater. Use a stud finder to locate the wall studs, as mounting the heater to studs provides the most secure attachment.

When selecting mounting hardware, opt for screws or bolts that are strong enough to hold the weight of the heater securely. It's essential to follow the manufacturer's guidelines regarding the type and size of hardware to use for mounting. Make sure to tighten the screws or bolts firmly to prevent the heater from shifting or becoming loose over time.

Additionally, consider the material of the wall when choosing the mounting hardware. Different wall materials may require specific anchors or screws for a secure attachment. By verifying the heater is securely mounted, you can prevent accidents and guarantee the efficient operation of the unit.

Verifying Proper Ventilation

Guarantee proper ventilation for your heater installation by following specific guidelines to enhance performance and safety. Adequate ventilation is vital to guarantee efficient operation and maintain good indoor air quality. When installing a heater, it's essential to adhere to ventilation requirements outlined by the manufacturer. Improper ventilation can lead to a build-up of harmful gases like carbon monoxide, posing serious health risks.

Verify that the heater is installed in a well-ventilated area with sufficient airflow to prevent the accumulation of combustion byproducts. Check the manufacturer's specifications for the recommended clearance distances around the heater to allow for proper air circulation. Additionally, inspect the venting system for any blockages or leaks that could impede the flow of exhaust gases.

Regular maintenance of the ventilation system is also important to uphold air quality standards. Clean or replace air filters as recommended to prevent dust and debris buildup that can affect the heater's efficiency and air quality.

Testing Thermostat Functionality
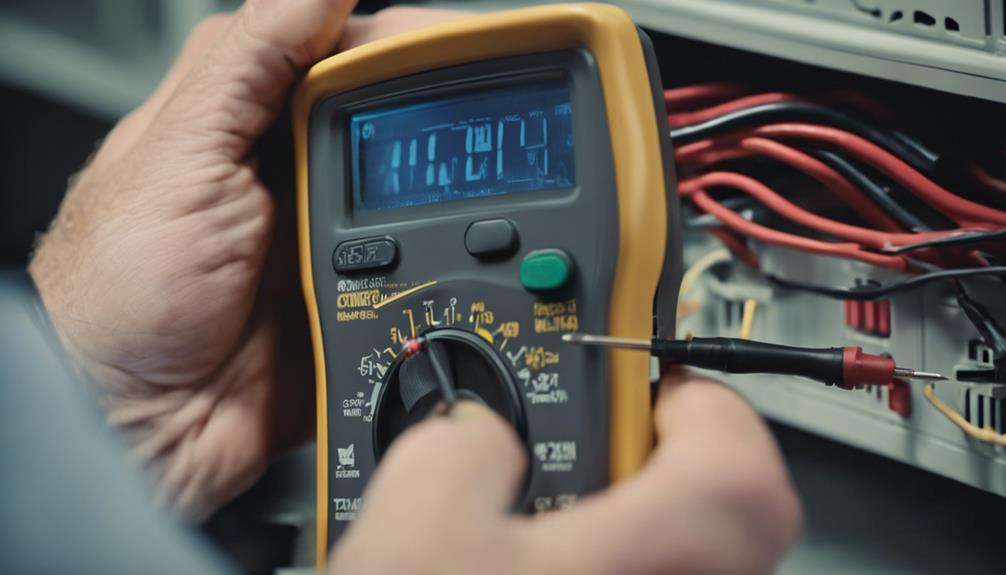
thermostat functionality testing procedure

Guarantee proper functionality of the thermostat by conducting thorough testing procedures before completing the heater installation process.

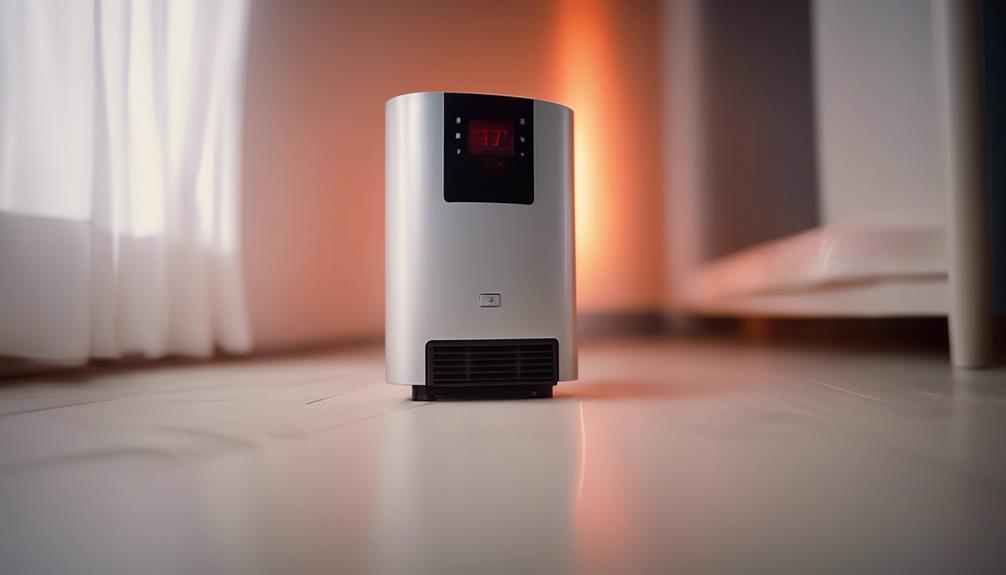
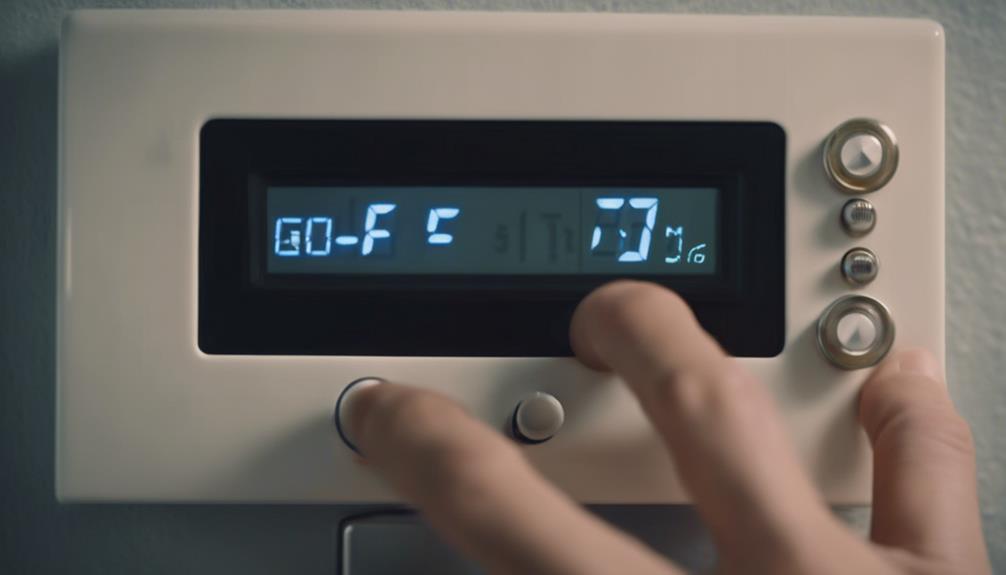
Begin by calibrating the thermostat to guarantee accurate temperature readings. Follow the manufacturer's instructions for calibration, usually involving adjusting the temperature settings to match a separate thermometer. Once calibrated, test the thermostat by setting it to different temperatures and verifying that the heater responds accordingly.

If the thermostat doesn't seem to be functioning correctly, troubleshoot the sensors. Dust and debris can accumulate over time, affecting sensor accuracy. Use a clean, soft cloth to gently wipe the sensors clean. Additionally, check for any obstructions that may be blocking the sensors' ability to detect temperature changes accurately.

After calibrating and troubleshooting the sensors, retest the thermostat to confirm proper functionality. Guarantee that the temperature settings are accurate and that the heater responds promptly to adjustments.

Inspecting Wiring Connections

Check each wiring connection carefully for any signs of wear, looseness, or damage before proceeding with the heater installation. Confirming wiring safety is vital for the proper functioning of your heater.

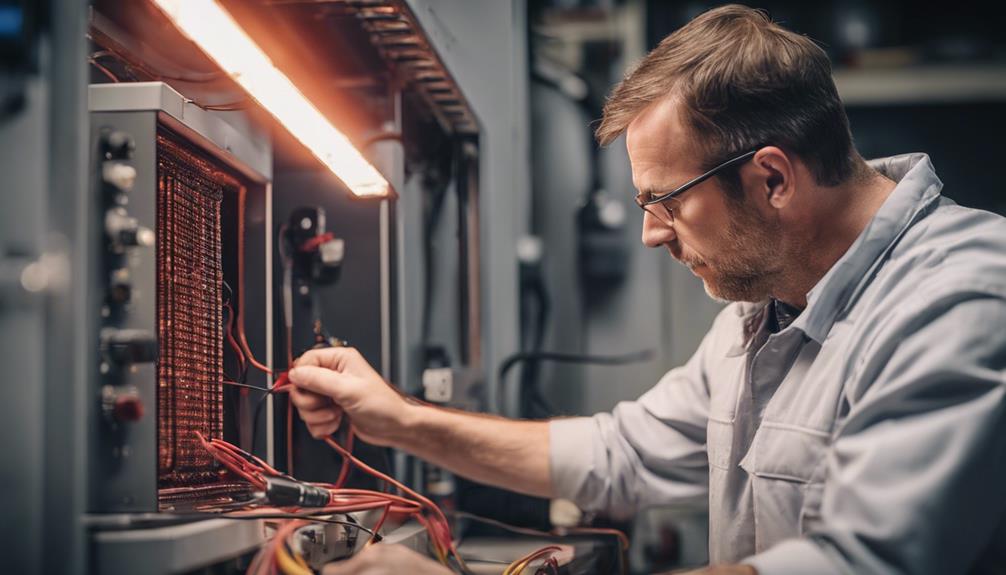
Start by examining each wire for any visible wear on the insulation or exposed metal. Look out for loose connections that could lead to electrical hazards or heating inefficiencies. It's important to maintain connection integrity to prevent potential malfunctions down the line.

Use a multimeter to test the continuity of the wires and confirm that each connection is secure. Tighten any loose connections and replace any damaged wires to guarantee a safe and effective heater installation.

Make sure all wires are correctly matched and connected according to the manufacturer's instructions to avoid any short circuits or overheating risks. Prioritize wiring safety throughout the installation process to promote the longevity and efficiency of your heating system.

Addressing Uneven Heating
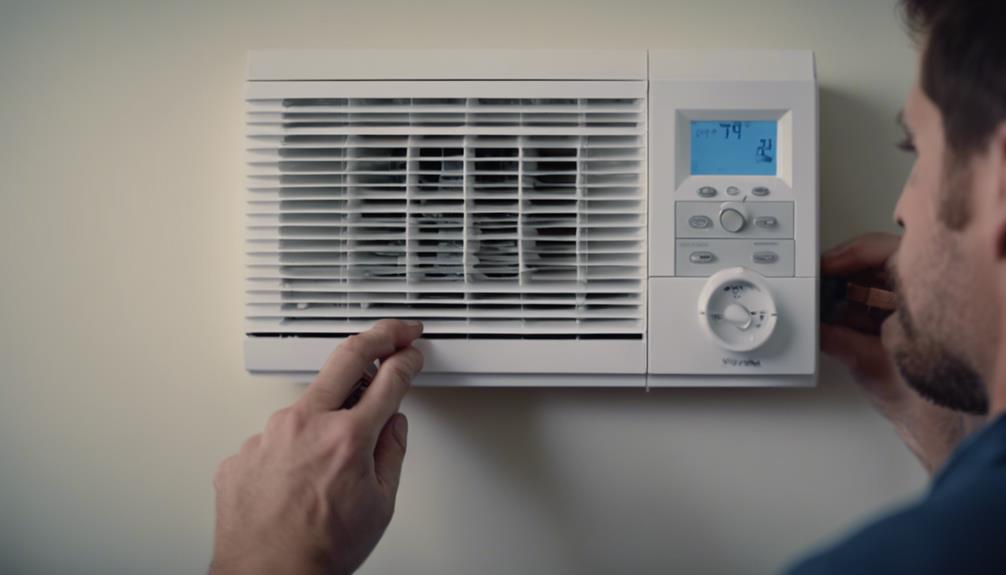
balancing temperature distribution issues

Inspect the airflow and distribution patterns in your heating system to identify and address any sources of uneven heating.

Start by checking for any blockages or obstructions in the vents or ductwork that could be impeding the proper flow of warm air. Ascertain that all vents are open and unobstructed to allow for efficient heat distribution throughout your space.

Next, conduct an insulation assessment in your home to determine if there are any areas where heat may be escaping or where cold air is infiltrating. Poor insulation can lead to temperature variations in different areas of your home, causing uneven heating. Consider adding insulation to areas such as attics, walls, and floors to improve heat retention and distribution.

Additionally, check the positioning of your furniture and other objects in the room. Large items blocking vents or radiators can disrupt the flow of warm air, leading to uneven heating. By rearranging furniture and ascertaining that air vents are unobstructed, you can help promote better heat distribution and achieve more consistent temperatures throughout your home.

Conclusion

In summary, following these top troubleshooting tips for heater installation will guarantee a successful and efficient heating system in your space.

By carefully selecting the location, checking power supply, securing mounting, confirming proper ventilation, testing thermostat functionality, inspecting wiring connections, and addressing any issues with uneven heating, you can assure a comfortable and safe environment for your home or workplace.

Stay proactive and thorough in your heater installation process for ideal results.
Posted on Leave a comment

Why Is My Infrared Heater Installation Failing?

infrared heater installation issues

If your infrared heater installation is failing, it might be due to incorrect wiring connections. Verify your wiring matches the heater's requirements to avoid issues. Check for proper power supply; use a multimeter to confirm voltage output meets specs. Position your heater correctly for even distribution and adequate airflow. Inspect components for damage or faults affecting performance. Ascertain your mounting height and angle are suitable. Regular maintenance and cleaning prevent breakdowns. Check compatibility with thermostat systems. Understanding these common issues can help you troubleshoot and resolve your infrared heater installation problems effectively.

Incorrect Wiring Connections

faulty electrical installations identified

Make certain that the wiring connections on your infrared heater are correctly aligned with the corresponding terminals to prevent potential installation issues.

When dealing with wiring connections, it's imperative to take into account both the wiring gauge and connection types. The wiring gauge refers to the thickness of the wire used, with lower gauge numbers indicating thicker wires capable of handling higher currents. Always verify that the wiring gauge matches the requirements of your infrared heater to prevent overheating and potential hazards.
Moreover, understanding the different connection types is essential for a successful installation. Common connection types include screw terminals, spade terminals, and wire nuts. It's important to use the appropriate connection type specified by the manufacturer to guarantee a secure and reliable connection.
Improper connections can lead to erratic heater behavior, malfunctions, or even electrical hazards. By paying close attention to the wiring gauge and using the correct connection types, you can avoid potential issues with your infrared heater installation.

Insufficient Power Supply

Make certain that your infrared heater is receiving an adequate power supply to avoid operational issues and performance deficiencies.

When dealing with insufficient power supply, the first step is to conduct a thorough power source troubleshooting process. Begin by checking the power outlet to ascertain it's functioning correctly and providing the required voltage. Use a multimeter to assess the voltage output accurately. If the voltage is below the manufacturer's specifications, it could lead to the infrared heater not operating effectively.

Additionally, examine the circuit breaker connected to the heater to verify it hasn't tripped or blown. Reset the breaker if necessary and monitor it for any reoccurrence.

In some cases, inadequate power supply can be due to overloaded circuits or shared circuits with high-power-consuming appliances. Consider redistributing the load to guarantee the infrared heater receives the power it needs to function efficiently.

Placement and Ventilation Issues

ventilation placement challenges addressed

Guaranteeing proper placement and adequate ventilation are vital factors to take into account when installing an infrared heater to enhance its performance and prevent potential issues.

Proper placement involves positioning the heater in a location where it can evenly distribute heat throughout the intended space. Placing the heater too close to walls or furniture can obstruct heat distribution, leading to uneven heating and reduced efficiency. To improve heat distribution, verify that the heater is mounted at an appropriate height and angle to cover the desired area effectively.

In addition to placement, effective airflow management is important for the ideal operation of an infrared heater. Poor ventilation can result in overheating, reduced performance, and potential safety hazards. Make certain there's sufficient clearance around the heater to allow for proper air circulation.

Clear any obstructions that could impede airflow, such as curtains or furniture. Regularly clean the heater and its surroundings to prevent dust buildup, which can hinder heat emission and airflow.

Faulty or Damaged Components

To guarantee the proper functioning of your infrared heater, it's vital to inspect for any faulty or damaged components that could impact its performance. One common issue is poor component quality. When components like heating elements, wiring, or sensors are subpar, they can lead to malfunctions or even safety hazards. Ascertain that all parts meet quality standards and are compatible with your specific heater model.

Another aspect to take into account is adherence to installation guidelines. Even the highest quality components can fail if not installed correctly. For instance, improper wiring connections can cause the heater to short circuit. Make sure to follow the manufacturer's instructions meticulously during the installation process.

Regularly checking for damaged components is imperative for the longevity of your infrared heater. Conduct routine inspections to look for signs of wear and tear, corrosion, or loose connections.

Improper Mounting or Positioning

incorrect installation or placement

Check the positioning and mounting of your infrared heater to avoid potential performance issues and safety hazards.

Improper mounting height or positioning angle can lead to inefficient heating and even potential safety risks. When installing your infrared heater, verify that the mounting height is appropriate for the size of the space you intend to heat.

Mounting the heater too high can result in heat dispersion that's too widespread, while mounting it too low may lead to localized heating.

Additionally, consider the positioning angle of the heater. Aiming the heater too high or too low can impact the distribution of heat in the room.

To achieve maximum heating efficiency, position the heater at an angle that allows the heat to spread evenly throughout the space.

Inadequate Maintenance and Cleaning

Inspecting your infrared heater regularly for any signs of dust buildup or wear is crucial to maintaining its efficiency and prolonging its lifespan. Dust accumulation on the heater's components, especially on the reflective surfaces and heating elements, can greatly reduce its performance.

To address this, make certain you perform routine filter replacement to prevent dust from clogging the system and hindering heat distribution. Additionally, conduct safety inspections to check for any loose connections or signs of damage that may pose a risk.

Inadequate maintenance can lead to decreased heating efficiency and potential safety hazards. To avoid these issues, incorporate regular performance checks into your maintenance routine.

Monitor the heater's output temperature and heating patterns to make sure it's operating at peak levels. By staying proactive with maintenance and cleaning tasks, you can maximize the effectiveness of your infrared heater and enjoy a safe and comfortable environment.

Compatibility With Thermostat Systems

thermostat system compatibility check

How can you guarantee that your infrared heater is compatible with thermostat systems for ideal control and efficiency? Verifying thermostat compatibility is essential for seamless integration and efficient operation of your infrared heater.

When selecting an infrared heater, check for compatibility with various thermostat systems, especially considering smart thermostat integration for enhanced control and energy savings.

Smart thermostats offer advanced features like remote monitoring, scheduling, and energy usage tracking. To confirm compatibility, verify that your infrared heater supports the communication protocol required by your chosen smart thermostat. Common protocols include Wi-Fi, Zigbee, or Z-Wave.

Additionally, some infrared heaters come with built-in smart capabilities, allowing direct integration with popular smart thermostat brands.

Before purchasing an infrared heater, thoroughly review the product specifications to confirm compatibility with your existing thermostat system or the smart thermostat you plan to install.

Conclusion

Guarantee proper wiring connections, adequate power supply, correct placement and ventilation, and regular maintenance to prevent infrared heater installation failures.

Check for faulty components, guarantee proper mounting, and compatibility with thermostat systems.

By addressing these issues, you can troubleshoot and resolve any problems with your infrared heater installation, guaranteeing efficient and effective operation.

Posted on Leave a comment

Top 10 Tips for Infrared Heater Care

infrared heater maintenance tips

To guarantee your infrared heater functions at its best, start with regular maintenance and cleaning. Keep the filter clean to maintain airflow, and have a qualified technician inspect it periodically. Test safety features, position the heater for proper ventilation and even heat distribution, and monitor thermostat settings. Avoid obstructions, inspect wiring regularly, and enhance usage for energy efficiency. Remember to stay mindful of safety considerations and get professional inspections done to extend its lifespan. Following these tips will help you care for your infrared heater effectively and keep it running smoothly for years to come, securing a cozy and safe environment in your space.

Regular Cleaning

consistent maintenance routine

To maintain ideal performance and efficiency, clean your infrared heater regularly to prevent dust accumulation.

One important aspect of cleaning your infrared heater is filter maintenance. The filter in your infrared heater plays a significant role in trapping dust, dirt, and other particles to prevent them from entering the unit and affecting its functionality. Over time, these filters can become clogged with dust, hindering the heater's performance.

To guarantee peak airflow and heating capacity, it's recommended to clean or replace the filter at least every 3 months, or more frequently if you notice reduced heating output.

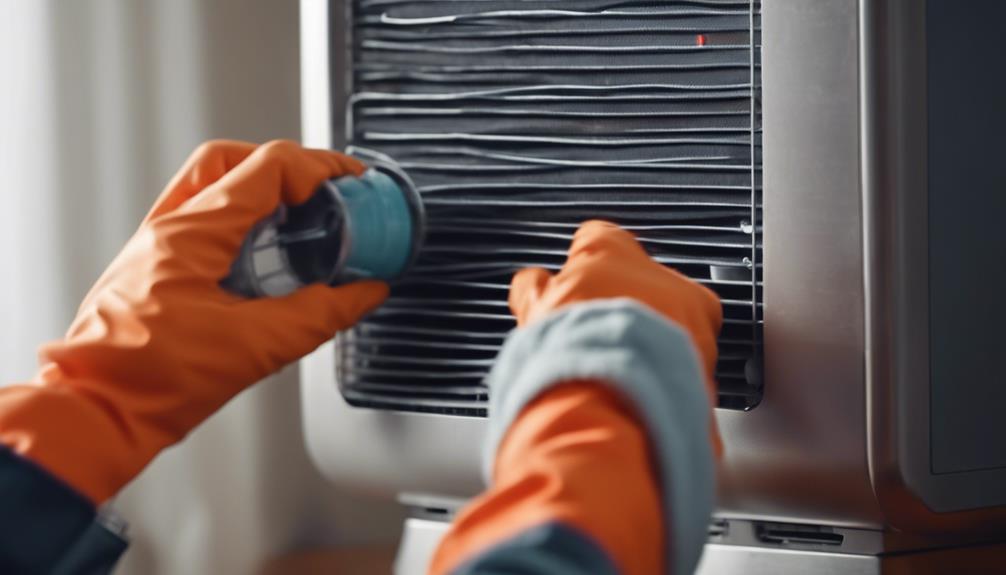
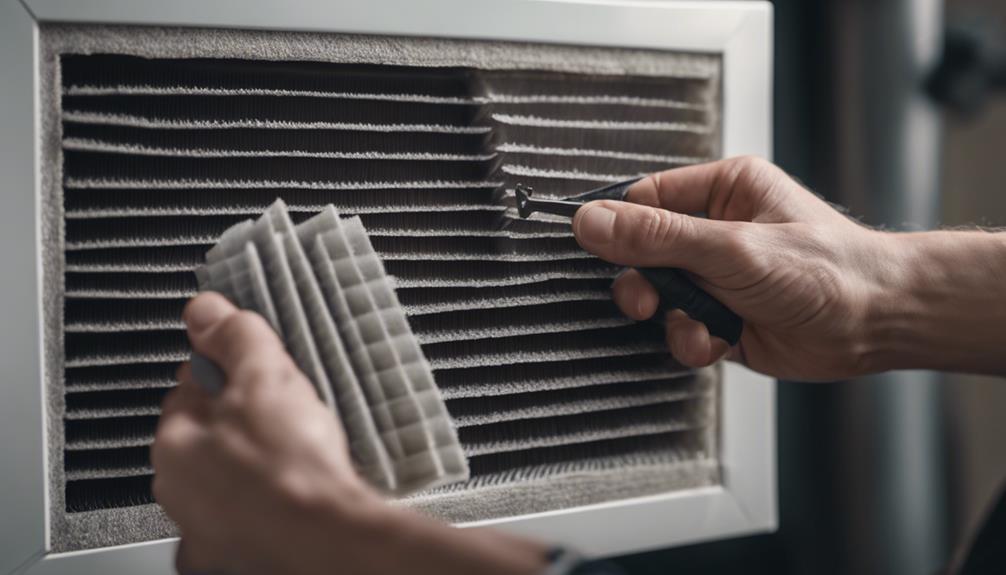
When cleaning the filter, first, verify the heater is turned off and unplugged. Carefully remove the filter according to the manufacturer's instructions. Depending on the type of filter, you can either vacuum it gently or wash it with mild soap and water.

Once cleaned, make certain the filter is completely dry before reinserting it into the heater. By maintaining clean filters, you can prevent dust accumulation, prolong the lifespan of your infrared heater, and enjoy efficient heating in your space.

Proper Ventilation

Guarantee that your infrared heater is positioned in an area with proper ventilation to enhance its performance and safety.

Adequate airflow management is vital for infrared heaters to function efficiently. Ascertain that the heater isn't obstructed by furniture, curtains, or any other objects that may impede the circulation of air around the unit. Proper ventilation helps prevent overheating and allows the heater to distribute warmth evenly throughout the room.

Maintaining humidity control is also imperative when it comes to proper ventilation for your infrared heater. High humidity levels can affect the performance of the heater and may lead to issues like condensation or corrosion.

Use a dehumidifier if necessary to keep the humidity at an ideal level for your heater to operate effectively.

Check for Leaks

monitor for information breaches

Guarantee that a thorough inspection for leaks is conducted regularly on your infrared heater to maintain its safety and efficiency.

Detecting leaks early is essential to prevent potential hazards and guarantee peak energy efficiency. Start by checking all connections and fittings for any signs of leakage. Use a soapy water solution to detect even the smallest leaks – bubbles will form where there's escaping gas.

Additionally, inspect the heater's gas valve and supply lines for any corrosion or damage that could lead to leaks. Remember to examine the heat exchanger for any cracks or holes that may allow gas to escape.

Proper leak detection not only enhances safety but also contributes to the heater's efficiency by preventing energy wastage. By staying vigilant and addressing leaks promptly, you can guarantee that your infrared heater operates effectively and safely for a long time.

Inspect Wiring

Inspect the wiring of your infrared heater regularly to guarantee peak performance and safety. The wiring in your heater plays a critical role in ensuring that electricity flows efficiently and safely to power the heating elements.

There are two main types of wiring commonly found in infrared heaters: stranded wire and solid wire. Stranded wire is more flexible and less prone to breaking from constant movement or vibration, making it a reliable choice for heaters. Solid wire, on the other hand, is more rigid and suitable for fixed installations where movement is minimal.

Safety concerns related to wiring include frayed or damaged insulation, loose connections, and overheating. Exposed wires can lead to electrical shorts and pose a fire hazard. Loose connections may cause intermittent heating or even complete failure of the heater. Overheating of wires can result in melting insulation or, in extreme cases, cause a fire.

Regularly inspecting the wiring for any signs of wear, securing loose connections, and ensuring proper insulation are essential steps in maintaining the safety and efficiency of your infrared heater.

Monitor Thermostat Settings

adjust temperature control settings

To guarantee peak performance and efficiency of your infrared heater, closely monitor the thermostat settings to maintain the desired temperature levels. Proper thermostat calibration is vital for confirming that your heater operates at its ideal level.

Check the accuracy of your thermostat by comparing it with a separate thermometer to verify that it's reading the room temperature correctly. If there are discrepancies, you may need to recalibrate the thermostat to improve its accuracy.

Monitoring your thermostat settings also plays an important role in maximizing energy efficiency. By setting your thermostat to the perfect temperature for your comfort, you can prevent energy wastage and reduce your heating costs.

Adjust the settings based on your heating needs throughout the day to avoid unnecessary energy consumption. Additionally, be mindful of any drafts or heat sources near the thermostat that could affect its readings and lead to inefficient operation.

Positioning Matters

Proper positioning of your infrared heater is vital for optimizing its performance and efficiency.

To guarantee the best heat distribution, place your heater in an area with good air circulation, avoiding obstructions that may block the infrared waves. Ideal locations for your infrared heater include near a wall for reflective warmth or in a corner to maximize heat dispersion.

Avoid placing the heater directly in front of furniture or curtains, as they can absorb the infrared heat. It's important to maintain a clear space around the heater, at least three feet away, to prevent overheating and guarantee safety.

Additionally, positioning the heater at a higher level can help distribute heat more evenly throughout the room.

Test Safety Features

evaluate protective mechanisms thoroughly

Guarantee that the safety features of your infrared heater are functioning correctly by conducting regular tests. Following safety guidelines is essential to confirm the proper operation of your heater.

Start by checking the tip-over switch, which automatically turns off the heater if it's knocked over. To test this feature, gently tip the heater to see if it powers down.

Additionally, examine the overheat protection feature by running the heater at its maximum temperature for a few hours. If the heater shuts off, the overheat protection is working as intended.

Conduct a visual inspection of the power cord and plug for any signs of wear or damage. Confirm that the plug fits securely into the outlet without any looseness.

Test the thermostat by adjusting the temperature setting and verifying that the heater responds accordingly.

Avoid Obstructions

Make certain that your infrared heater is placed in a location free of obstructions to maximize its performance and safety. Proper heat distribution is vital for efficient operation.

Confirm that there are no objects blocking the front or rear of the heater, as this can disrupt the airflow and hinder the unit's ability to distribute heat evenly. It's recommended to maintain a clearance of at least three feet around the heater to prevent any potential fire hazards. Additionally, avoid placing the heater near curtains, furniture, or other flammable materials.

To enhance safety precautions, never drape clothing or towels over the heater, as this could lead to overheating and pose a significant fire risk.

It's also essential to regularly inspect the area around the heater to verify there are no new obstructions that have inadvertently been placed in its vicinity.

Professional Inspection

thorough evaluation by experts

Regularly schedule a professional inspection of your infrared heater to confirm peak performance and safety.

Setting up a maintenance schedule with a qualified technician guarantees that your heater functions effectively and remains safe to use. Technicians with the appropriate qualifications will be able to conduct a thorough examination of your infrared heater, checking for any potential issues or worn-out components that may impact its efficiency or pose a safety hazard.

During the inspection, the technician will meticulously assess all components of the infrared heater, including the heating elements, thermostat, wiring, and ventilation system.

They'll also clean any dust or debris that may have accumulated, which can hinder the heater's performance.

Additionally, the technician will verify that the heater is properly installed and that there are no obstructions that could compromise its operation.

Stay Mindful of Usage

Make certain that you're mindful of how you use your infrared heater to optimize its performance and longevity. To guarantee energy efficiency, consider your usage patterns.

It's recommended to use your infrared heater in rooms that are frequently occupied to maximize its effectiveness. This not only helps in maintaining a comfortable environment but also reduces the strain on the heater, leading to lower energy consumption.

Additionally, be mindful of the duration for which you run the infrared heater. Avoid leaving it on for extended periods when not needed. Utilize the built-in timer function if available to regulate usage effectively.

By being conscious of when and how long you operate the heater, you can greatly impact its energy efficiency and overall lifespan.

Monitoring the usage patterns of your infrared heater allows you to make informed decisions that benefit both your comfort and energy bills. By following these guidelines, you can enjoy the warmth provided by your heater while guaranteeing it operates efficiently for years to come.

Conclusion

In summary, following these top 10 tips for infrared heater care will guarantee the safety and efficiency of your heating system.

By regularly cleaning, checking for leaks, and monitoring thermostat settings, you can prevent potential issues and extend the lifespan of your heater.

Remember to stay mindful of usage and seek professional inspections when needed to keep your infrared heater running smoothly for years to come.

Posted on Leave a comment

Why Regular Maintenance Is Essential for Infrared Heaters

essential infrared heater maintenance

Regular maintenance is essential for your infrared heaters to operate efficiently and last longer. Keeping up with maintenance tasks like cleaning heating elements and checking for damage guarantees maximum performance and reduces the risk of costly repairs. Accumulated dust and debris can hinder heat transfer, affecting the heater's efficiency. By inspecting heating elements for damage early on, you can prevent uneven heating and maintain warmth output. Remember to also clean reflectors and filters regularly to uphold efficient operation. Addressing any irregularities promptly and scheduling professional inspections annually will help you achieve peak performance and safety for your heaters.

Importance of Regular Maintenance

essential for optimal performance

Regular maintenance of your infrared heaters is vital to confirm ideal performance and longevity. By conducting regular upkeep, you guarantee that your heaters maintain optimal energy efficiency levels, which not only saves you money on energy costs but also reduces their environmental impact. Proper maintenance also plays an essential role in extending the lifespan of your infrared heaters, ultimately saving you from the hassle and expense of premature replacements.

Maintaining your infrared heaters involves tasks such as cleaning the heating elements, checking for any signs of wear or damage, and verifying that all components are functioning correctly.

These routine checks not only enhance the energy efficiency of your heaters but also contribute to extending their overall lifespan. Neglecting maintenance can lead to decreased performance, higher energy consumption, and potentially costly repairs.

Taking the time to perform regular maintenance tasks will pay off in the long run by keeping your infrared heaters operating at their best and maximizing their longevity.

Checking for Dust and Debris

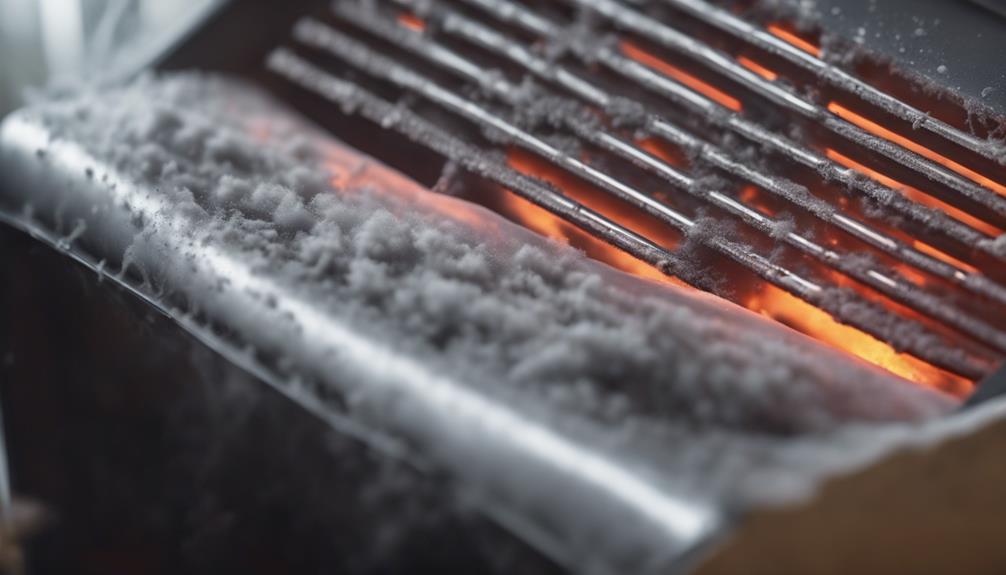
Inspect the infrared heaters for accumulated dust and debris to confirm ideal performance and efficiency. Dust accumulation on the heating elements can hinder the transfer of infrared heat, reducing the effectiveness of the heaters. Regularly checking for dust and debris is essential to make certain that the heaters operate at their best.

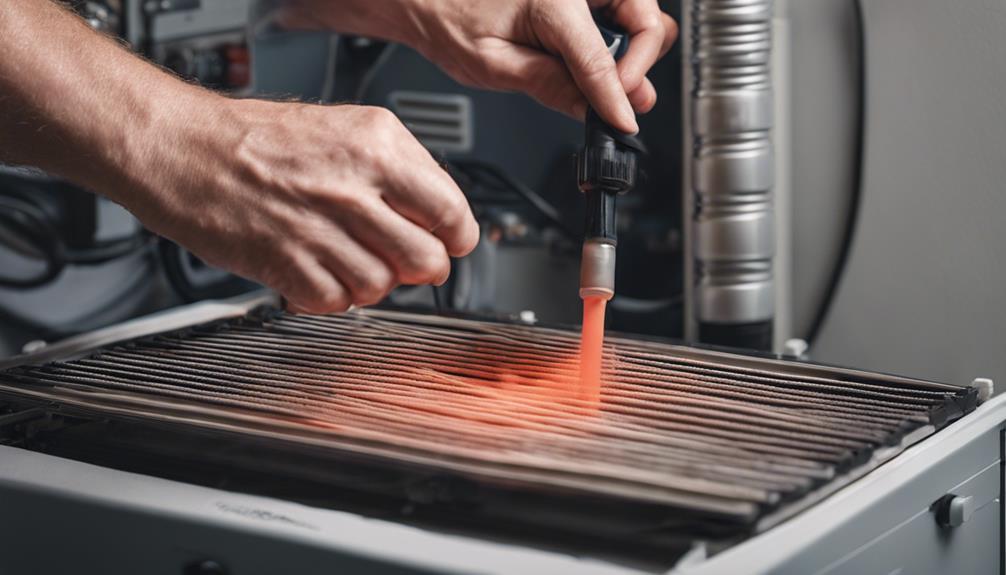
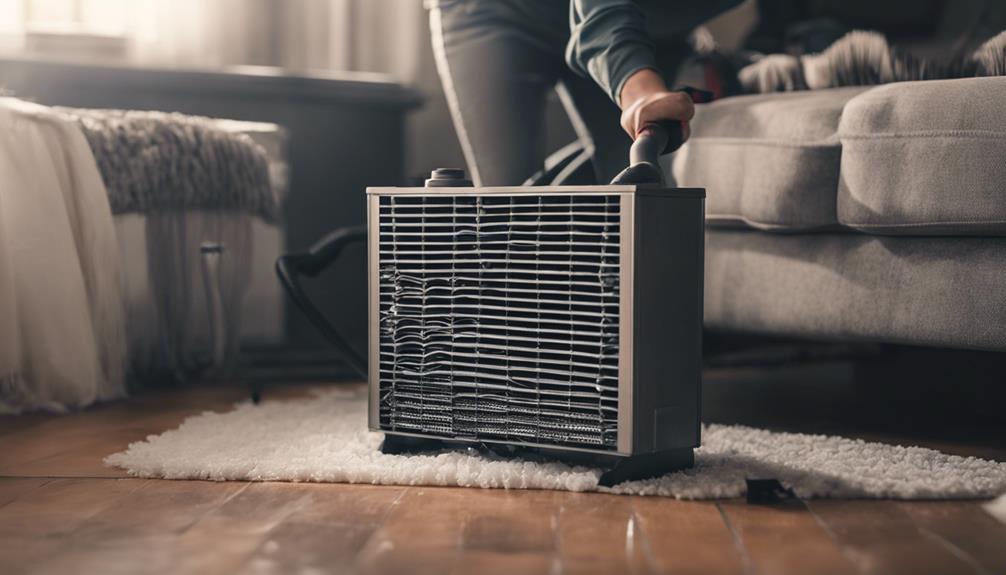
To remove dust and debris, start by unplugging the heaters and allowing them to cool down completely. Use a soft brush or vacuum cleaner with a brush attachment to gently clean the surface of the heaters.

Pay close attention to vents and grilles where dust tends to accumulate. For stubborn debris, a damp cloth can be used, but verify the heaters are completely dry before plugging them back in.

Inspecting Heating Elements

evaluating heater component functionality

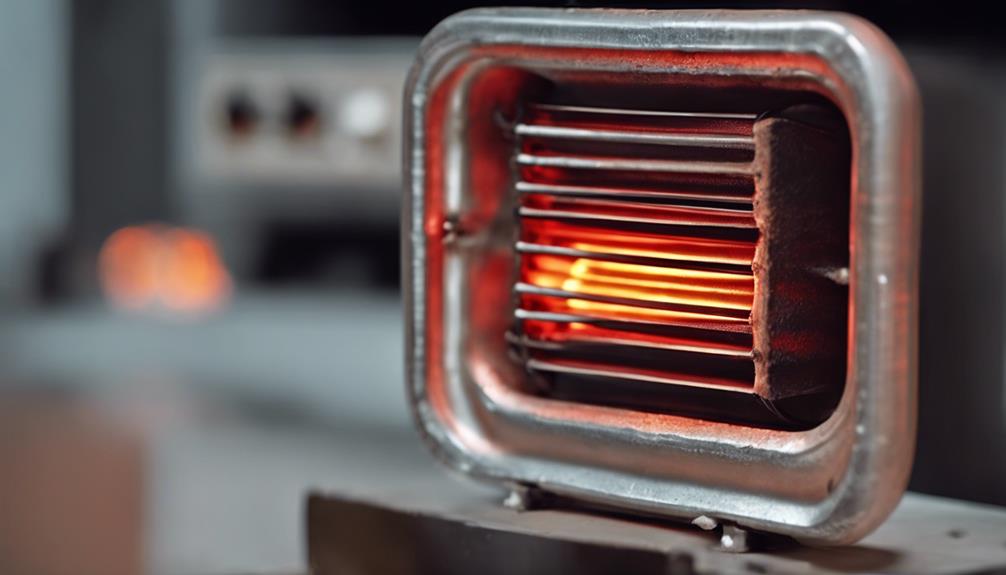
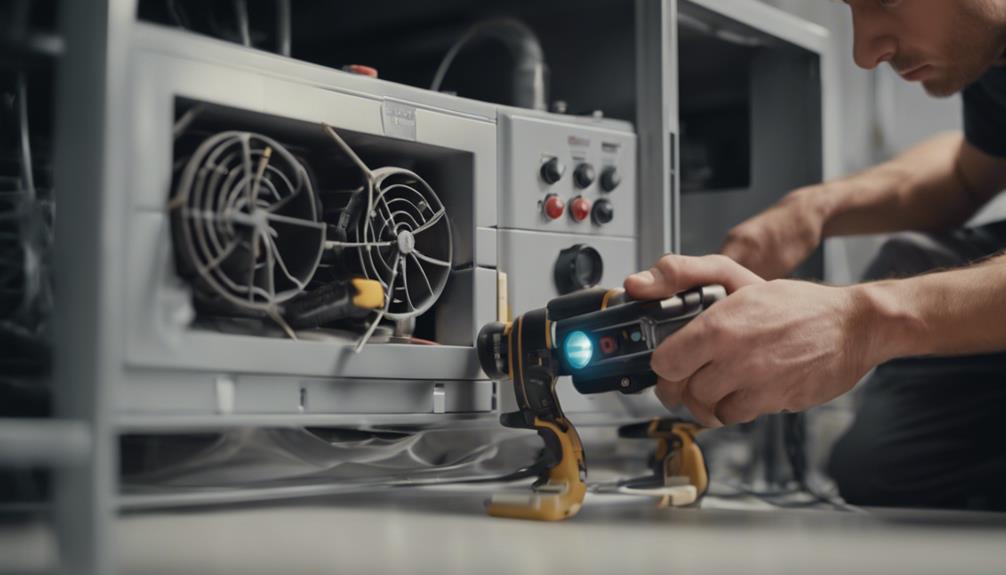
Using a flashlight, carefully examine the heating elements for any signs of damage or discoloration. The heating elements are vital components of an infrared heater, responsible for emitting the heat that warms your space.

Over time, these elements can degrade, impacting the efficiency of your heater. Regular inspections can help identify issues early on, extending the heating element lifespan and ensuring peak performance.

Inspecting the heating elements is essential for maintaining the efficiency of your infrared heater. Damaged or discolored elements can lead to uneven heating or reduced warmth output.

If you notice any abnormalities during your inspection, it's recommended to replace the affected heating elements promptly. By addressing these issues proactively, you can prevent further damage to the heater and maintain its effectiveness in heating your space efficiently.

Cleaning Reflectors and Filters

To guarantee your infrared heater operates efficiently, you must regularly clean the reflectors and replace the filters.

Start by turning off the heater and allowing it to cool down completely before beginning maintenance.

Remove the reflector by carefully unscrewing it from the unit. Use a soft cloth or brush to gently wipe away any dust or debris that has accumulated on the reflector. Be cautious not to damage the delicate surface of the reflector.

For filter replacement, consult your manufacturer's guidelines to determine the type of filter your heater uses and how often it should be changed. Typically, filters should be replaced every 6 to 12 months depending on usage. A clean filter guarantees that the heater functions at its best by allowing proper airflow.

Testing Thermostat Functionality

thermostat functionality testing process

To guarantee peak performance of your infrared heater, test the functionality of the thermostat periodically. The thermostat is essential for maintaining temperature stability and ensuring efficient operation of your heater.

Begin by checking the calibration of the thermostat. Use a separate thermometer to compare the temperature readings with the set temperature on the thermostat. If there's a significant variance, the thermostat may require calibration to accurately regulate the heat output.

Next, observe the heater during operation to see if it cycles on and off appropriately based on the temperature setting. An erratic cycling pattern could indicate a malfunctioning thermostat.

Additionally, listen for any unusual noises or smells that could suggest an issue with the thermostat.

Addressing Any Issues Promptly

When noticing any irregularities in the thermostat functionality during testing, promptly address these issues to prevent potential heater malfunctions. Ignoring these problems can lead to inefficiencies in heat distribution and reduced energy efficiency.

Infrared heaters rely on precise thermostat settings to regulate temperature accurately. If you experience inconsistent heating or notice that the heater isn't reaching the desired temperature as quickly as it should, there may be underlying issues that need attention.

By addressing these problems promptly, you can guarantee that your infrared heater operates efficiently, providing ideal heat distribution throughout the space it serves. Failure to address thermostat issues promptly can result in the heater working harder than necessary, leading to increased energy consumption and potentially higher utility bills.

Regularly monitoring and maintaining your infrared heater's thermostat functionality is vital for its overall performance and longevity. By promptly addressing any irregularities, you can maximize energy efficiency and guarantee consistent heat distribution in your environment.

Scheduling Professional Inspections

coordinating expert evaluation appointments

Consider scheduling annual professional inspections for your infrared heater to confirm peak performance and safety.

Maintaining a consistent maintenance frequency is essential in making certain that your infrared heater operates efficiently and remains safe for use.

Professional services offer a thorough assessment of your heater's components, identifying any potential issues before they escalate.

During these inspections, technicians can check for gas leaks, verify proper ventilation, clean heating elements, and confirm all connections are secure.

Conclusion

In summary, regular maintenance is essential for the proper functioning of infrared heaters.

By checking for dust and debris, inspecting heating elements, cleaning reflectors and filters, testing thermostat functionality, and addressing any issues promptly, you can guarantee that your infrared heater continues to operate efficiently.

Don't forget to schedule professional inspections to catch any potential problems before they escalate.

Stay proactive in maintaining your infrared heater for peak performance and longevity.

Posted on Leave a comment

Optimize Your Infrared Heater: 5 Maintenance Tips

infrared heater maintenance tips

To maximize the efficiency and lifespan of your infrared heater, remember these 5 maintenance tips. Clean components every 3-6 months using a damp cloth and mild soap for reflectors. Inspect and replace filters regularly to maintain peak airflow. Check for wiring damage and component wear to prevent hazards. Guarantee proper ventilation by clearing debris and maintaining space around the unit. Schedule professional maintenance for safety checks and expert advice. Following these steps will enhance your heater's performance and longevity.

Regular Cleaning for Efficiency

consistent maintenance for productivity

To maintain peak performance, regularly clean the components of your infrared heater, such as the reflectors, heating elements, and fan blades. The cleaning frequency depends on usage but generally, aim to clean these parts every 3-6 months.

Start by turning off and unplugging the heater. For the reflectors, use a soft cloth dampened with a mixture of water and mild soap. Gently wipe the reflectors to remove dust or residue that can block the heat output.

The heating elements are delicate, so use caution. A soft brush or vacuum with a brush attachment can effectively clean them. Avoid using water on the heating elements.

The fan blades can accumulate dust, affecting airflow. Use a damp cloth to clean the blades and guarantee they rotate freely.

When choosing cleaning products, opt for mild solutions to avoid damaging the components. Regular maintenance of these elements will help your infrared heater operate efficiently and prolong its lifespan.

Checking and Replacing Filters

Make certain you regularly check and replace the filters in your infrared heater to maintain peak performance and efficiency.

Filters play a vital role in trapping dust, dirt, and other particles that can accumulate over time and obstruct airflow.

There are typically two main filter types in infrared heaters: pre-filter and HEPA filter. Pre-filters are designed to capture larger particles, while HEPA filters are capable of trapping smaller particles like allergens.

The lifespan of filters varies depending on usage and environmental factors. It's recommended to inspect filters every 3 to 6 months and replace them as needed.

A clogged filter can reduce the heater's efficiency and lead to decreased performance.

To guarantee your infrared heater operates at its best, follow the manufacturer's guidelines for filter maintenance and replacement.

Inspecting for Damage and Wear

damage and wear assessment

Regularly examine the components of your infrared heater for signs of damage or wear to guarantee peak performance and safety.

Start by conducting a thorough wiring inspection. Check for any frayed wires, loose connections, or signs of overheating. Damaged wiring can't only affect the efficiency of your heater but also pose a fire hazard. Confirm all wiring is intact and properly secured.

Next, perform a detailed component evaluation. Inspect all parts of the heater, including the heating element, reflectors, and thermostat. Look for any cracks, corrosion, or wear that may impact the functionality of the heater. Replace any worn-out components to maintain ideal performance.

Additionally, pay close attention to the housing of the infrared heater. Check for any signs of physical damage, such as dents or cracks, that could compromise the unit's safety or efficiency.

Ensuring Proper Ventilation

Inspecting your infrared heater for proper ventilation is vital to confirm efficient and safe operation. Adequate air circulation is important for the heat distribution of your heater.

Begin by verifying that the heater's venting system is clear of obstructions such as dust, debris, or any blockages that could impede airflow. Check the vents regularly to prevent any buildup that could hinder the proper functioning of the heater.

Proper ventilation also involves maintaining a clear space around the heater. Make sure there are no objects blocking the airflow around the unit. Keep at least a few feet of clearance on all sides of the heater to allow for ideal heat distribution and prevent any potential hazards.

Regularly inspecting and cleaning the vents won't only confirm the efficient performance of your infrared heater but also contribute to its longevity. By prioritizing proper ventilation, you can enhance the heat distribution in your space and enjoy the benefits of a well-maintained infrared heater.

Professional Maintenance for Longevity

expert care for durability

Ensuring the longevity of your infrared heater involves scheduling professional maintenance to enhance its performance and durability.

Professional maintenance often includes safety inspections and expert advice to keep your heater running efficiently. These maintenance checks are vital in preventing potential malfunctions and ensuring the safety of your heater.

Safety inspections carried out by professionals involve a thorough examination of all components of your infrared heater. This includes checking for any signs of wear and tear, ensuring proper functioning of the heating elements, and inspecting the electrical connections for any potential hazards.

Expert advice provided during professional maintenance sessions can help you understand how to best care for your infrared heater. Professionals can offer insights into regular cleaning routines, effective usage practices, and troubleshooting tips to address minor issues promptly.

Conclusion

In summary, optimizing your infrared heater through regular maintenance is essential for its efficiency and longevity.

By following these maintenance tips such as cleaning regularly, checking filters, inspecting for damage, guaranteeing proper ventilation, and seeking professional maintenance when needed, you can confirm that your heater continues to operate at its best.

Taking the time to care for your heater won't only save you money in the long run but also provide you with consistent and reliable warmth.

Posted on Leave a comment

Top Tips for Maintaining Your Heater

heater maintenance best practices

Maintaining your heater in excellent condition requires regular inspection to spot wear like cracks or discoloration, along with checking for frayed cords and blocked vents. Cleaning the interior components with a soft brush and keeping filters clean are essential tasks. Install carbon monoxide detectors for safety, and guarantee proper ventilation by checking for obstructions and replacing air filters regularly. Test safety features, like accurate thermostat settings and proper heater placement. Finally, scheduling professional inspections can catch potential issues early and optimize efficiency. Adhering to these tips will keep your heater running smoothly and safely.

Inspect Regularly for Wear

routine wear inspection required

Regularly inspect your heater for signs of wear to guarantee peak performance and safety. Visual signs such as frayed wires, discolored components, or rust are wear indicators that shouldn't be overlooked. These signs can point to potential issues that, if left unaddressed, could lead to malfunctions or safety hazards.

Start by visually examining the exterior of your heater. Look for any cracks, dents, or discoloration on the surface. Check the power cord for any fraying or exposed wires, as this could pose a fire risk. Additionally, inspect the vents for any blockages or debris that could restrict airflow.

Next, open the heater and inspect the interior components. Look for any signs of wear on the heating elements, such as discoloration or corrosion. Clean out any dust or debris that may have accumulated inside the unit, as this can affect its efficiency.

Clean Interior Components

Inspecting and cleaning the interior components of your heater is essential for maintaining its efficiency and prolonging its lifespan. To keep your heater running smoothly, it's vital to use proper cleaning techniques and guarantee component lubrication.

Begin by turning off the heater and allowing it to cool down before starting any maintenance. Remove the access panel carefully to access the interior components.

Use a soft brush or cloth to gently clean the fan blades, motor, and any visible dust or debris. Avoid using water directly on these components to prevent damage. Check for any signs of wear or corrosion during the cleaning process.

Lubricate any moving parts following the manufacturer's recommendations to reduce friction and extend the lifespan of the components.

Regular cleaning and lubrication of the interior components won't only improve the heater's efficiency but also prevent potential breakdowns. By incorporating these maintenance practices into your routine, you can guarantee your heater operates at peak performance for years to come.

Check and Replace Filters

inspect and swap filters

To guarantee peak performance and efficiency, regularly check and replace the filters in your heater.

Filters play an essential role in trapping dust, debris, and other particles that can impede the proper functioning of your heating system. There are different filter types available, including fiberglass, pleated, electrostatic, and HEPA filters. The type of filter your heater requires depends on factors such as allergies, air quality, and the specific model of your heater.

It is recommended to check your filters every 1 to 3 months, depending on usage and the manufacturer's guidelines. Filters that are visibly dirty or clogged should be replaced immediately to prevent airflow restrictions and potential damage to your heater.

Neglecting filter replacement can lead to decreased efficiency, higher energy bills, and even system malfunctions. By staying proactive and maintaining clean filters, you confirm that your heater operates at its best, providing peak comfort and air quality in your home.

Monitor Carbon Monoxide Levels

Check for any potential safety hazards by monitoring carbon monoxide levels in your home, especially in close proximity to your heater.

Carbon monoxide is a colorless, odorless gas that can be produced by heaters and pose a serious threat to your health. To guarantee your safety, install carbon monoxide detectors in key areas of your home, particularly near your heater.

These detectors will sound safety alarms if elevated levels of carbon monoxide are detected, alerting you to the presence of this dangerous gas. It's vital to test these alarms regularly to confirm they're functioning correctly.

Carbon monoxide poisoning can lead to symptoms like headaches, dizziness, nausea, and even death in severe cases.

By being proactive and monitoring carbon monoxide levels with detectors and safety alarms, you can protect yourself and your loved ones from potential harm.

Ensure Proper Ventilation

maintain adequate airflow safety

Proper ventilation is essential for maintaining the efficiency and safety of your heater. By guaranteeing adequate airflow, you can optimize the performance of your heating system and prevent the buildup of harmful gases like carbon monoxide.

To achieve proper ventilation, start by checking that all vents and air ducts are free of obstructions such as furniture or dust. These obstructions can disrupt the airflow and reduce the effectiveness of your heater. Additionally, consider using ventilation techniques like opening windows periodically to let fresh air circulate throughout your home.

Another way to guarantee proper ventilation is by inspecting your heater's air filters regularly and replacing them as needed. Clogged filters can impede airflow and cause your heater to work harder than necessary.

Furthermore, keeping the area around your heater clear of clutter can help maintain good airflow and prevent overheating.

Test Safety Features

Guarantee the safety of your heater by regularly testing its safety features to prevent potential hazards. Start by checking the thermostat settings to confirm they're accurate and functioning correctly.

Incorrect thermostat settings can lead to overheating or inadequate heating, posing a risk of fire or uncomfortable temperatures. It's vital to verify that the heater turns on and off at the set temperatures to maintain a safe environment.

Additionally, assess the heater placement in your home. Make sure there are no flammable materials near the heater, such as curtains, furniture, or paper, which could ignite if they come into contact with the heat source.

Proper heater placement is essential to prevent accidental fires and guarantee efficient heating without obstructions.

Schedule Professional Inspections

arrange expert evaluations promptly

Regular professional inspections of your heater are essential to guarantee its peak performance and longevity. Scheduling these inspections guarantees that any potential issues are identified early, preventing costly repairs or breakdowns later on.

Professional technicians have the expertise and tools to conduct thorough assessments of your heating system, checking for any malfunctions, leaks, or inefficiencies that could be impacting its performance.

During these inspections, professionals will also assess the heating efficiency of your system, guaranteeing that it's operating at its prime level. They'll inspect and clean essential components, such as filters, ducts, and vents, to maintain proper airflow and heating distribution throughout your home.

Additionally, hiring technicians with professional certifications guarantees that they've the necessary training and knowledge to perform these inspections accurately.

Conclusion

In summary, by following these top tips for maintaining your heater, you can guarantee that it operates efficiently and safely.

Regular inspections, cleaning, and filter replacements are vital for peak performance.

Monitoring carbon monoxide levels and guaranteeing proper ventilation are imperative for your health and safety.

Testing safety features and scheduling professional inspections will give you peace of mind knowing that your heater is in good working condition.

Stay proactive and stay warm!

Posted on Leave a comment

Optimal Installation Tips for Infrared Heaters

infrared heater installation guide

Position your infrared heater centrally in consideration of room size and insulation for ideal heat distribution. Guarantee airflow by maintaining space around the heater and utilizing fans for circulation. Securely mount the heater using quality brackets matched to the model, reinforcing the wall for stability. Choose the right wiring gauge and comply with building codes for safety. Equip yourself with essential tools and safety gear for installation. Test the functionality meticulously before regular maintenance like filter replacements and cleaning for longevity. Master these tips for efficient infrared heater installation.

Choosing the Right Location

optimal site selection process

When selecting the ideal location for your infrared heater, consider factors such as room size, insulation quality, and proximity to electrical outlets. To maximize heat distribution, place the heater in a central location within the room. This guarantees that heat is evenly distributed throughout the space, avoiding cold spots and ensuring the best comfort.

Additionally, take into account the room layout. If the room has high ceilings or is open-concept, you may need to adjust the positioning of the heater to compensate for these factors. In rooms with poor insulation, such as those with drafty windows or doors, placing the heater near these areas can help counteract heat loss.

Confirm that the heater isn't obstructed by furniture or other objects that could block the infrared waves from reaching all corners of the room.

Ensuring Proper Ventilation

For ideal performance and safety, guaranteeing proper ventilation is vital when installing an infrared heater.

Adequate airflow management is important to maintain peak temperature regulation and prevent overheating. When positioning your infrared heater, make sure there's ample space around the unit for air to circulate effectively. Avoid obstructing vents or placing the heater in a confined area that restricts airflow.

To enhance ventilation, consider installing a ceiling fan or using a standalone fan to improve air circulation in the room. This will help distribute the heat evenly and prevent any hotspots from forming. Additionally, opening doors or windows periodically can help refresh the air and promote better airflow management.

Regularly check the vents and filters of your infrared heater to verify they're clean and free from dust or debris. Clogged vents can impede airflow and impact the heater's performance.

Mounting the Heater Securely

securely mounting the heater

Guarantee secure mounting of the infrared heater to the wall using appropriate mounting brackets and hardware for ideal stability and safety.

Start by selecting high-quality mounting brackets designed to support the weight of the heater. Confirm the brackets are compatible with the specific model of your infrared heater. Prior to mounting, consider reinforcing the wall with suitable wall reinforcements like plywood or studs.

Position the mounting brackets at the desired location on the wall, confirming they're level and securely anchored. Use appropriate hardware such as screws and anchors to fasten the brackets to the wall. Double-check the alignment and stability of the brackets before proceeding.

After the brackets are securely in place, carefully lift the infrared heater and align it with the brackets. Slide the heater onto the brackets and secure it according to the manufacturer's instructions.

Test the stability of the mounted heater by gently applying pressure. A properly mounted infrared heater provides efficient heating while confirming safety for you and your space.

Electrical Wiring Considerations

To guarantee the safe and efficient operation of your infrared heater, meticulous consideration of electrical wiring is imperative.

When wiring your infrared heater, it's essential to select the appropriate wiring gauge to handle the electrical load without overheating. Consult the manufacturer's guidelines to determine the correct gauge for your specific model. Additionally, confirm that your electrical circuit meets the heater's power requirements. Inadequate circuit capacity can lead to tripped breakers or even electrical fires.

Selecting the correct wiring gauge is determined by the heater's wattage and the distance to the power source. Heavier gauges, such as 10-gauge wire, are typically recommended for higher wattage heaters or longer distances, while lighter gauges like 14-gauge wire may suffice for smaller heaters or shorter distances. Always adhere to local building codes and regulations when performing electrical installations to confirm compliance and safety.

Before starting the installation process, verify that your existing electrical system can support the additional load of the infrared heater. If in doubt, consult a qualified electrician to assess your circuit requirements and make any necessary upgrades to prevent electrical hazards.

Using the Correct Tools

utilizing appropriate resources

Make certain that you have the appropriate tools available for the successful installation of your infrared heater. Essential installation tools include a screwdriver, pliers, wire strippers, a voltage tester, a drill with bits, and a stud finder.

Additionally, safety equipment such as gloves, safety goggles, and a mask should be worn during the installation process to prevent any accidents.

Before starting the installation, verify that all tools are in good working condition and suitable for the task. The screwdriver will be used for securing brackets and panels, while pliers are handy for twisting wires together.

Wire strippers are necessary for removing insulation from wires, and a voltage tester is vital for checking if the power is off before working on electrical connections. A drill with the appropriate bits will come in handy for mounting the heater securely, and a stud finder will help locate solid structures within walls for safe and stable installation.

Testing for Proper Functionality

Make certain that all electrical connections are properly secured before proceeding with the testing of the infrared heater's functionality. Safety precautions are vital during this phase.

Begin by turning on the infrared heater and allowing it to run for a few minutes. Check for any unusual sounds, smells, or overheating.

To test the heat distribution, place a hand several feet away from the heater and move it around to feel the warmth evenly spread. If you notice any cold spots or uneven heating, there may be an issue with the heater's reflectors or elements.

Additionally, you can use a thermal imaging camera to visually inspect the heat distribution across the heating elements. Confirm that the heater reaches the desired temperature and maintains it consistently.

Monitor the heater for an extended period to confirm its reliability. Remember to always follow safety guidelines and manufacturer recommendations when testing the functionality of your infrared heater.

Regular Maintenance Practices

consistent upkeep and servicing

Performing routine maintenance on your infrared heater is vital to guarantee its best performance and longevity. Two key maintenance practices for your infrared heater are filter replacement and heater cleaning.

Regularly replacing the filter is essential to make certain that your infrared heater operates efficiently. Clogged filters can obstruct airflow, reducing the heater's effectiveness and potentially causing overheating. To replace the filter, first, verify the heater is turned off and unplugged. Locate the filter compartment, remove the old filter, and insert a new one according to the manufacturer's instructions.

In addition to filter replacement, regular heater cleaning is important to prevent dust and debris buildup, which can impact the heater's performance. Use a soft cloth to gently wipe down the heater's exterior and grille. For interior cleaning, carefully vacuum any accumulated dust inside the heater. Avoid using harsh chemicals or abrasive materials that may damage the heater.

Conclusion

In summary, following these ideal installation tips for infrared heaters will guarantee maximum efficiency and safety in your space.

By choosing the right location, confirming proper ventilation, securely mounting the heater, considering electrical wiring, using the correct tools, testing functionality, and maintaining the unit regularly, you can enjoy a reliable and effective heating solution for years to come.

Remember to always consult the manufacturer's instructions and guidelines for proper installation procedures.

Posted on Leave a comment

What Are the Steps for Installing an Infrared Heater?

installing infrared heater steps

To install an infrared heater correctly, first, verify a 3-foot clearance from flammable materials. Plug directly into a wall outlet, avoid extension cords. Find a central position in smaller rooms for even heat. Mount securely using provided brackets, toggle bolts for heavy units. Wire cautiously, matching gauge and circuit capacity. Follow the manufacturer's instructions for live, neutral, and ground connections. Test temperatures and adjust settings accordingly. Secure the heater with proper brackets for stability. Keep up with maintenance by checking filters, cleaning the exterior, and inspecting vents. These steps will help you set up your infrared heater effectively for warmth and comfort.

Safety Precautions

implementing essential safety measures

Prior to installing an infrared heater, verify that all safety precautions are carefully followed to prevent any accidents or mishaps.

When dealing with fire safety, ascertain that the heater is placed at least three feet away from any flammable materials such as curtains, furniture, or bedding. It's essential to never leave the heater unattended while in use to reduce the risk of fire. Regularly inspect the heater for any signs of damage to the cord or plug, and refrain from using the unit if any issues are detected to prevent electrical hazards.

Additionally, always plug the infrared heater directly into a wall outlet, avoiding the use of extension cords or power strips to prevent overheating and potential fires. Make sure the outlet is grounded properly to reduce the risk of electric shock.

When not in use, unplug the heater and store it in a safe, dry location. By adhering to these fire safety and electrical hazard guidelines, you can install and operate your infrared heater safely and efficiently.

Choosing the Right Location

To guarantee ideal performance and safety of your infrared heater, carefully select a suitable location that meets specific criteria for efficient heat distribution.

The best placement of your infrared heater is vital for maximizing its effectiveness. Consider the dimensions of the room where the heater will be installed. For smaller rooms, a centralized location that allows for even heat distribution is recommended. In larger rooms, it may be beneficial to install multiple heaters strategically placed to cover the entire area adequately.

When determining the best location, make sure that there are no obstructions blocking the infrared waves emitted by the heater. Keep the heater away from curtains, furniture, or any other objects that may absorb or block the heat.

Additionally, avoid installing the heater near sources of moisture or flammable materials to prevent safety hazards. By carefully evaluating the room dimensions and choosing the right location for your infrared heater, you can guarantee efficient heat distribution and a safe environment for operation.

Mounting the Heater

installing the heater system

When mounting the infrared heater, verify that it's securely attached to the wall or ceiling according to the manufacturer's instructions for safe and efficient operation.

To mount the heater, first, identify the appropriate location verifying proper clearance from any obstructions. Use wall brackets or mounting templates provided by the manufacturer to mark the positions for drilling. Make sure to drill into wall studs or ceiling joists for secure attachment.

Choose the correct mounting techniques based on the heater's weight and design. For heavier units, consider using toggle bolts or anchors for additional support.

Once the brackets are secured, lift the heater into place and align it with the mounting holes. Insert the mounting screws through the heater's brackets and into the wall or ceiling anchors.

Tighten the screws securely, but avoid over-tightening to prevent damage. Double-check the heater's stability before turning it on to verify safe operation.

Electrical Wiring Installation

Begin by confirming that the power to the designated electrical circuit is turned off before proceeding with the installation of the infrared heater.

The electrical wiring installation is a vital step in setting up your heater correctly. Check the wiring requirements provided by the manufacturer, confirming that the wires are of the appropriate gauge to handle the heater's power consumption. It's essential to verify that the circuit capacity matches the specifications of the infrared heater. If the existing circuit doesn't meet the requirements, consult with a qualified electrician to upgrade the wiring and circuit breaker to guarantee safe and efficient operation.

When connecting the wiring, follow the manufacturer's instructions carefully. Typically, this involves connecting the live, neutral, and ground wires to their corresponding terminals on the heater.

Double-check all connections to prevent any loose or exposed wires that could lead to electrical hazards. After the wiring is securely in place, proceed to the next step of the installation process.

Testing and Adjusting Settings

configuration and calibration process

How do you guarantee the proper functioning of your infrared heater by conducting thorough testing and making necessary adjustments to the settings?

Once the infrared heater is installed and powered on, the next vital step is to test and calibrate its temperature settings. Refer to the user manual provided by the manufacturer to understand the specific procedures for testing and adjusting the settings accurately.

To begin, turn on the infrared heater and set it to the lowest temperature setting. Allow the heater to run for a sufficient amount of time to ascertain it reaches a stable operating condition.

Then, using a thermometer, measure the temperature output at various distances from the heater to verify its accuracy.

If the temperature readings aren't consistent with the settings on the heater, you may need to recalibrate the temperature settings following the instructions in the user manual.

Make incremental adjustments and retest until the desired temperature output is achieved.

Securing the Heater in Place

To guarantee proper installation and safety, securely fasten the infrared heater in place using the provided mounting hardware and following the manufacturer's guidelines.

Begin by attaching the wall brackets to the wall at the predetermined height and spacing as recommended by the manufacturer. Ascertain the wall surface is suitable for mounting and use appropriate anchors if needed to support the weight of the heater.

Once the brackets are securely in place, lift the heater and align it with the brackets. Gently slide the heater onto the brackets, making sure it sits snugly and level. Double-check that all mounting screws are tightened to prevent any movement that could compromise heater stability.

It's essential to verify that the heater is firmly attached to the wall to avoid any accidents or damage.

Periodically inspect the heater's position and the integrity of the wall brackets to maintain peak heater stability over time.

Maintenance and Cleaning Tips

effective maintenance and cleaning

For ideal performance and longevity of your infrared heater, regular maintenance and cleaning are essential tasks that shouldn't be overlooked.

One vital aspect of maintaining your infrared heater is confirming the filter is clean and free of debris. It's recommended to check and replace the filter every 3-6 months, depending on usage, to maintain peak heater efficiency.

To clean the exterior of your infrared heater, use a soft, dry cloth to wipe away any dust or dirt. Avoid using harsh chemicals or abrasive materials that could damage the heater's surface.

Additionally, inspect the heater's vents regularly to verify they aren't blocked by any obstructions, as this can reduce the heater's performance.

Periodically, check the power cord and plug for any signs of wear or damage. If any issues are detected, refrain from using the heater until it has been repaired or replaced to prevent any safety hazards.

Conclusion

In summary, following the proper steps for installing an infrared heater is essential to guarantee safe and efficient operation.

By taking precautions, choosing the right location, mounting the heater securely, and testing the electrical wiring, you can enjoy the benefits of infrared heating in your space.

Remember to regularly maintain and clean the heater to prolong its lifespan and maintain peak performance.

Posted on Leave a comment

Proper Installation Tips for Your Heater

heater installation best practices

Guarantee a safe and efficient heater installation by initially prioritizing safety precautions like maintaining proper distance from flammable materials and never leaving the heater unattended. When choosing a location, guarantee no obstructions for adequate ventilation and ideal heat distribution. Follow manufacturer guidelines for electrical connections, matching wire colors and testing afterward. Mount securely on wall studs, checking for obstructions, and testing calibration for uniform heat distribution. Remember to maintain your heater by regularly replacing air filters and scheduling seasonal checkups. These precise tips will help you set up your heater effectively for peak performance.

Safety Precautions

essential safety measures implemented

Before beginning the installation process, make certain you have read and understood all safety precautions outlined in the user manual provided with your heater. Ignoring these guidelines could lead to severe fire hazards and endanger both property and lives.

It's essential to have a clear understanding of the emergency procedures in case of a malfunction or accident. Familiarize yourself with the shutdown process and how to safely turn off the heater in case of an emergency.

Ensure that your heater is placed away from any flammable materials such as curtains, furniture, or papers. Keep a minimum distance of at least three feet around the heater to prevent accidental fires.

Additionally, never leave the heater unattended while in operation. Regularly check for any signs of damage to the heater's cord or plug, and refrain from using it if there are any issues.

Choosing the Right Location

Select a location for your heater that's free from obstructions and provides adequate ventilation to guarantee safe and efficient operation.

When considering heater placement, make certain that the unit is placed in a central location within the room to maximize heat distribution. For peak performance, take into account the size of the room. Larger rooms may require heaters with higher heating capacities or the installation of multiple units to evenly heat the space.

Avoid placing the heater near curtains, furniture, or other flammable materials to prevent potential fire hazards. Additionally, keep the heater away from high-traffic areas to reduce the risk of accidental contact or tripping. Adequate spacing around the heater is essential for proper airflow and heat circulation.

Before finalizing the location, consider the proximity to electrical outlets to guarantee easy access for power connection.

Remember that proper heater placement not only guarantees efficient heating but also enhances overall safety in your living space.

Proper Ventilation Requirements

adequate airflow standards needed

Positioning your heater to confirm proper ventilation is key to its safe and efficient operation. There are two main types of ventilation systems to evaluate: natural ventilation, which relies on airflow through windows, doors, or vents, and mechanical ventilation, which involves fans or duct systems to circulate air. Both types play an essential role in maintaining good indoor air quality, making sure the combustion process in your heater functions correctly, and preventing the buildup of harmful gases like carbon monoxide.

When installing your heater, verify that it's placed in an area with an adequate air supply to support combustion. This includes following manufacturer guidelines on clearance distances from walls and furniture to allow for proper airflow. Additionally, it's vital to check for any obstructions that could block vents or air intakes.

Regular maintenance of your ventilation system is also important to uphold air quality and the overall efficiency of your heater. By adhering to proper ventilation requirements, you can enjoy a safe and comfortable environment while maximizing your heater's performance.

Electrical Connection Instructions

Make certain that the electrical connection for your heater is carried out according to the manufacturer's specifications for safe and ideal performance.

Before proceeding, verify that the power to the circuit is switched off at the main electrical panel. Always refer to the wiring diagrams provided by the manufacturer to correctly identify the different wires for the heater connection.

When connecting the heater, match the corresponding wire colors as per the manufacturer's guidelines. Use appropriate wire connectors to secure the connections and prevent any loose wiring.

Once all connections are made, verify that the wires are tucked away neatly to avoid any interference with the heater's components.

After the electrical connections are secure, turn the power back on and test the heater to verify it's functioning correctly. If the heater doesn't operate as expected, immediately turn off the power and recheck all connections.

Remember to never exceed the electrical load specified for the circuit to prevent tripping circuit breakers or causing damage to the heater.

Mounting the Heater

installing the heater unit

Verify the heater is securely mounted to the designated location on the wall or ceiling using the appropriate mounting hardware provided by the manufacturer.

When mounting your heater, consider the type of wall materials you're dealing with. For drywall, it's crucial to locate the wall studs for secure mounting. Utilize a stud finder to locate the studs and confirm the mounting screws penetrate into them for stability. In the case of concrete or brick walls, specialized anchors may be required to provide the necessary support.

Before drilling any holes, double-check the designated location to avoid any obstructions such as electrical wiring or pipes. Use a level to confirm the heater is mounted straight.

Additionally, consider the weight of the heater and verify the mounting surface can support it. Follow the manufacturer's instructions for specific mounting techniques based on the model of your heater.

Testing and Calibration

To guarantee ideal functionality, conduct thorough testing and calibration of your heater post-installation.

Begin by verifying the heat distribution is uniform across all areas of the room. Use a thermometer to measure the temperature at various points to identify any hot or cold spots. Adjust the heater's positioning or settings accordingly to optimize heat distribution.

Next, focus on the temperature control of the heater. Test the accuracy of the thermostat by setting it to different temperatures and verifying if the heater responds correctly. Calibrate the thermostat if necessary to verify it accurately reflects the room's temperature.

Conduct a runtime test by running the heater for an extended period to check for any fluctuations in heat output or irregularities in performance. Make adjustments as needed to maintain consistent heating throughout the testing period.

Maintenance and Cleaning

routine upkeep and sanitation

Regular maintenance and cleaning of your heater is essential to guarantee peak performance and longevity.

One vital aspect of maintenance is the regular replacement of air filters. Clogged filters restrict airflow, reducing efficiency and potentially causing damage to the system. It's recommended to replace disposable filters every 1-3 months, depending on usage and air quality. For reusable filters, follow manufacturer guidelines for proper cleaning and maintenance.

In addition to filter replacement, scheduling a seasonal checkup with a professional technician is highly advisable. During these checkups, the technician will inspect and clean critical components of the heater, ensuring everything is in prime condition.

They'll also perform safety checks to identify any potential hazards or malfunctions that could compromise the system's operation.

Conclusion

In summary, following proper installation tips for your heater is vital to guarantee safe and efficient operation.

By taking the necessary precautions, selecting the right location, providing proper ventilation, and correctly connecting the electrical components, you can prevent potential hazards and extend the lifespan of your heater.

Remember to regularly test, calibrate, and maintain your heater to keep it running smoothly and effectively.

Stay safe and warm with your properly installed heater.

Posted on Leave a comment

7 Best Installation Tips for an Infrared Heater

optimal infrared heater setup

Position your infrared heater at least three feet away from flammable items, avoiding windows and doors to maintain efficiency. Mount securely, ensuring the wall can handle its weight, level the brackets, and test for stability afterward. Check if your electrical circuit can support the heater's wattage and upgrade if needed. Mount at 6 to 8 feet for optimum heat distribution, adjusting for insulation and room layout. Follow wiring codes, secure connections, and use correct wire gauge. Prioritize safety, inspect for fire hazards, clearance, and keep a maintenance routine for peak performance. Master these basics for successful infrared heater installation.

Proper Location Selection

optimal site choice

When positioning your infrared heater, make sure that it's placed at least three feet away from any combustible materials. This critical step guarantees the safety of your space by preventing potential fire hazards.

Consider the ambient temperature of the room when deciding on the heater's location. Placing it near windows or doors can affect its efficiency as drafts may interfere with its ability to heat the room effectively. Ideal positioning involves selecting a central location that allows for even distribution of heat throughout the space.

Additionally, take into account the room layout when determining where to place your infrared heater. For example, if the room has high ceilings, you may need to adjust the positioning to guarantee that the heat reaches occupants at lower levels.

Similarly, if the room has furniture or obstacles that could block the heat flow, strategic placement of the heater can help overcome these challenges.

Secure Mounting Positioning

Consider the weight and dimensions of your infrared heater when determining the secure mounting position to guarantee proper installation and safety.

Start by evaluating the wall materials where you plan to mount the heater. Different wall materials may require specific mounting brackets or anchors to confirm a secure attachment.

When choosing a mounting position, make sure that the wall can support the weight of the heater. Use a stud finder to locate studs in the wall for a more secure installation. If mounting on drywall, consider using toggle bolts or anchors designed for heavier loads.

Position the mounting brackets at the desired height for the heater, ensuring they're level before securing them to the wall. Double-check the dimensions of the heater and the spacing required for proper ventilation to avoid any obstructions.

Once the mounting brackets are in place, carefully lift and attach the infrared heater, following the manufacturer's instructions.

Test the stability of the installation by gently nudging the heater. A secure mounting position is essential for both the functionality and safety of your infrared heater.

Electrical Power Considerations

power supply specifications overview

Make certain that the electrical circuit you plan to connect your infrared heater to is rated to handle the wattage requirements specified by the manufacturer.

Before installation, it's essential to conduct a thorough load calculation to guarantee that the power source can adequately support the heater's energy needs.

The first step is to identify the power supply available and confirm its voltage and amperage ratings. This information is critical in determining if the circuit can handle the load of the infrared heater without overloading.

Next, calculate the total wattage required by the heater and compare it to the power source's capacity. Factor in any other appliances or devices sharing the same circuit to prevent tripping breakers or causing electrical issues.

If the heater's wattage exceeds the power source's capabilities, consider upgrading the circuit or installing a dedicated line for the infrared heater to operate efficiently and safely.

Adhering to these electrical power considerations will help avoid potential hazards and guarantee peak performance of your infrared heater.

Optimal Height Placement

To guarantee efficient heating performance, position the infrared heater at an ideal height within the room.

Mount the heater at a height of around 6 to 8 feet above the floor for maximum heat distribution. This elevation allows the infrared waves to cover a broader area while ensuring that the heat reaches you evenly.

Consider the wall insulation when determining the height placement of the heater. If the walls are well-insulated, you can adjust the heater slightly higher since the insulation helps in retaining the heat within the room.

Conversely, if the walls have poor insulation, it might be beneficial to position the heater a bit lower to compensate for potential heat loss.

Effective Wiring Techniques

optimal electrical installation methods

Implementing proper wiring techniques is vital for guaranteeing the safe and efficient operation of your infrared heater. When wiring your infrared heater, it's important to adhere to local wiring codes to assure compliance and safety. Confirm that all electrical connections are secured tightly using appropriate connectors to prevent any loose connections that may lead to overheating or electrical hazards.

When connecting your infrared heater to the power source, make certain to use the correct wire gauge based on the manufacturer's recommendations. This will help prevent voltage drops and confirm that your heater functions at peak performance. Additionally, always install a dedicated circuit breaker for your infrared heater to prevent overloading the circuit and minimize the risk of electrical fires.

Before starting the wiring process, carefully read the installation manual provided by the manufacturer to understand the specific requirements for your infrared heater model. Following these wiring techniques meticulously won't only assure the safe operation of your heater but also extend its lifespan.

Safety Precautions Prior Installation

Guaranteeing your safety prior to the installation of an infrared heater involves conducting a thorough inspection of the installation area for any potential hazards.

Before beginning the installation process, it's essential to identify and address any fire hazards in the vicinity. Check for flammable materials, such as curtains, papers, or furniture, that may be too close to where the heater will be placed. Make certain to follow the manufacturer's clearance requirements to prevent any risks of overheating and potential fires.

Additionally, make sure that there's adequate clearance around the heater to allow for proper ventilation and heat dissipation. Failure to provide sufficient clearance may not only pose a fire hazard but also reduce the efficiency and lifespan of the infrared heater.

It's recommended to leave a minimum of 18 inches of space around the heater to guarantee safe operation.

Regular Maintenance Practices

consistent care for equipment

Regular maintenance practices for your infrared heater play an important role in guaranteeing its best performance and longevity. Two significant maintenance tasks are filter cleaning and thermostat calibration.

Filter cleaning is essential for maintaining the efficiency of your infrared heater. Over time, dust and debris can accumulate on the filter, obstructing airflow and reducing the heater's effectiveness. To clean the filter, simply remove it from the unit and gently vacuum or wash it, depending on the type of filter. Regular filter cleaning, ideally every 1-3 months, can greatly improve the heater's performance.

Thermostat calibration is another important maintenance practice. A poorly calibrated thermostat can lead to temperature inconsistencies and energy wastage. To calibrate the thermostat, use a separate thermometer to check the actual room temperature against the thermostat reading. If there's a discrepancy, follow the manufacturer's instructions to adjust the thermostat settings accurately. Regular calibration, at least once a year, guarantees your infrared heater operates efficiently and keeps your space comfortable.

Conclusion

In summary, following these installation tips for your infrared heater will guarantee peak performance and safety.

By selecting the proper location, securely mounting the unit, considering electrical power needs, placing it at the ideal height, using effective wiring techniques, taking safety precautions, and maintaining it regularly, you can enjoy the benefits of a well-functioning and efficient heating system.

Remember, proper installation is key to maximizing the effectiveness of your infrared heater.